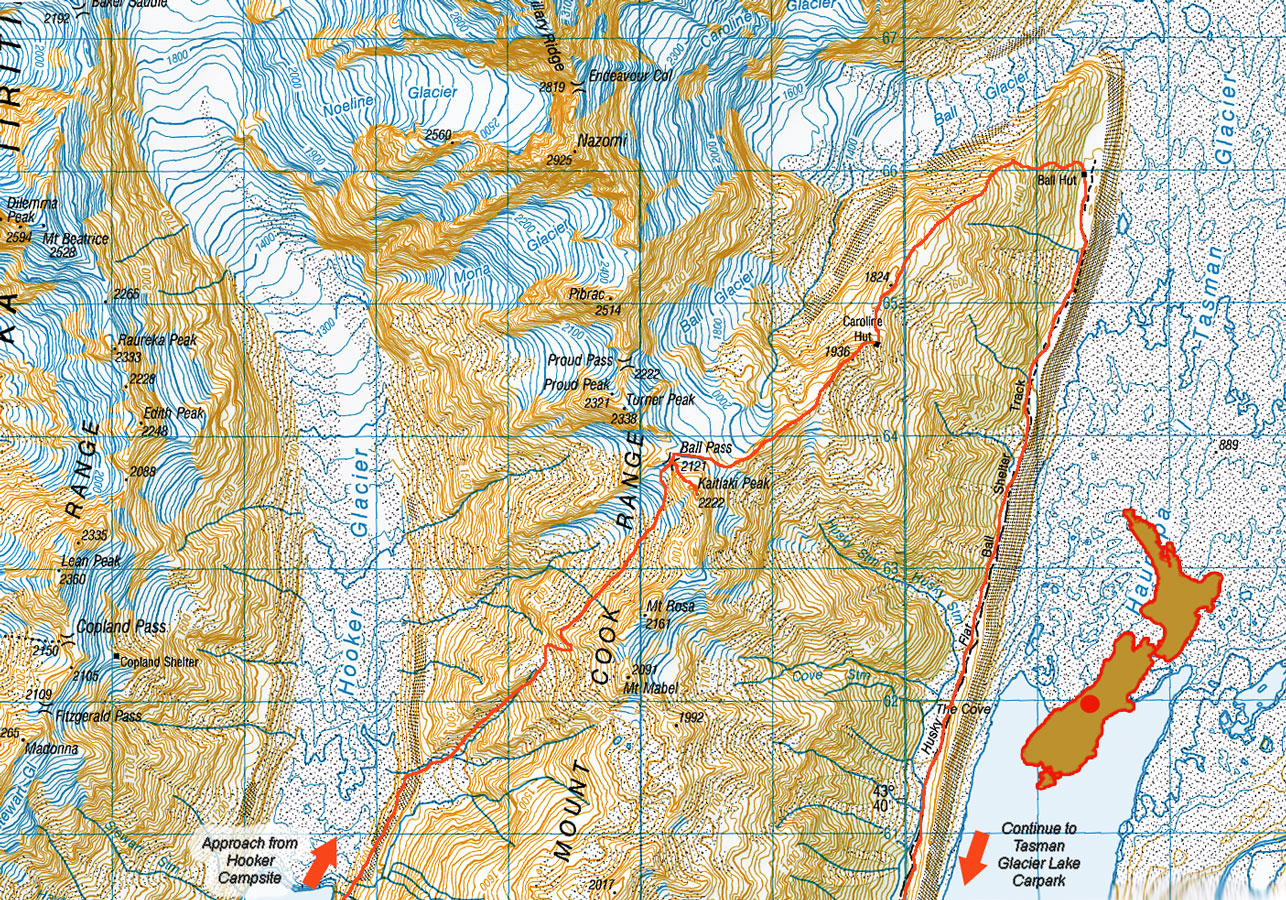
Ball Pass, January 2018

Tracing the true left side of the Hooker River, not realising that the tourist trail now crosses the river higher up

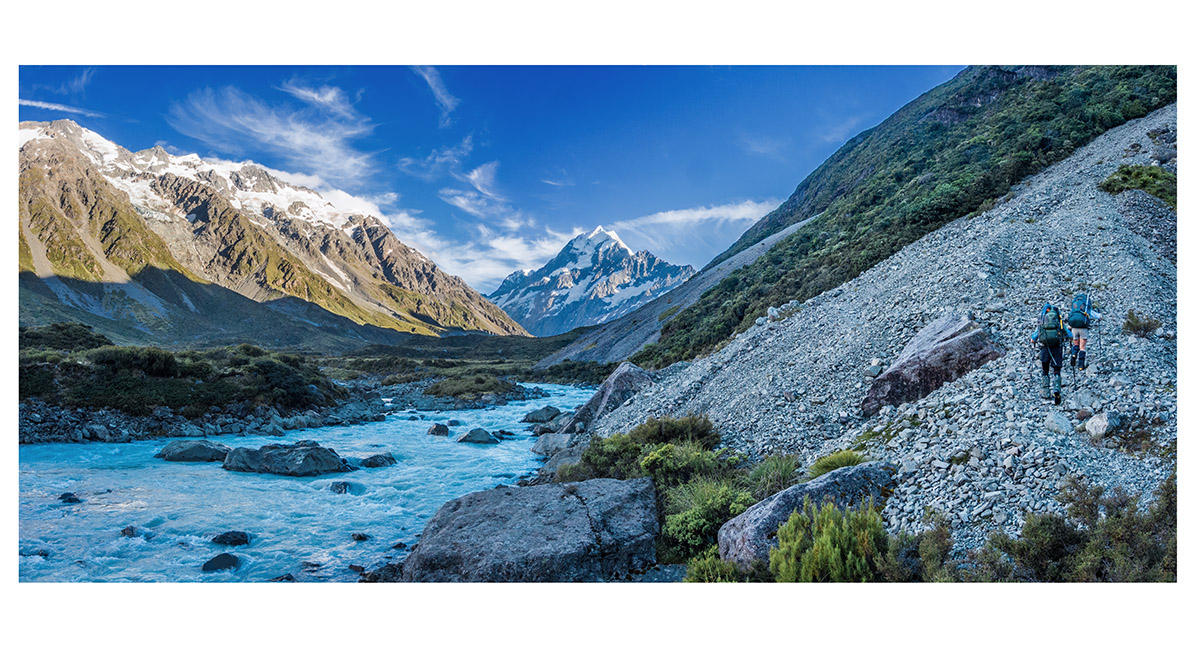
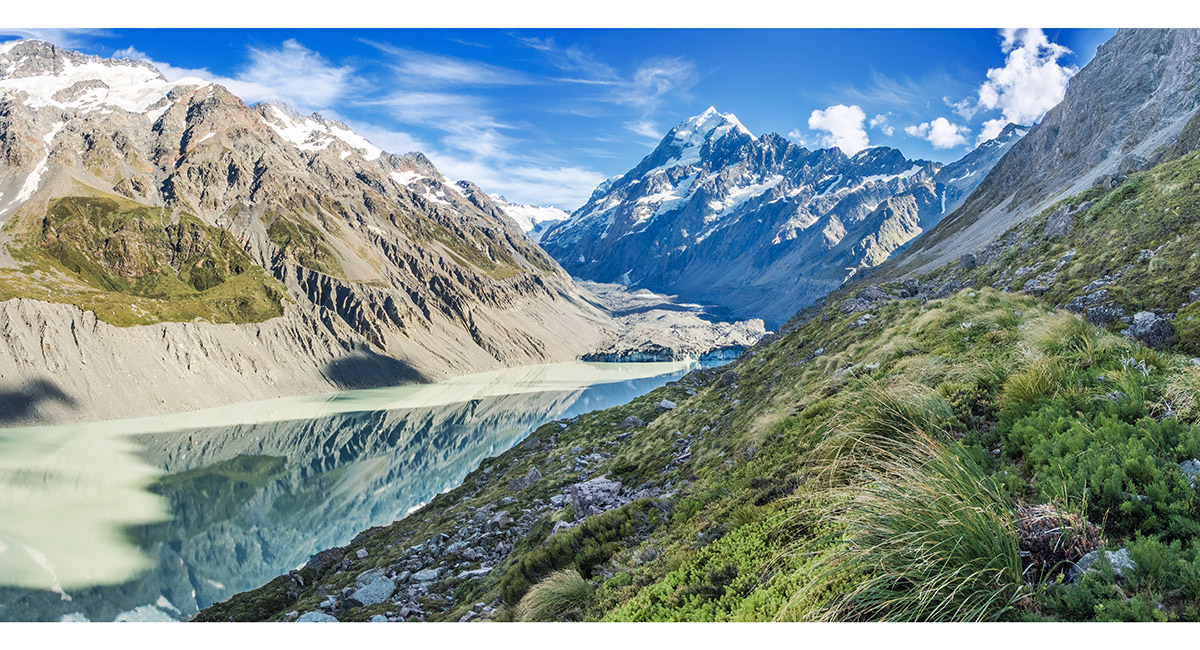
Tracing the true left side of the Hooker River, with Aoraki Mt Cook in the distance

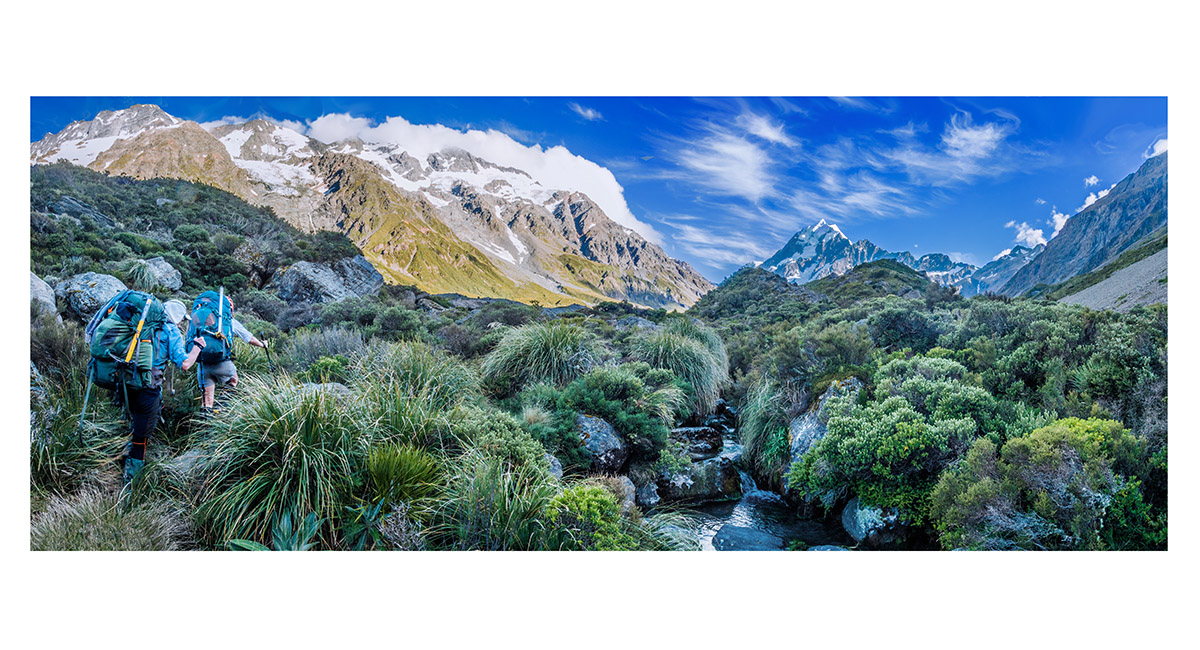
In scrubby terrain on the true left of the Hooker River, at about 850m

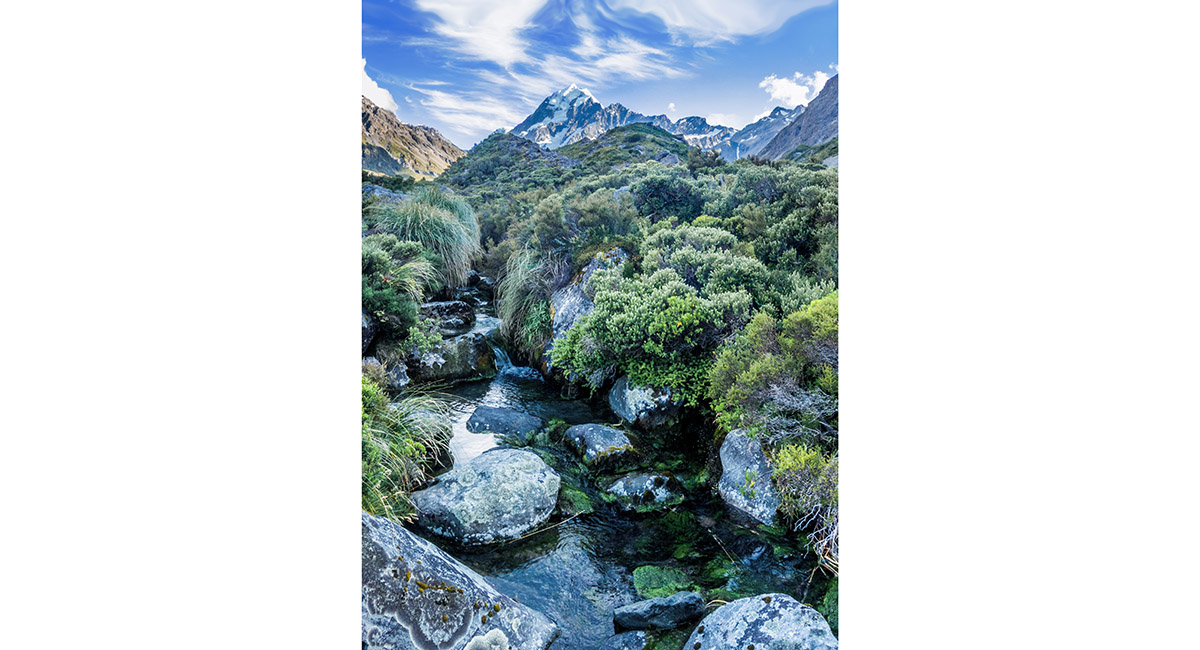
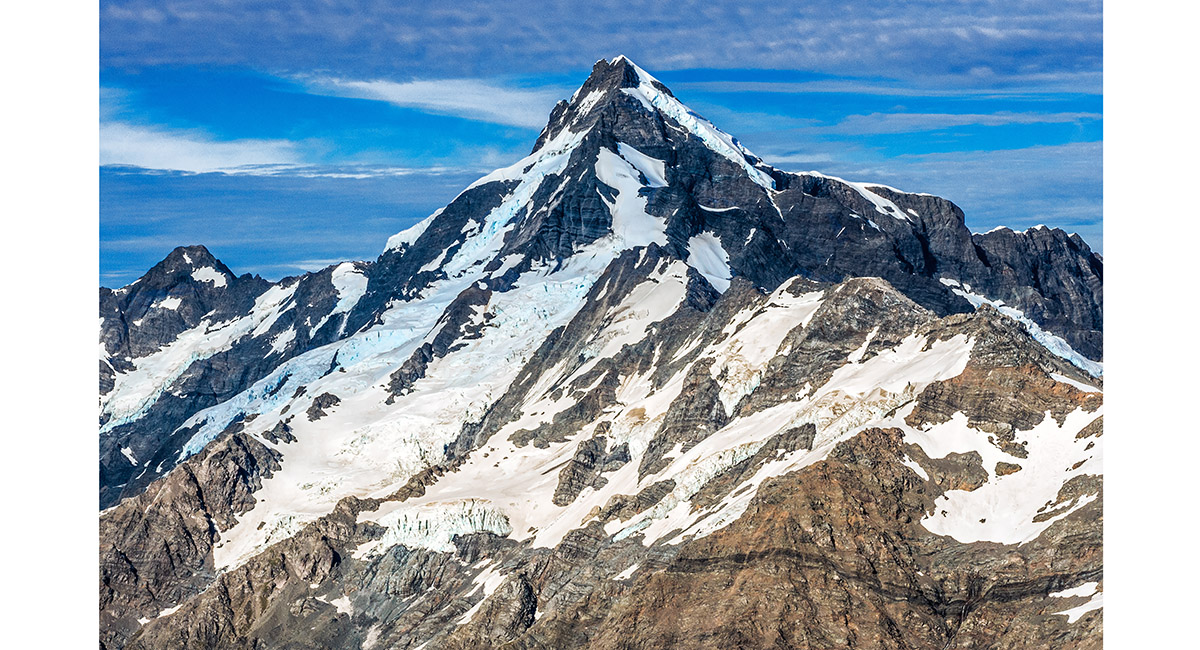
Aoraki Mt Cook (3,724m)

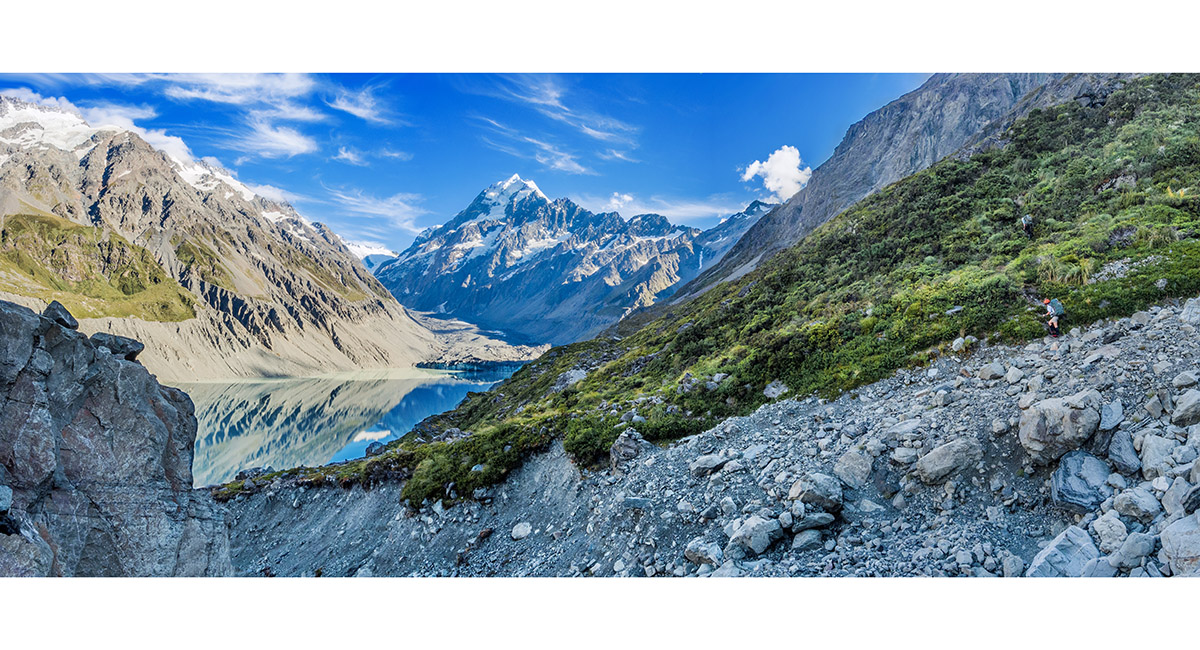
Crossing above one of several large slips on the moraine beside Hooker Lake

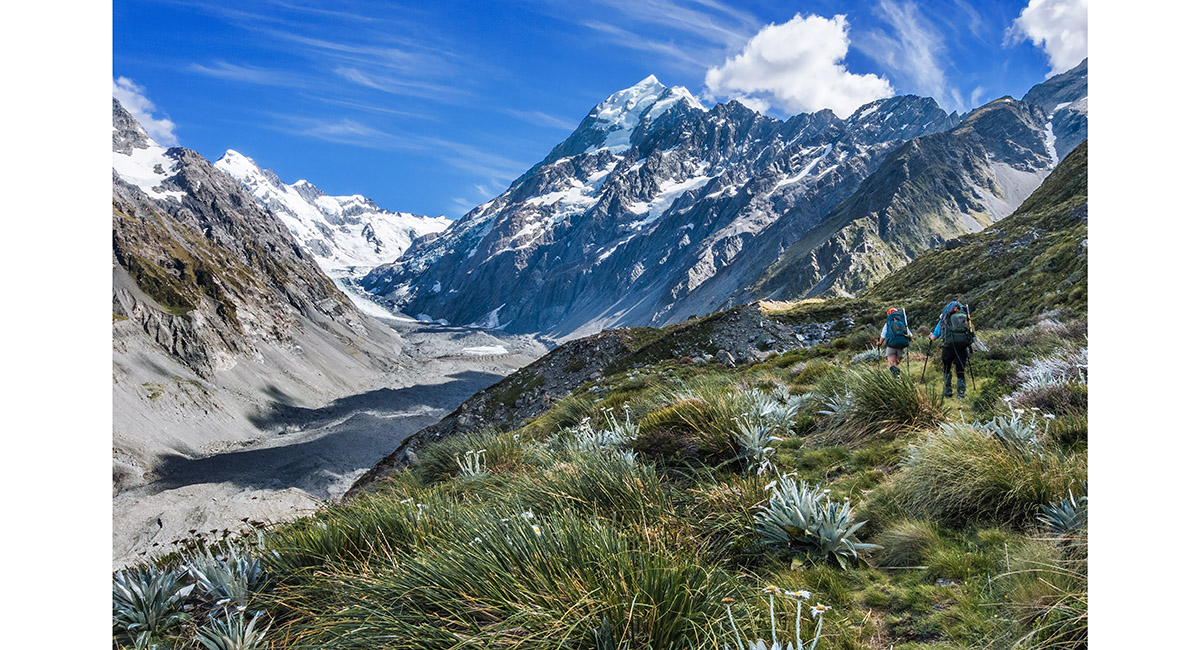
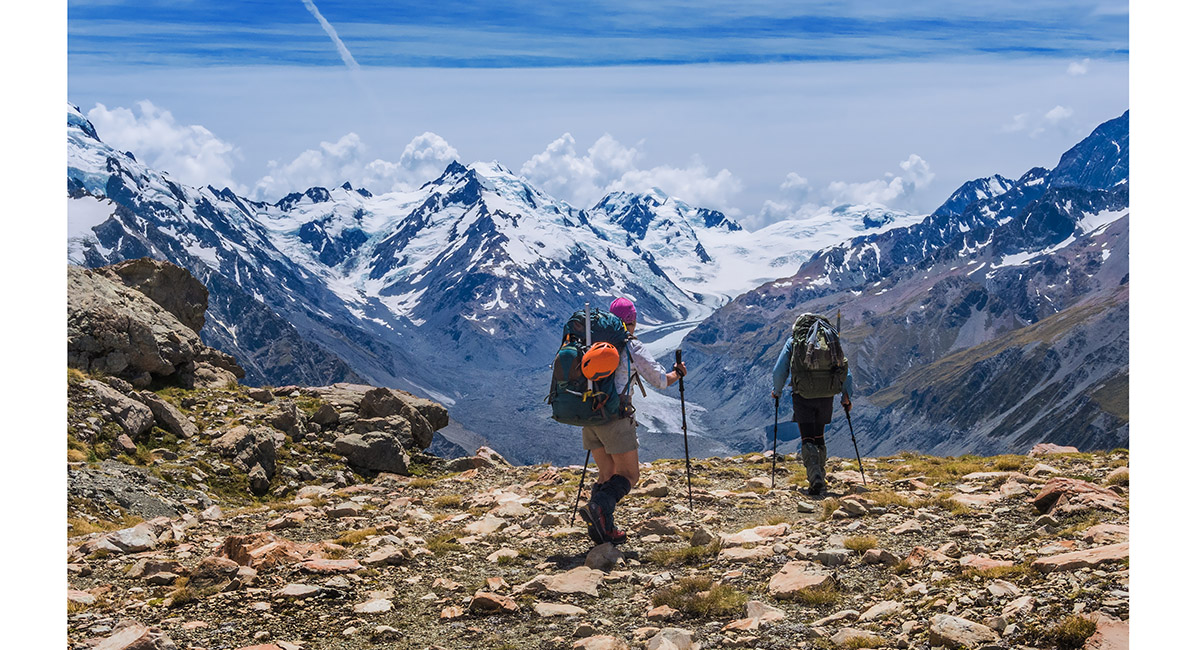
On the true left of Hooker Glacier moraine, heading towards Aoraki Mt Cook

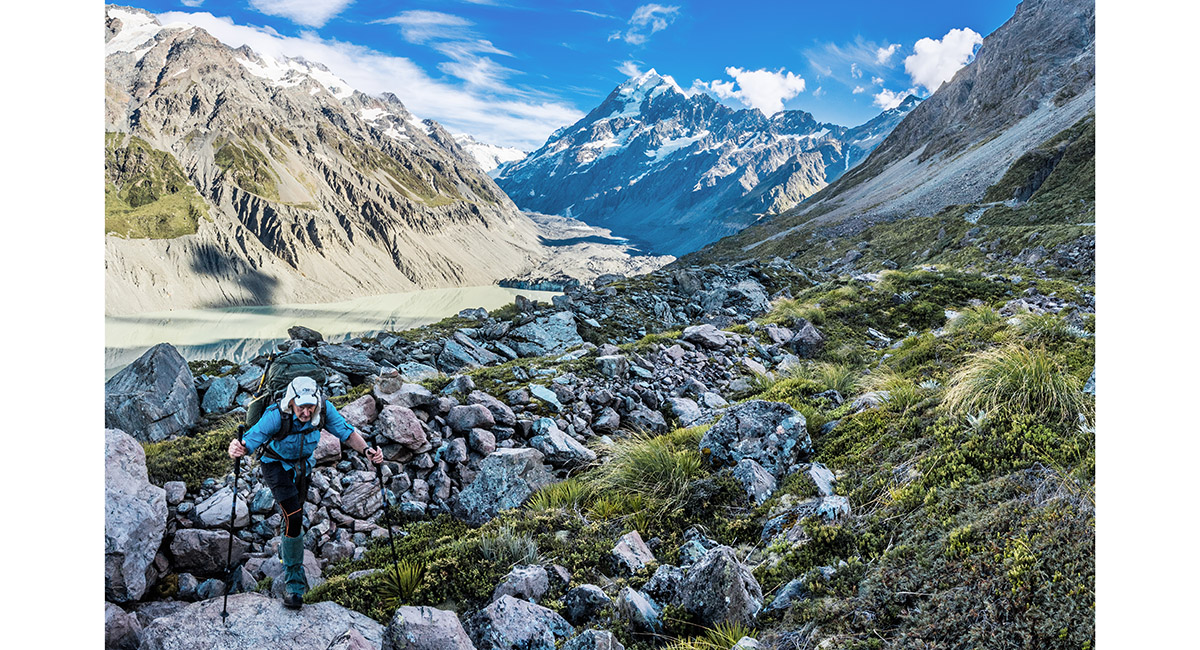
On the true left of Hooker Glacier moraine, heading towards Aoraki Mt Cook

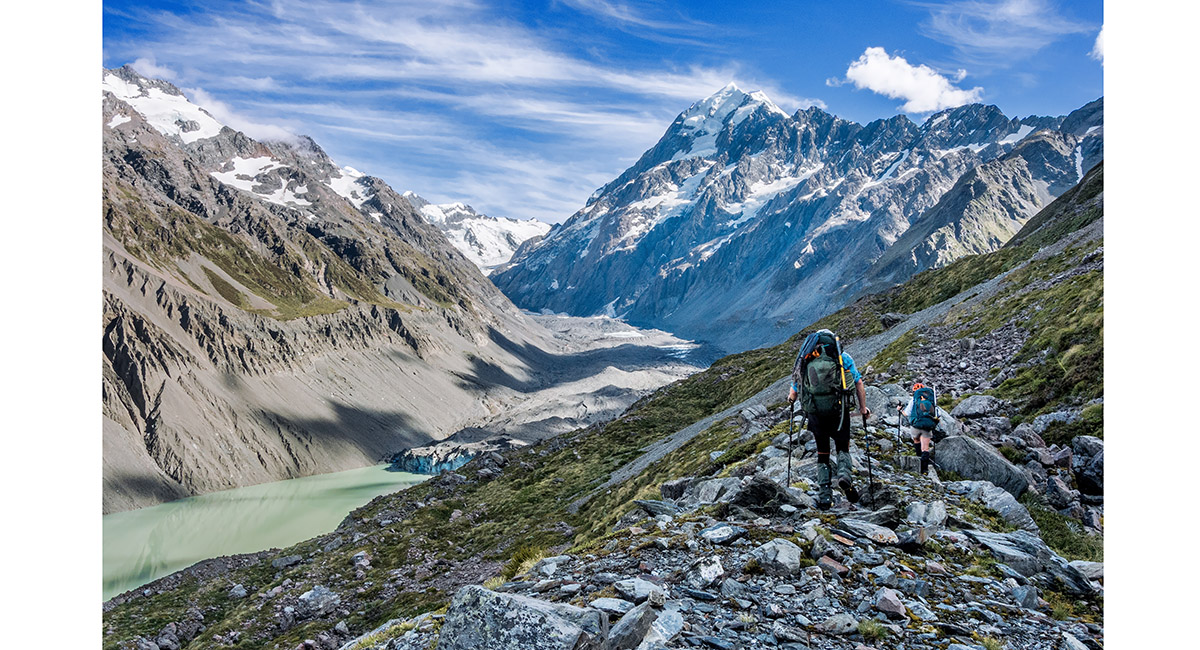
On the true left of Hooker Glacier moraine, heading towards Aoraki Mt Cook

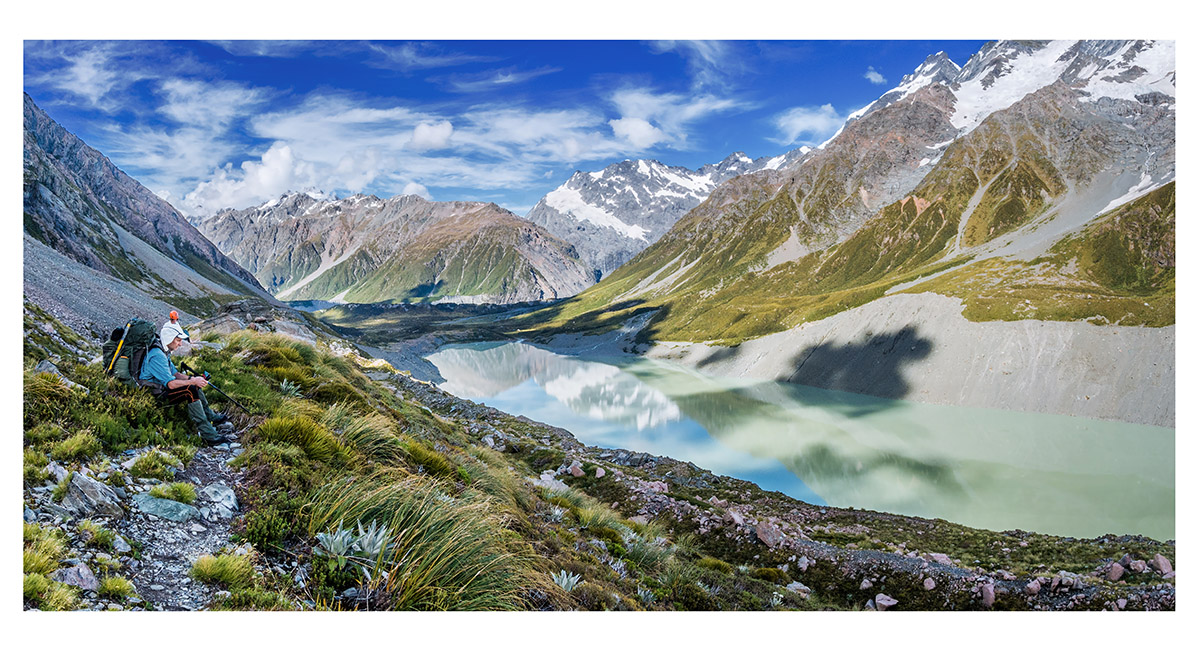
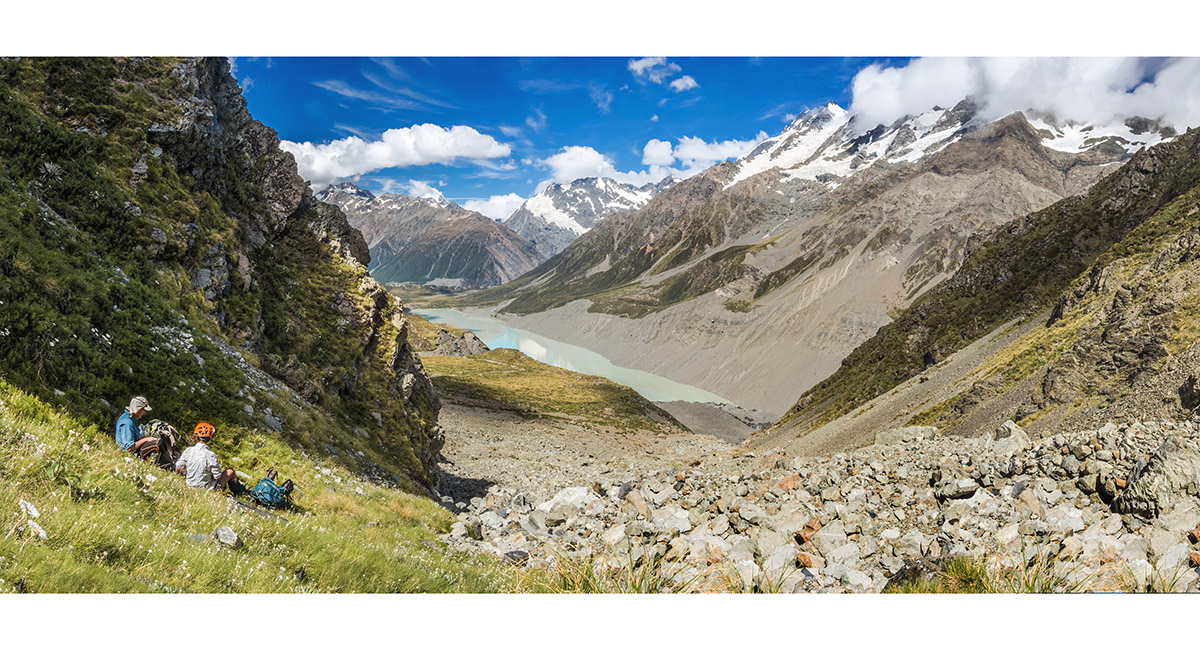
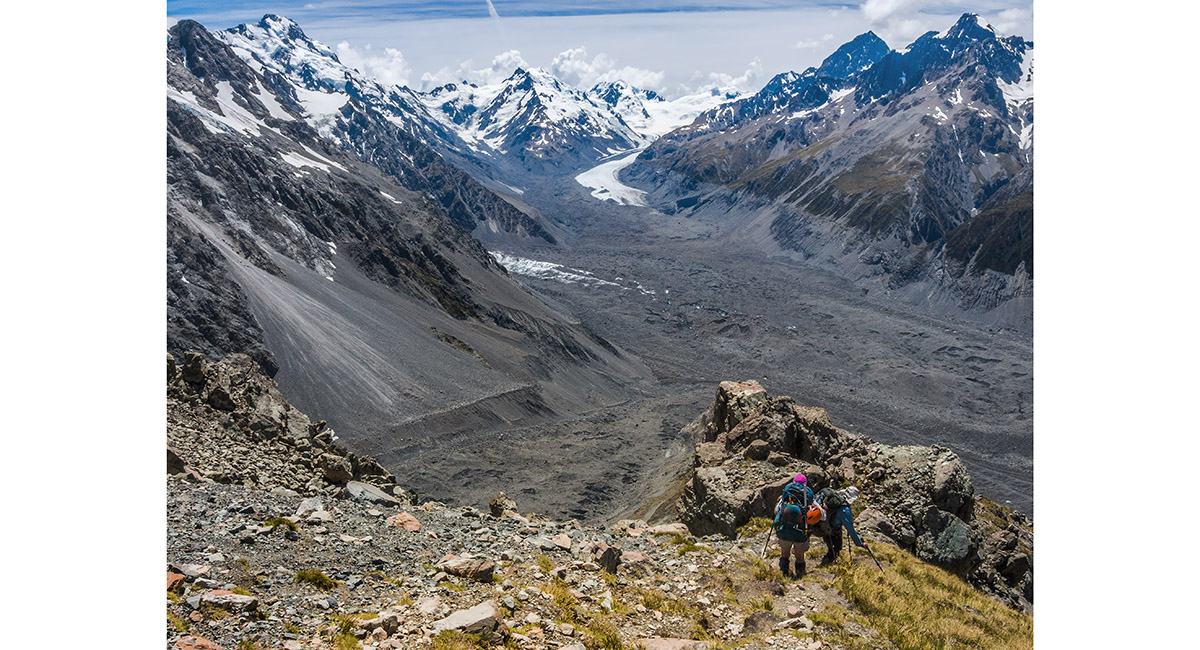
On the true left of Hooker Glacier moraine, looking back to the end of Hooker Lake and the Sealy Range

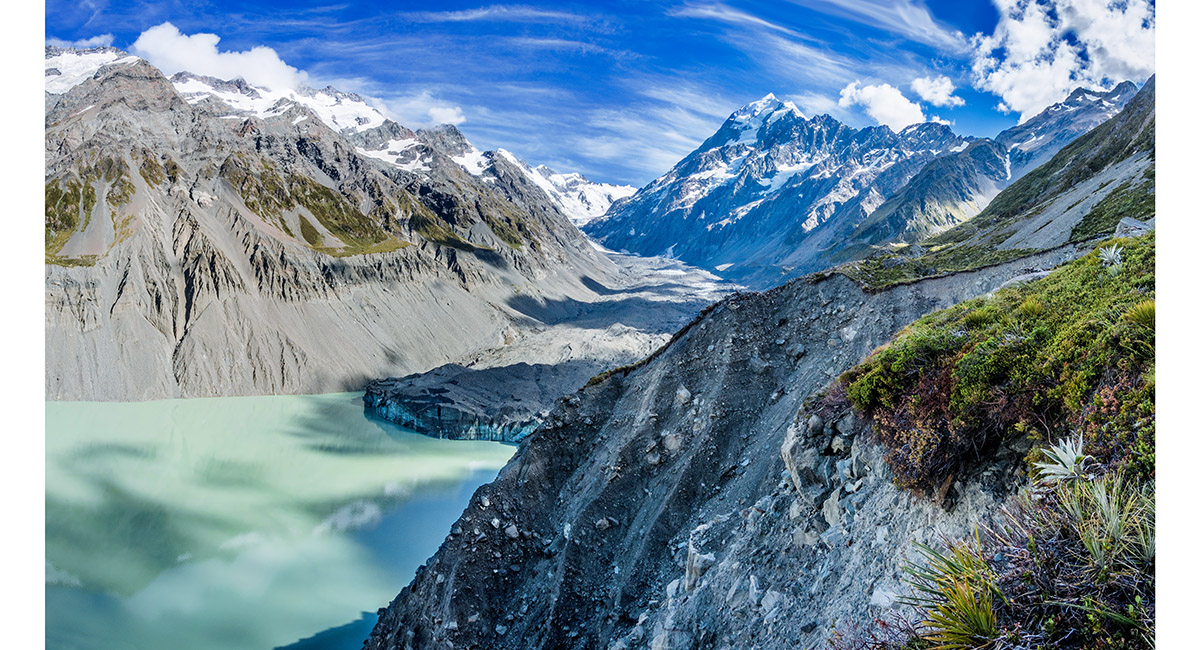
Nearing the terminal moraine of Hooker Glacier, with another large slip in the foreground


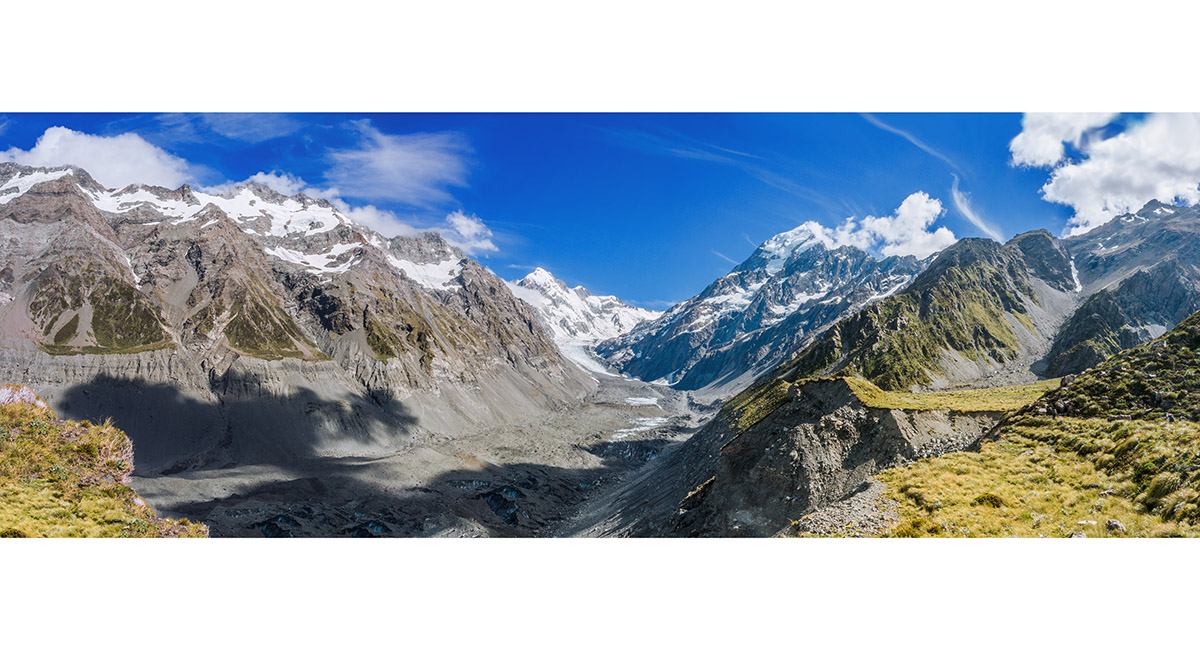
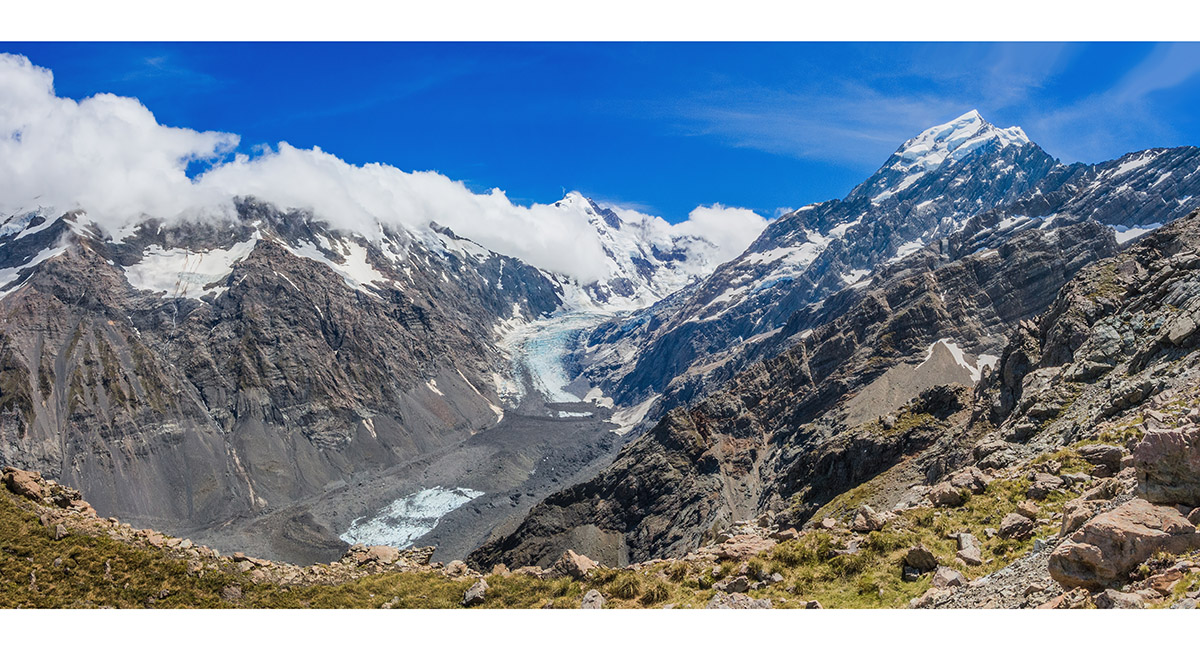
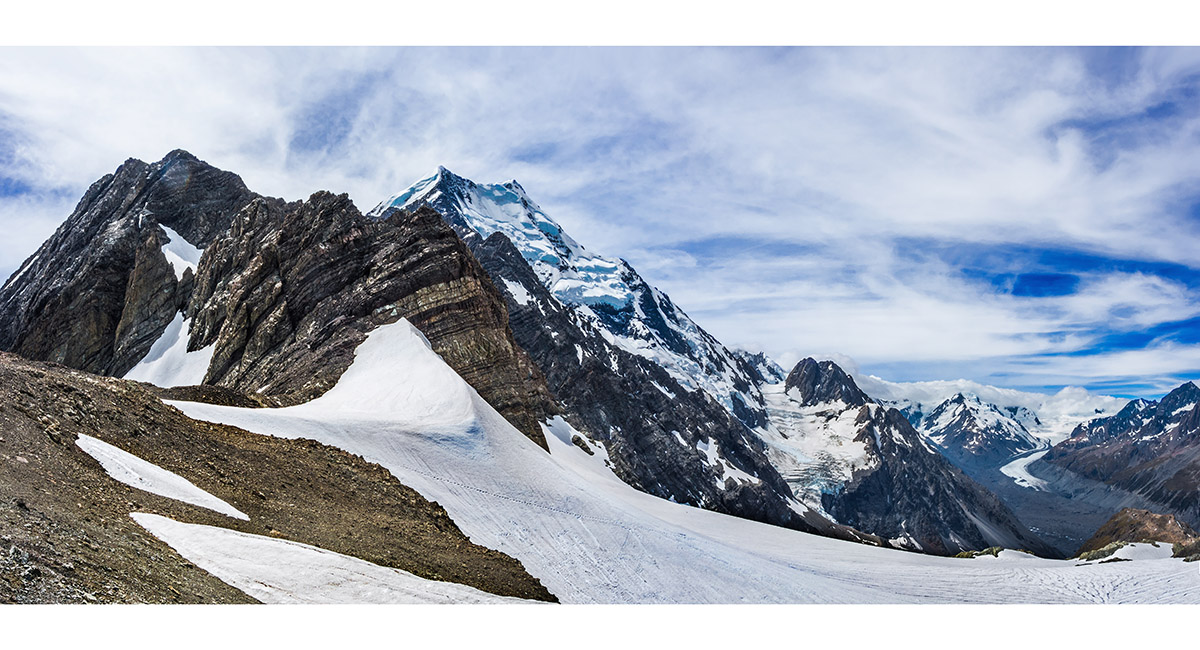
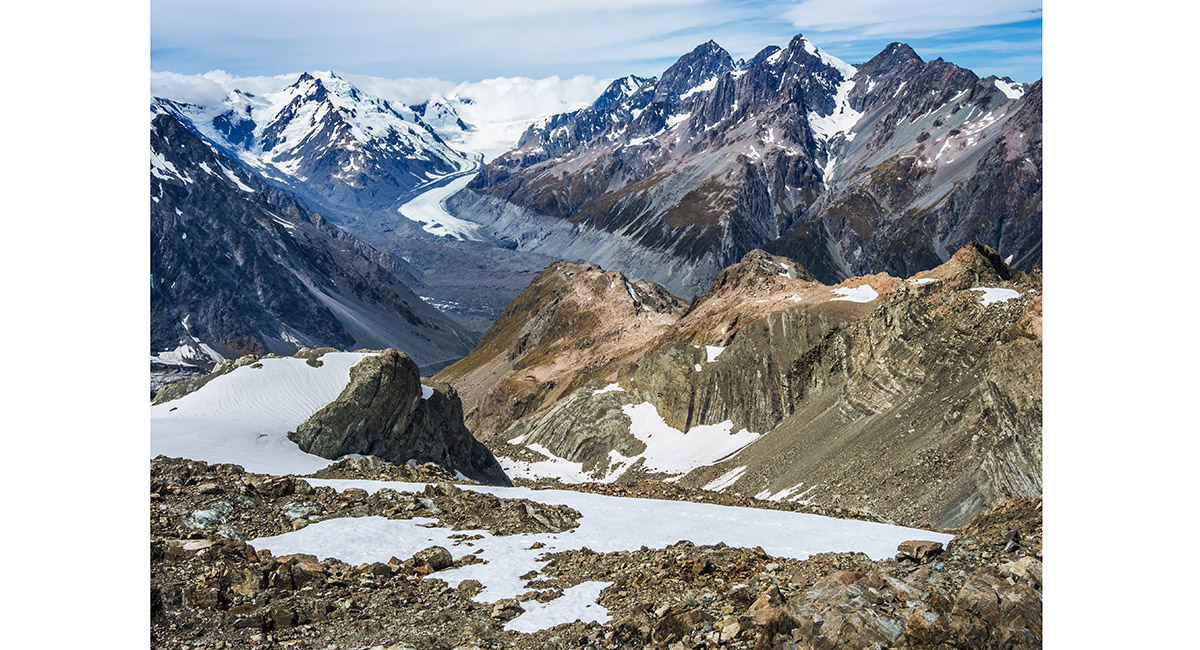
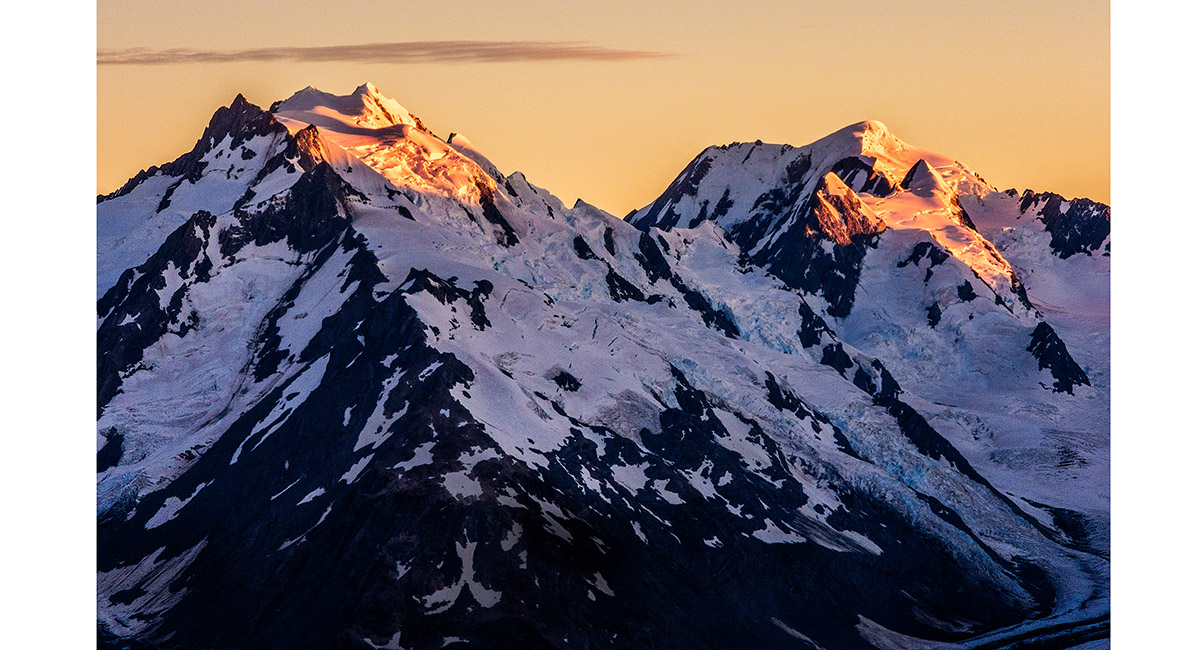
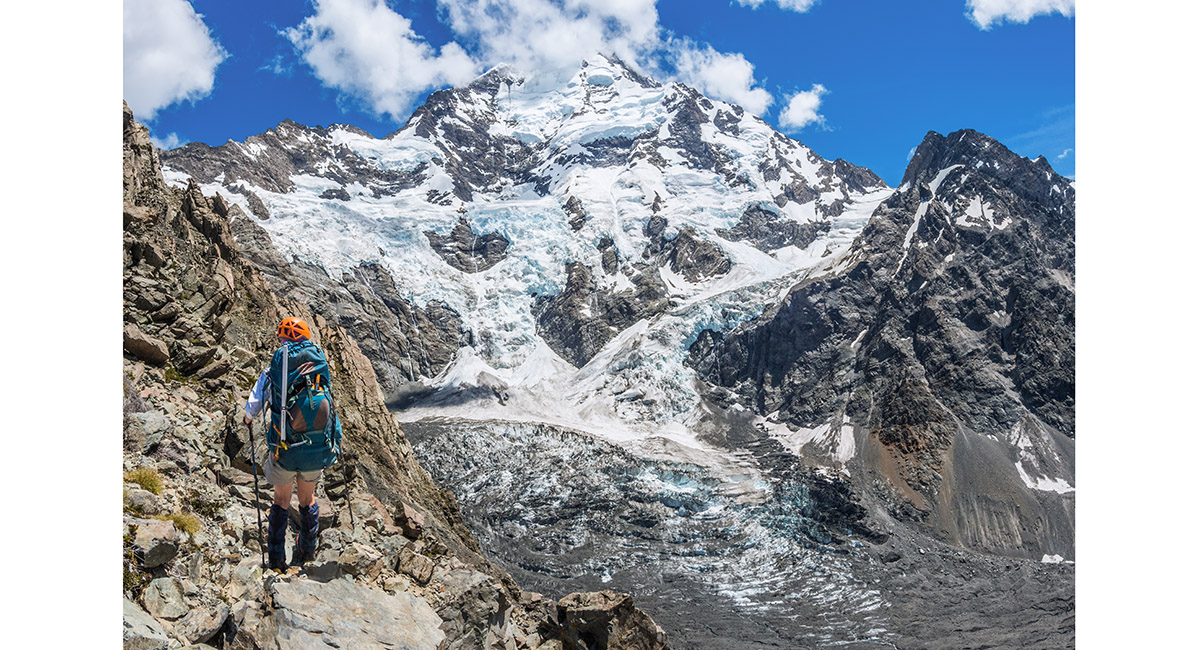
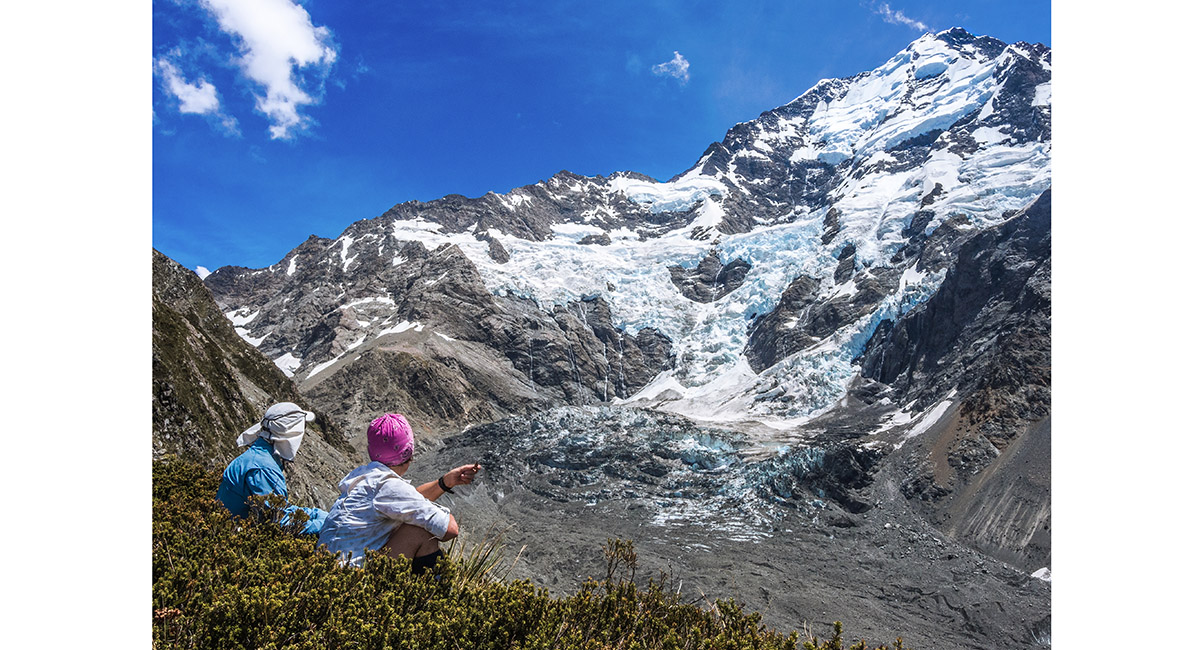
The upper Hooker Glacier, with La Perouse (3,078m) at left, Aoraki Mt Cook (3,724m) right

On the true left of Hooker Glacier moraine, beyond the terminal moraine, on a tussock shelf. The steep snow chute forming the lower section of the Ball Pass route is top right

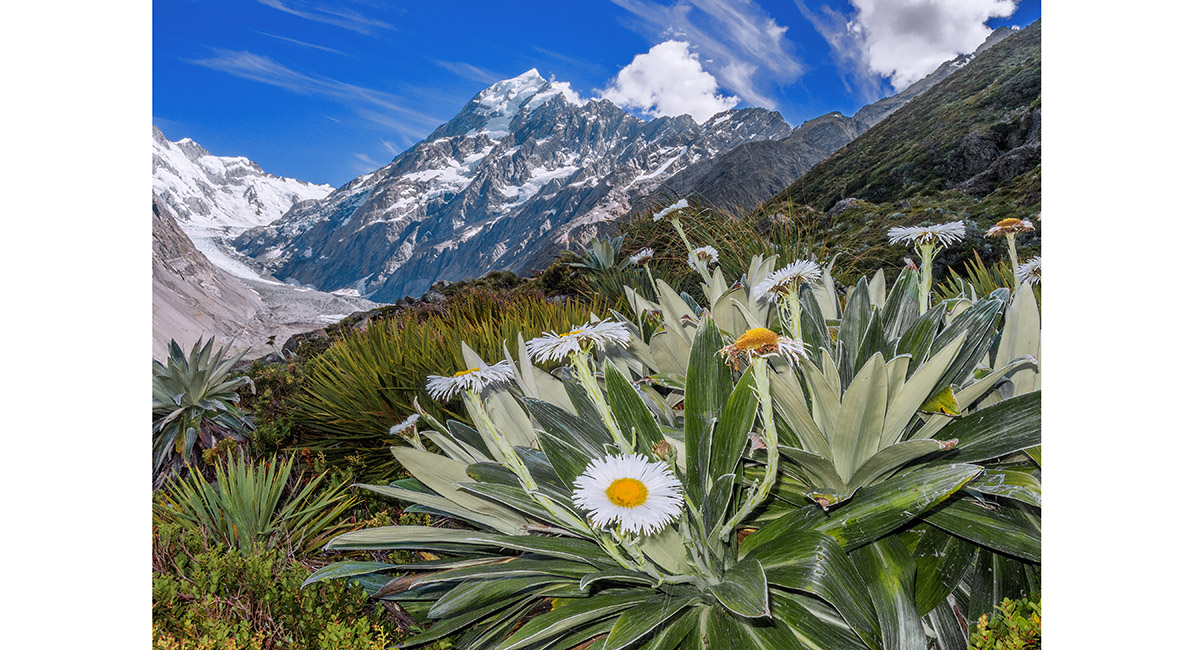
Mount Cook lilies, with Aoraki Mt Cook behind

On the true left of Hooker Glacier moraine, beyond the terminal moraine, on a tussock shelf. The steep snow chute forming the lower section of the Ball Pass route is top right

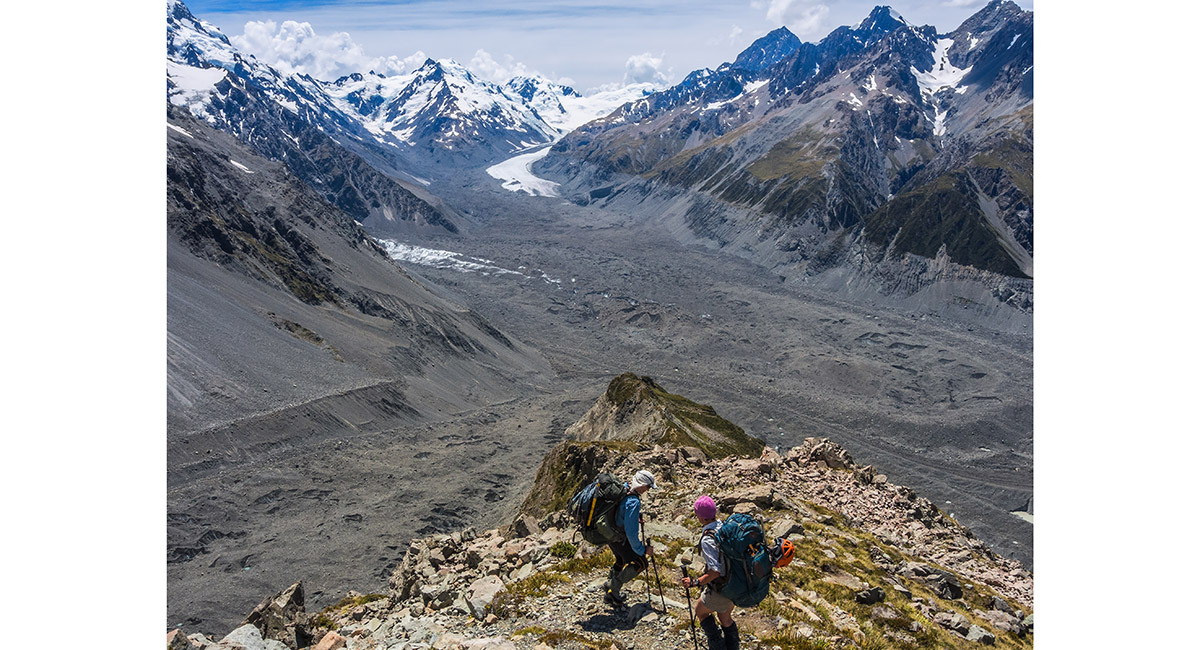
On the true left of Hooker Glacier moraine, beyond the terminal moraine, on a tussock shelf, looking up the Hooker Glacier

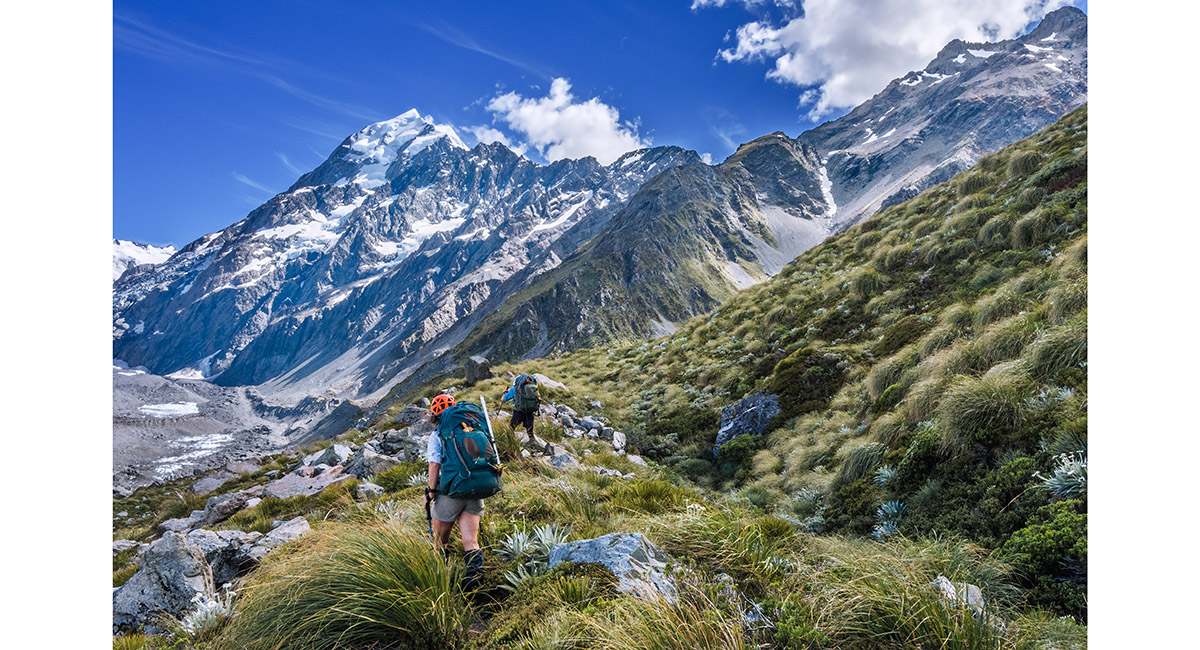
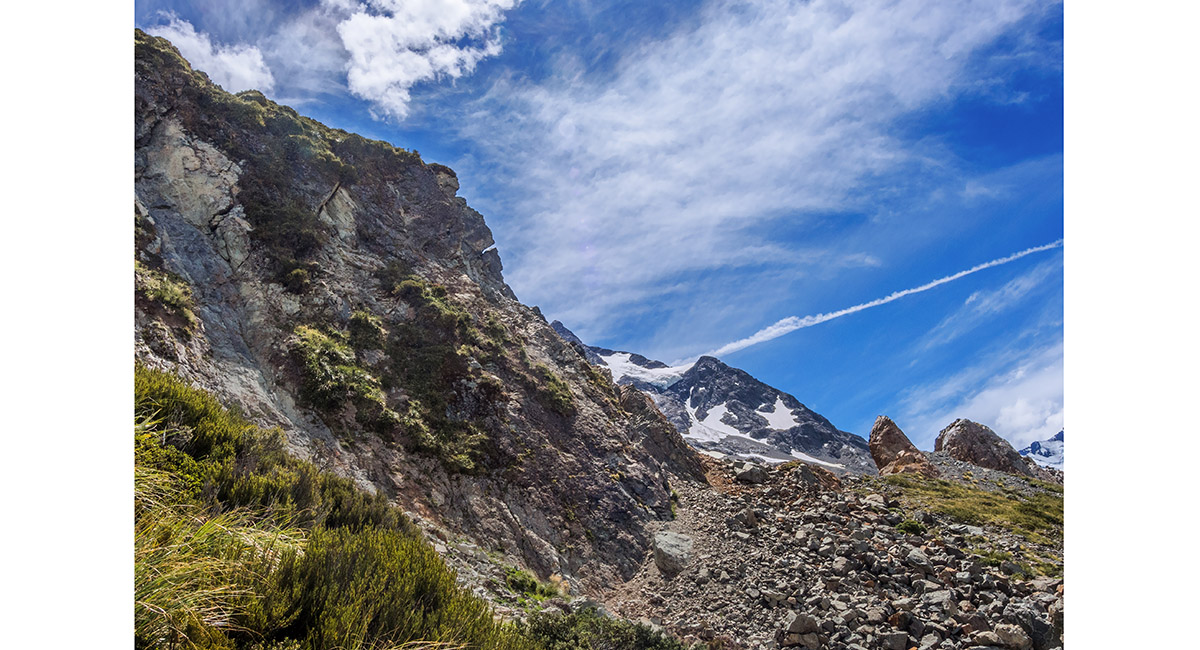
Taking a break at about 1,200m, at the base of the first steep section of the Ball Pass route. A lack of cairns had us puzzled as to where to next for a while here

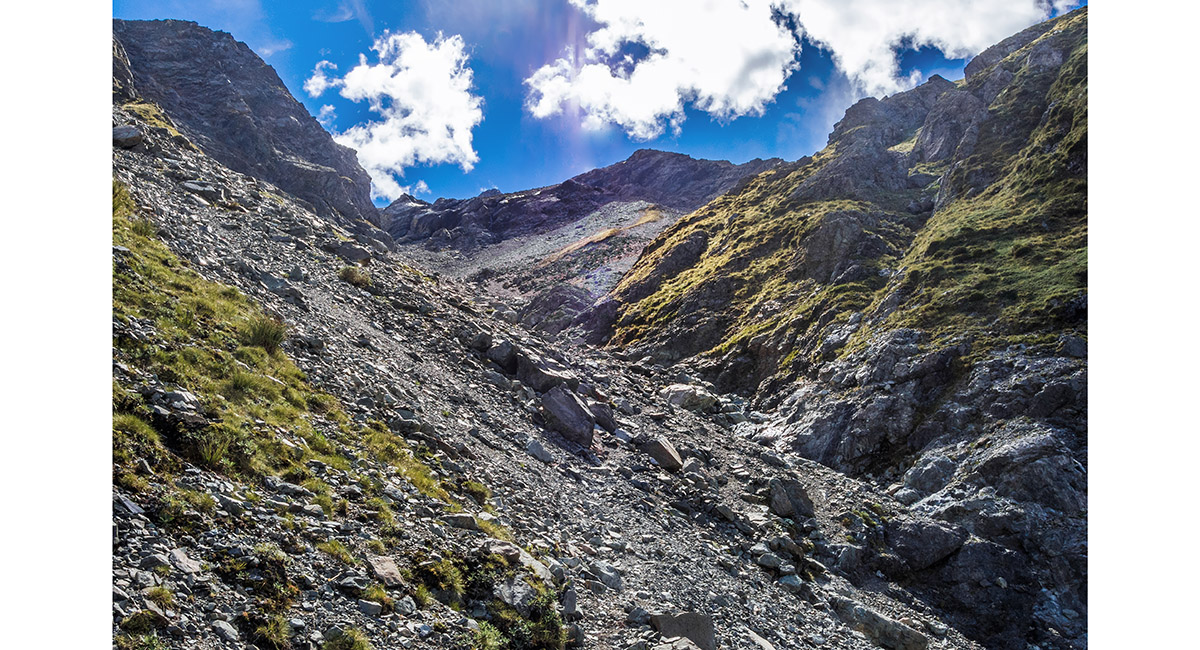
Looking up from about 1,300m towards the base of the snow chute, hidden above in this picture

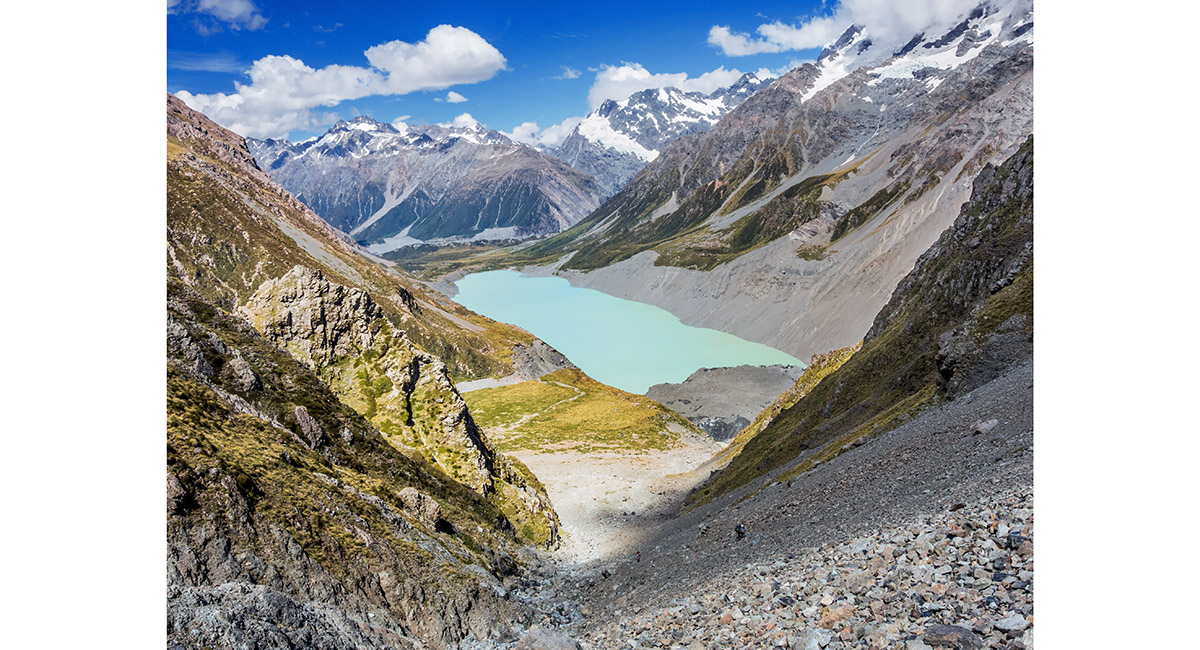
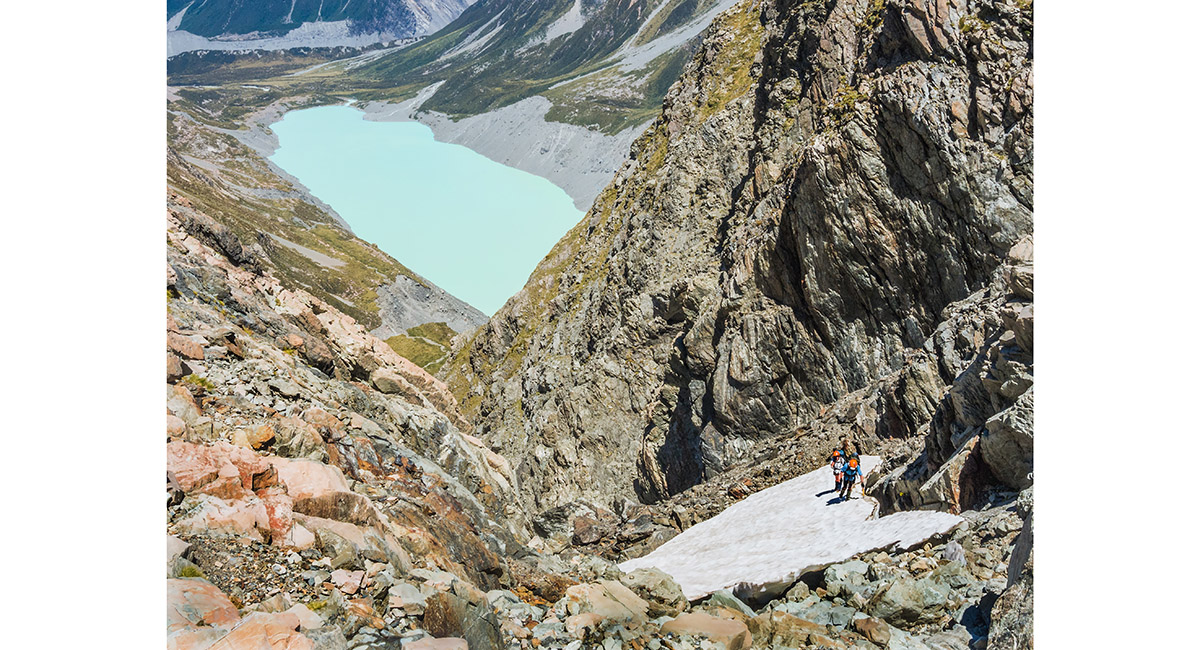
A view back down the chute from about 1,300m to Hooker Lake


A view back down the chute from the bottom of the steep snow, from about 1,350m, to Hooker Lake

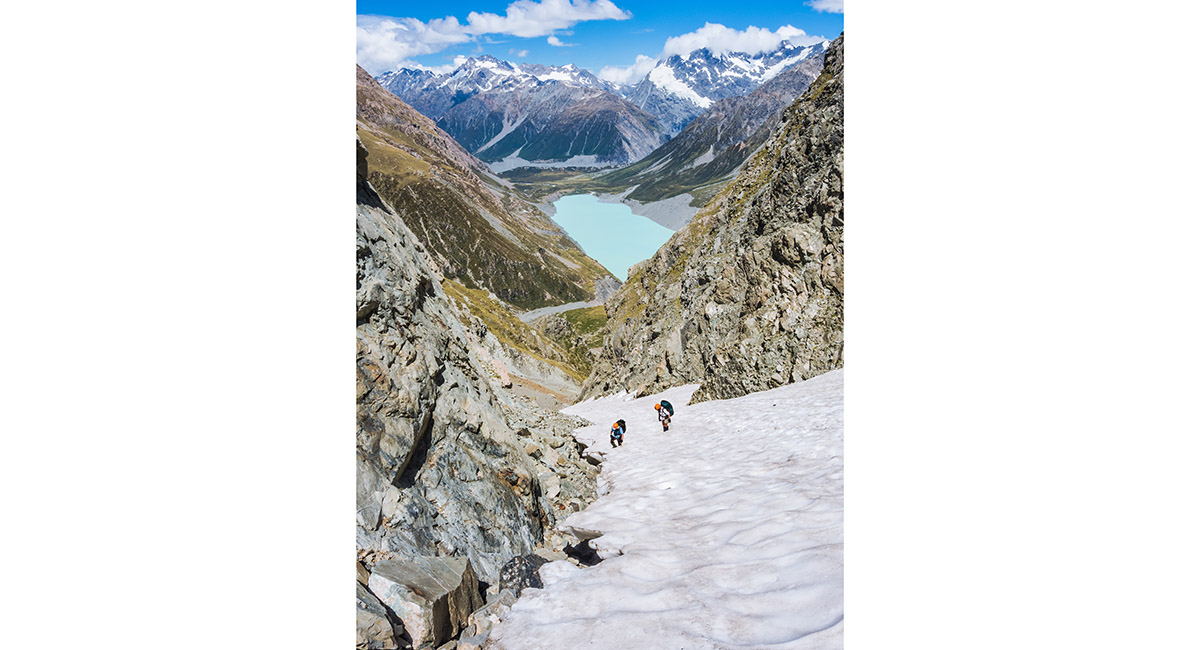
A view back down the steep snow, from about 1,450m, to Hooker Lake


Nearing a choke stone that cut the snow, at about 1,550m

Above the snow at 1,600m, on a large rock and tussock field that breaks up the west side of the Ball Pass route

Above the snow at 1,600m, on a large rock and tussock field that breaks up the west side of the Ball Pass route

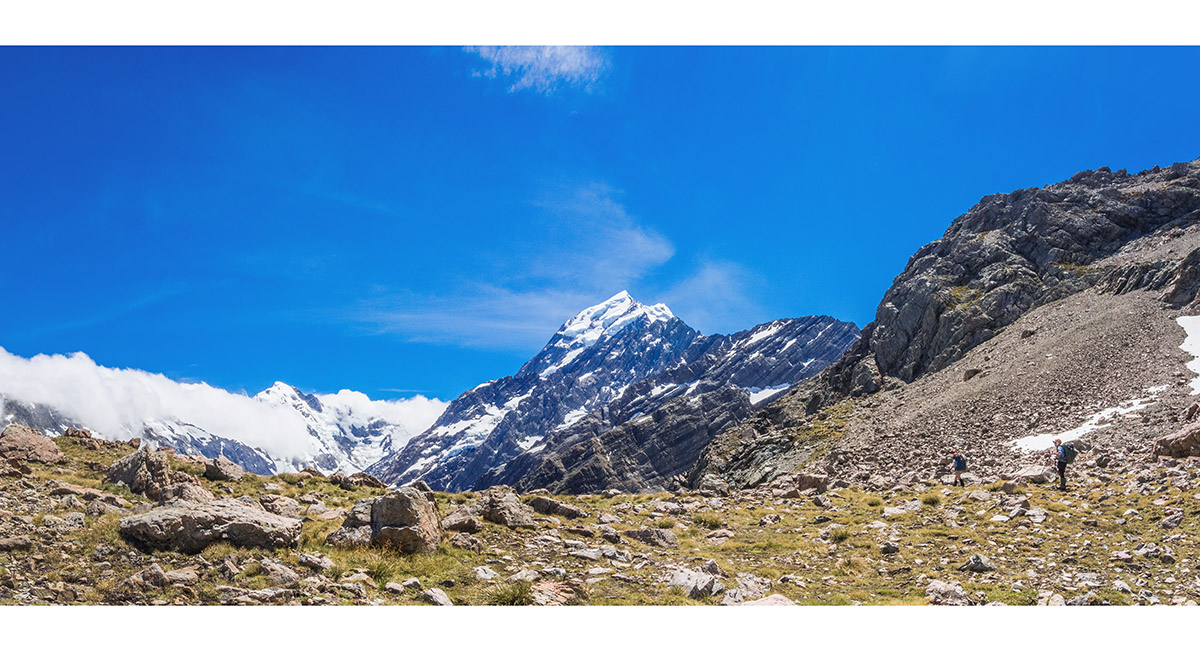
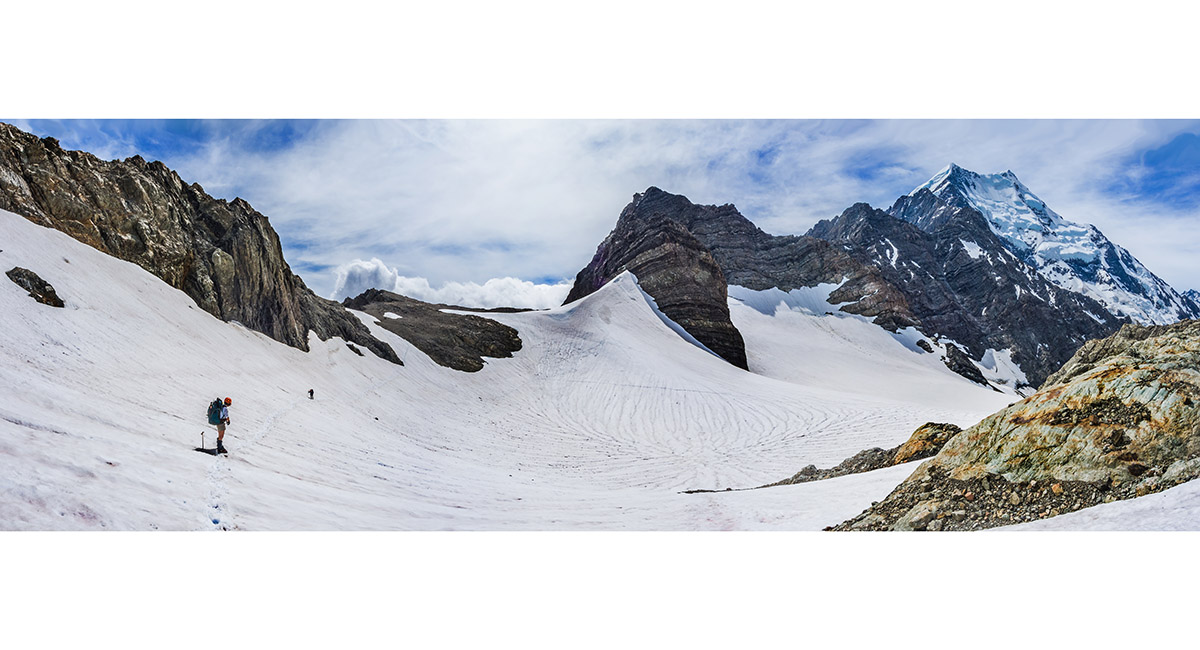
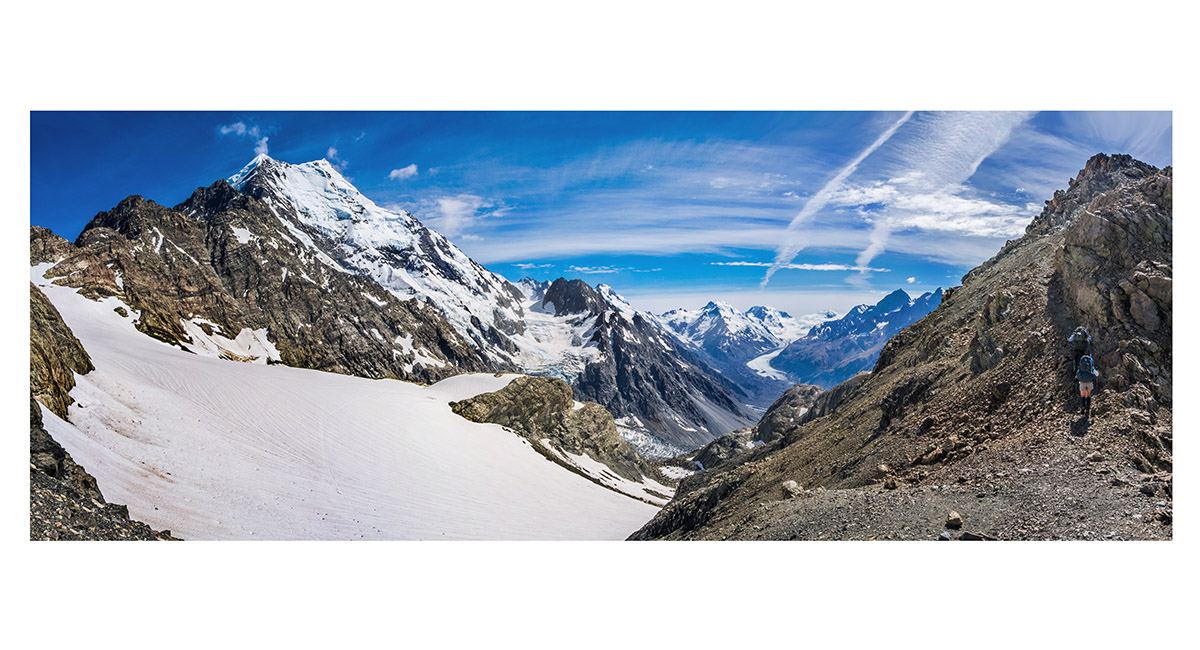
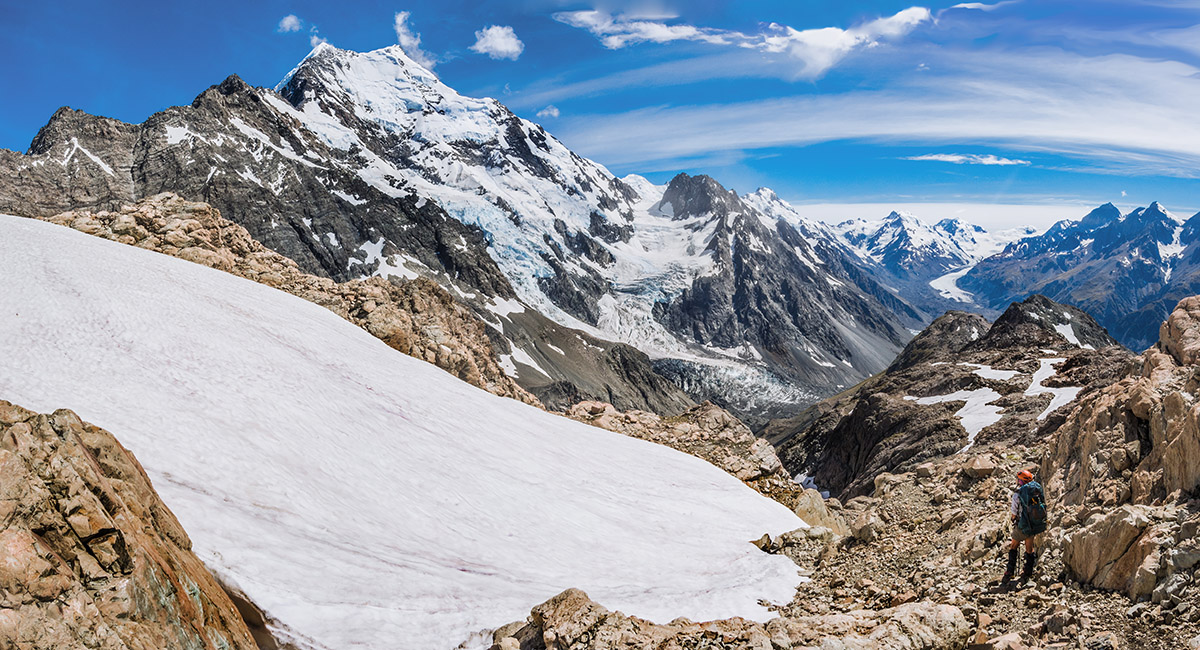
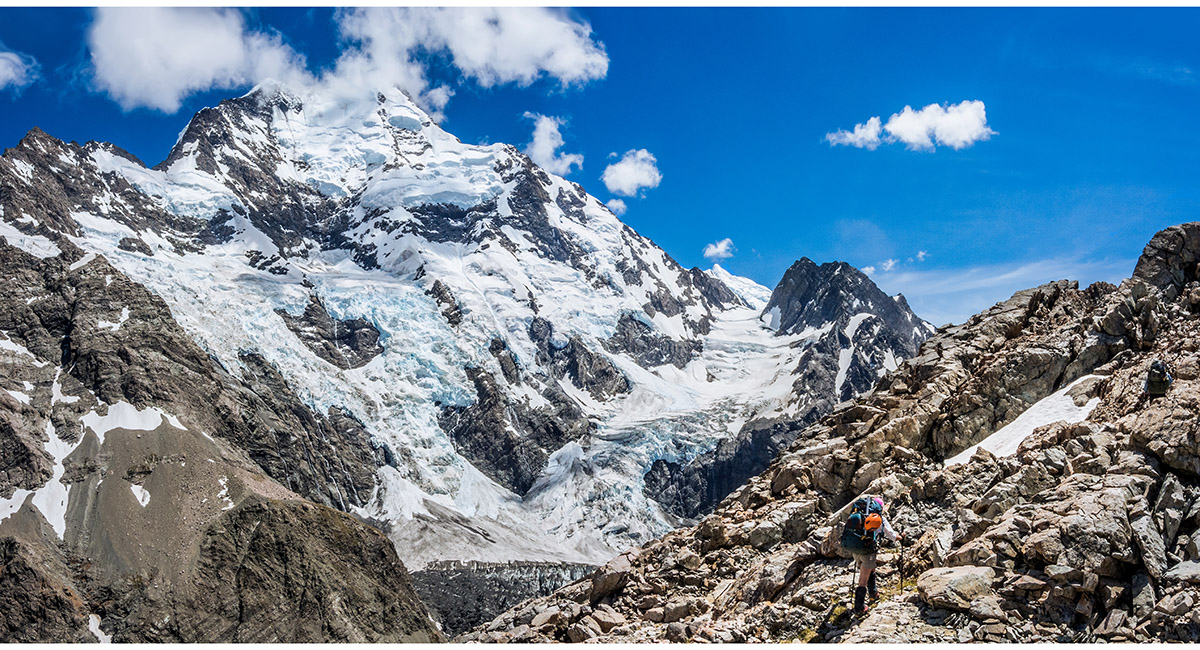
On the large rock and tussock field, looking to Aoraki Mt Cook centre and the middle section of the Ball Pass route right

On the large rock and tussock field, looking to Aoraki Mt Cook and the upper Hooker Glacier

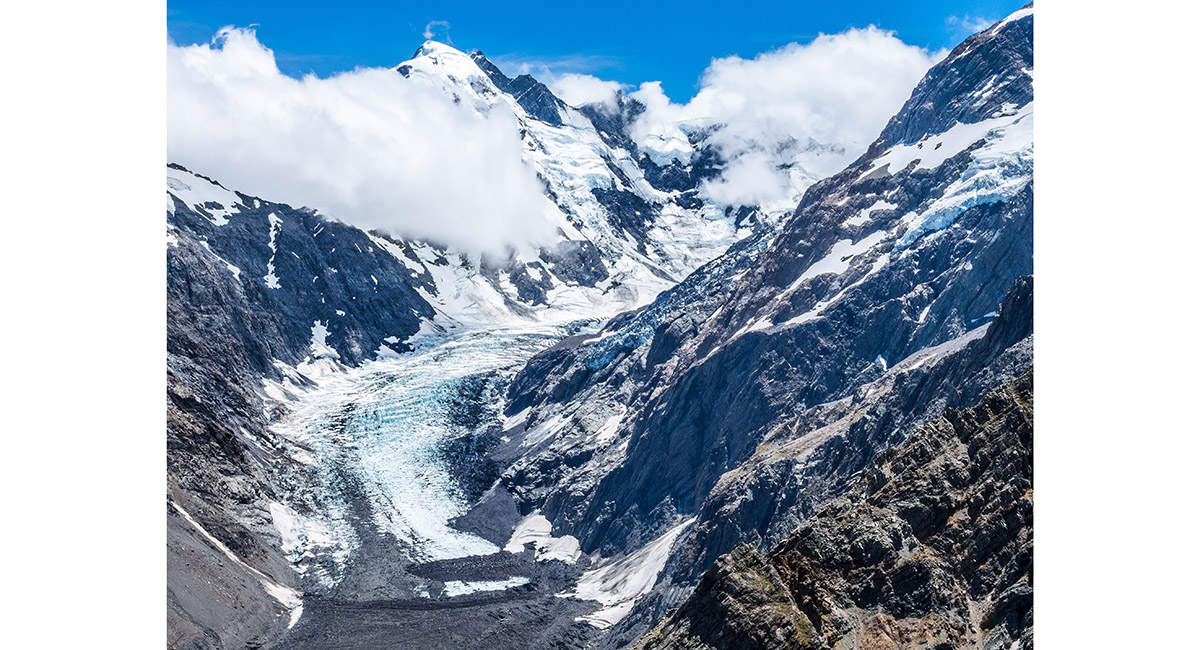
A closer view from the large rock and tussock field, looking to La Perouse (3,078m) and the upper Hooker Glacier


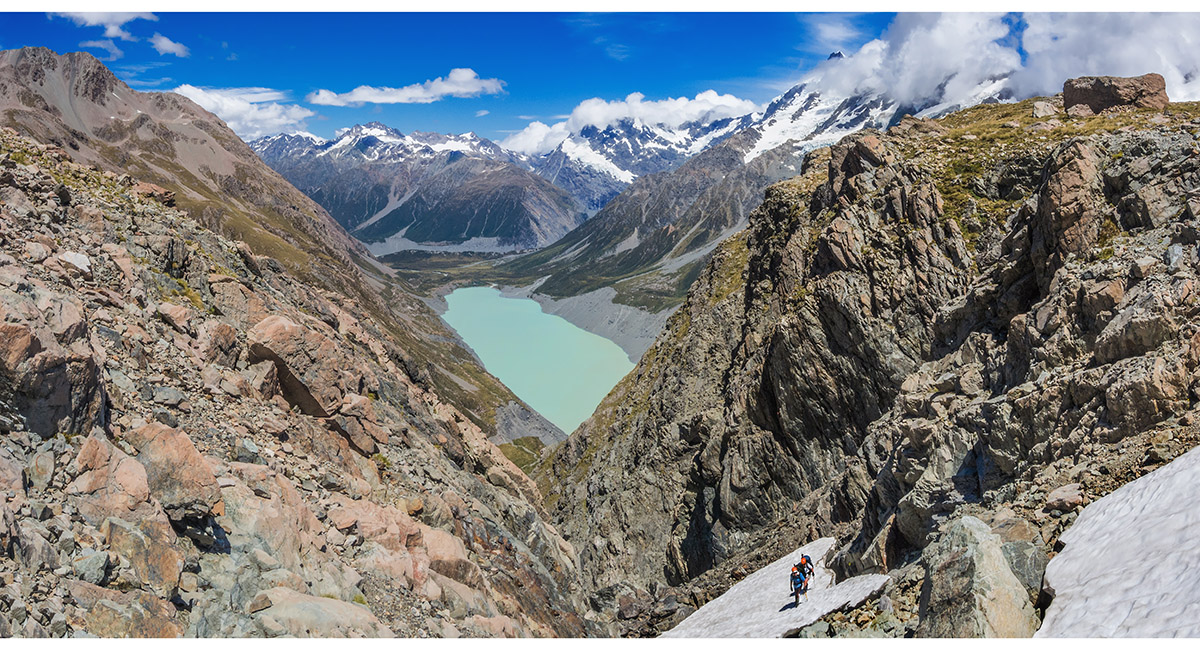
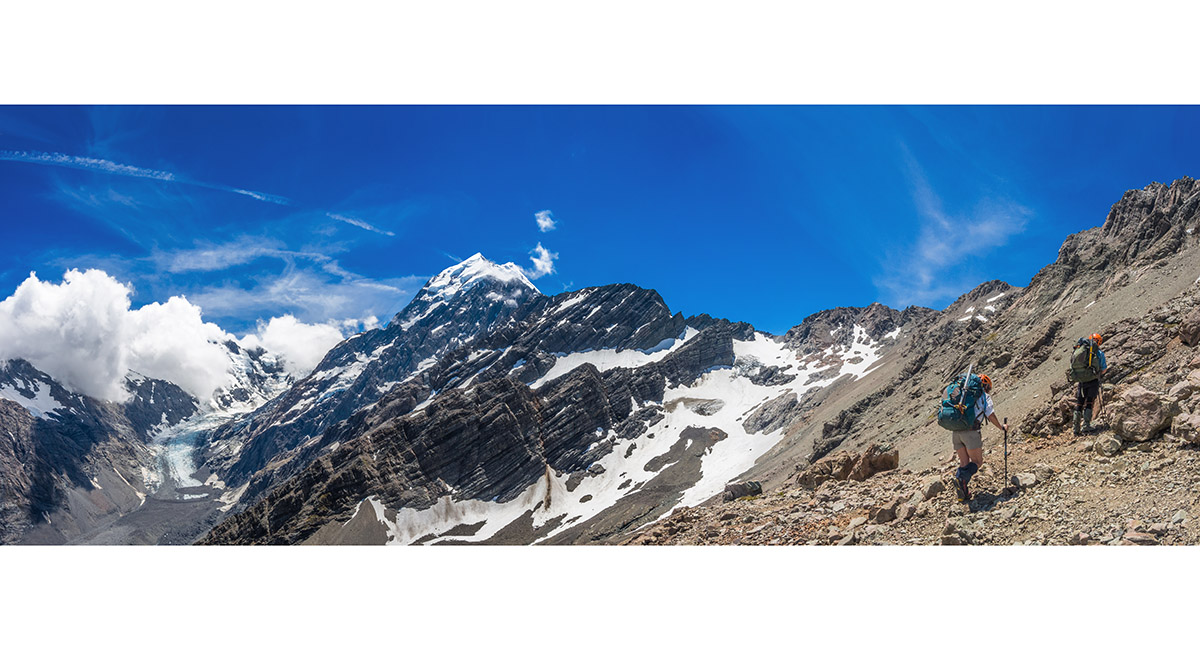
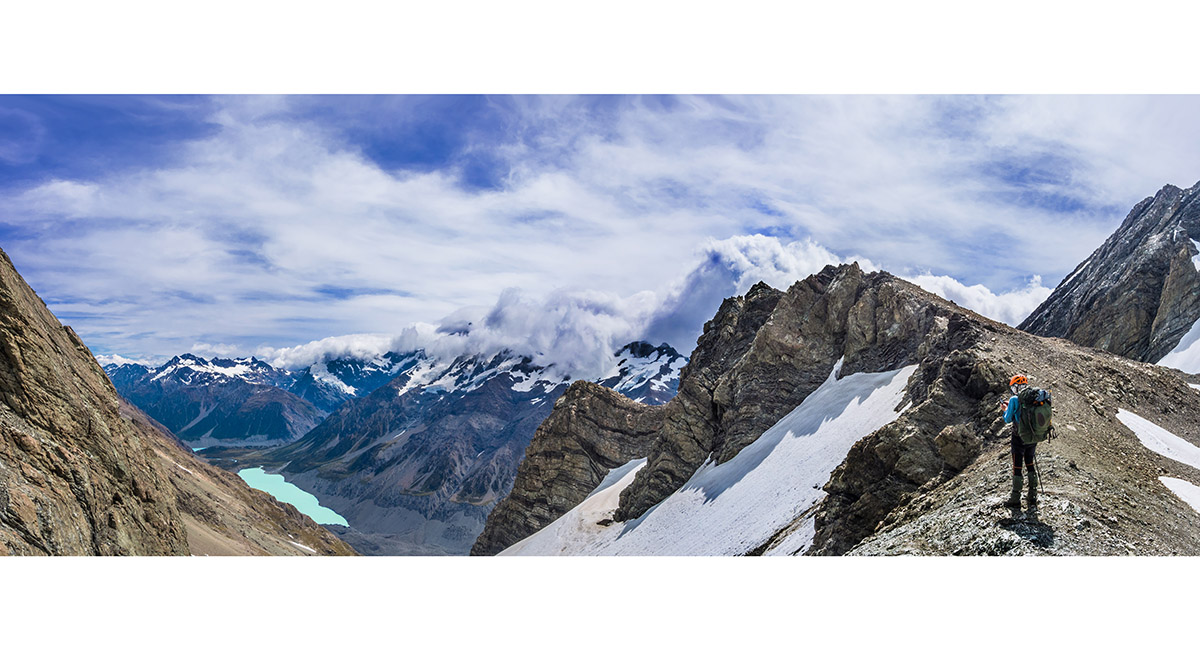
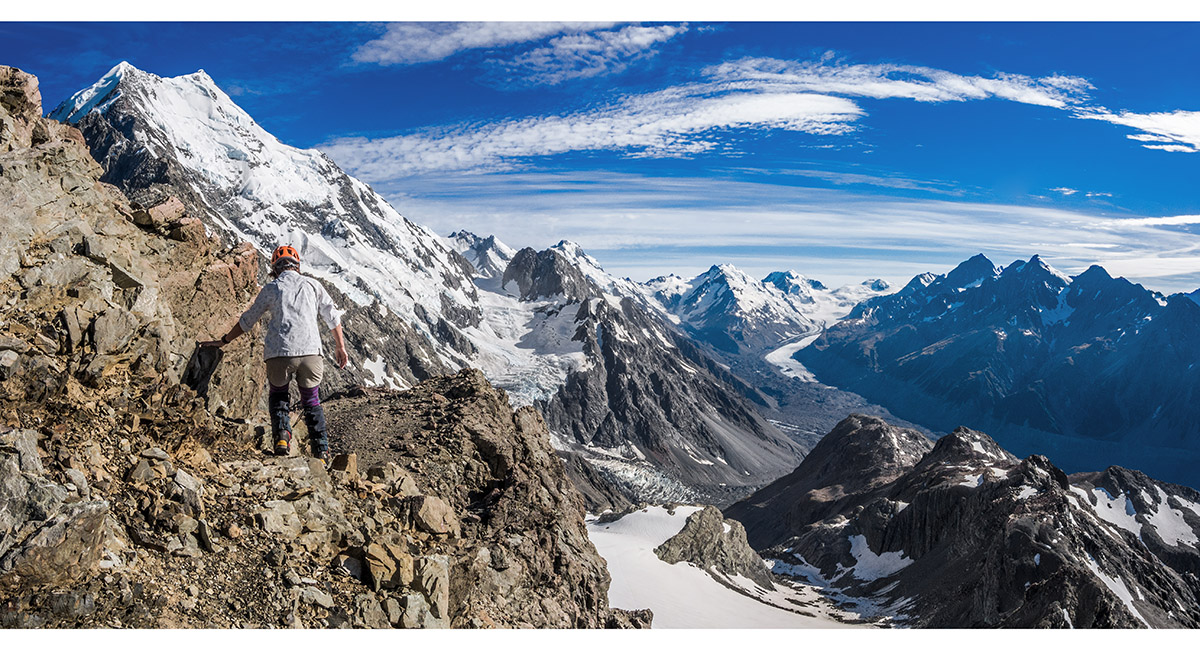
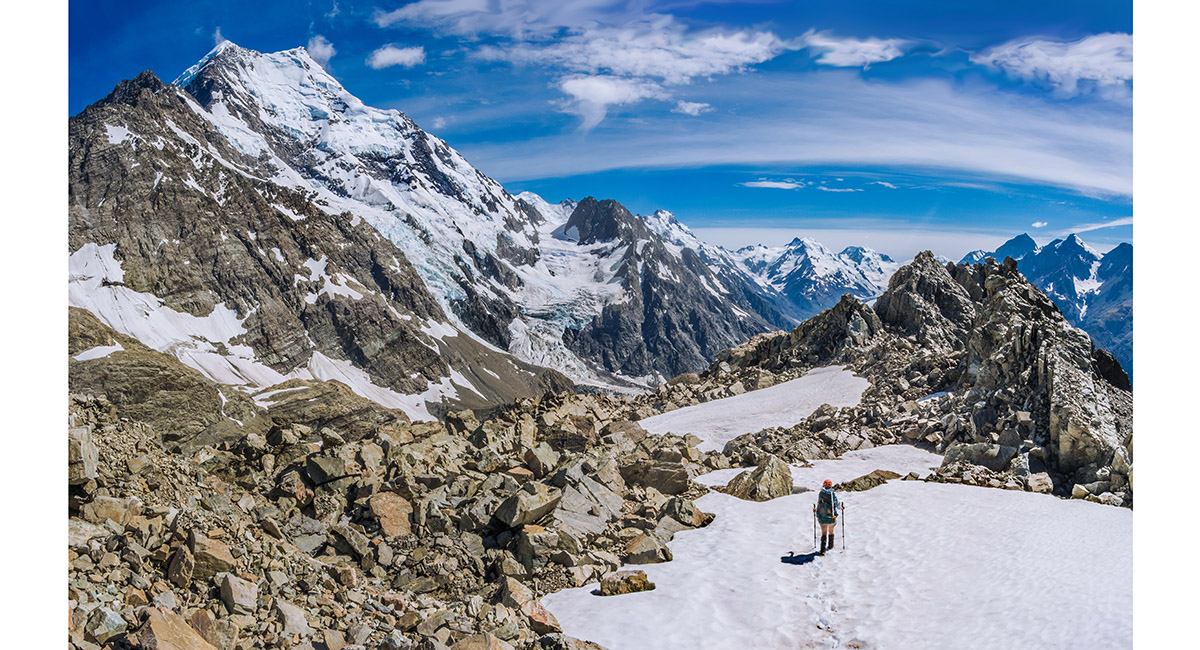
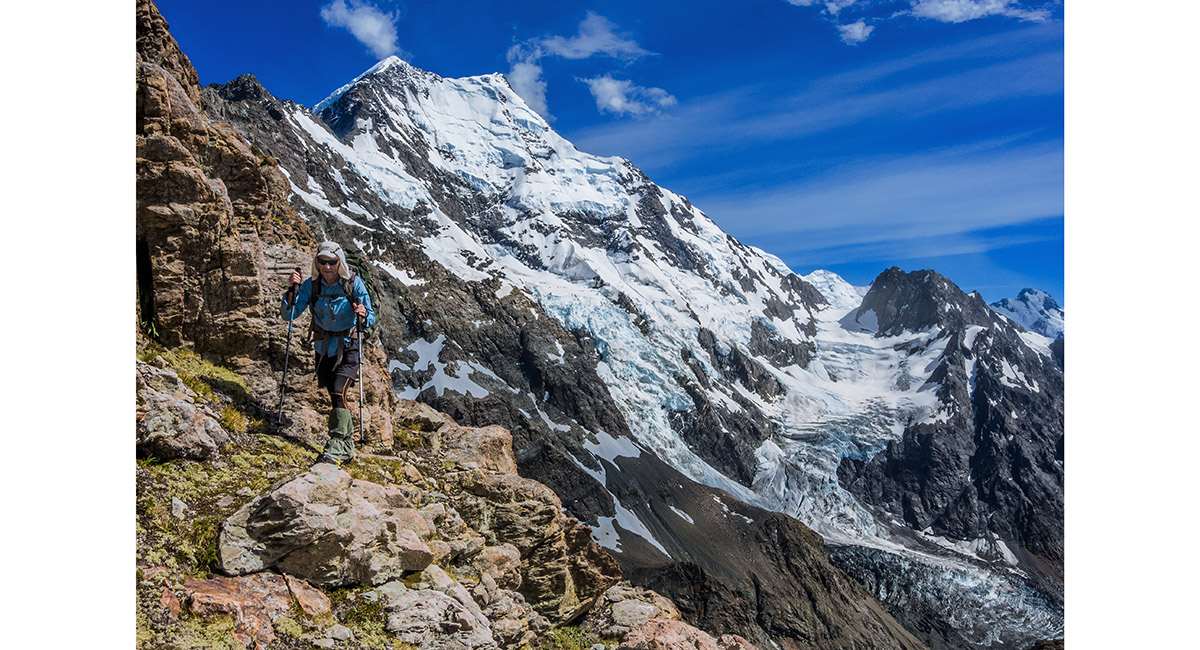
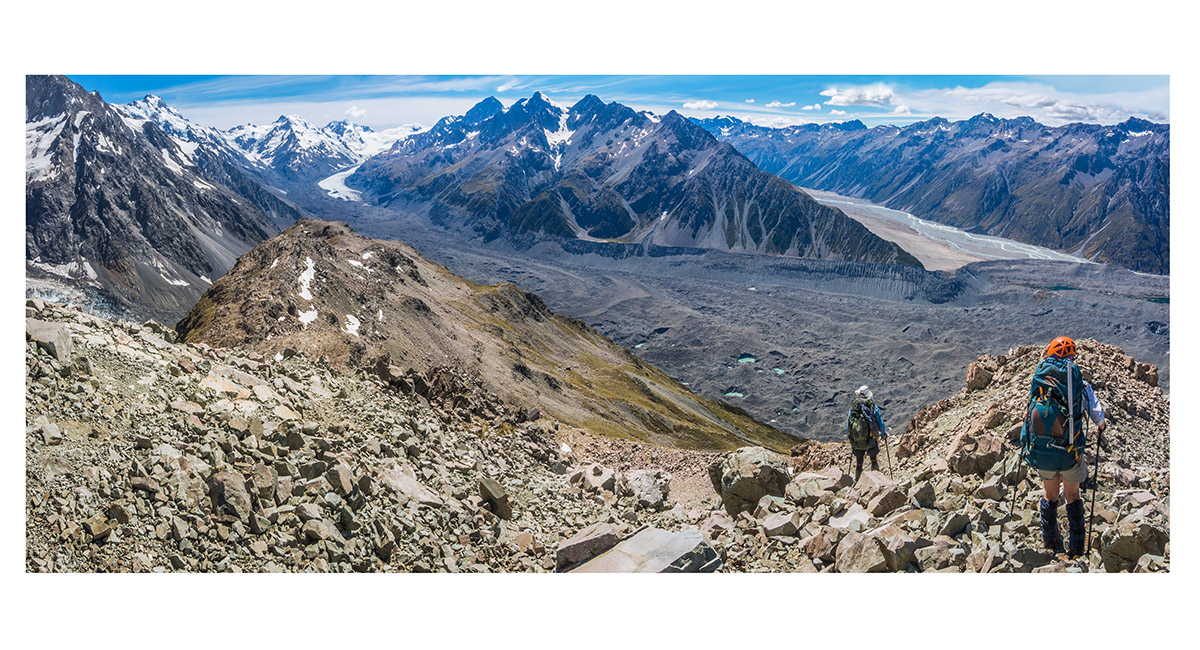
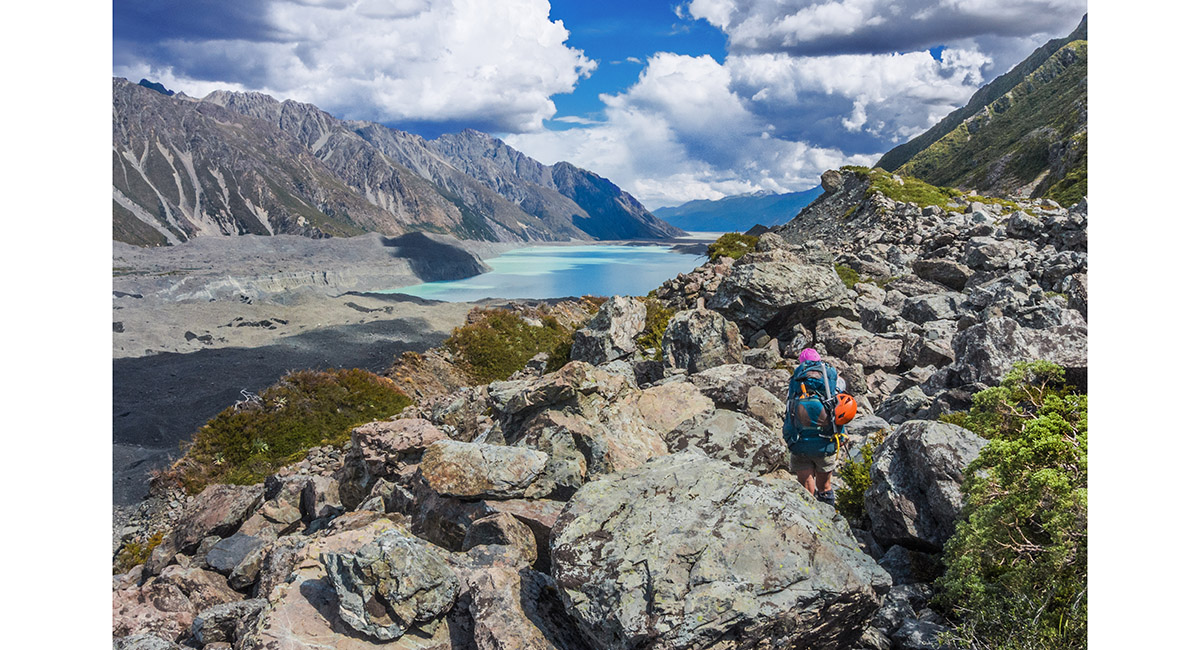
Ascending the middle section of the western side Ball Pass route, with Hooker Lake below


Ascending the middle section of the western side Ball Pass route, with Hooker Lake below

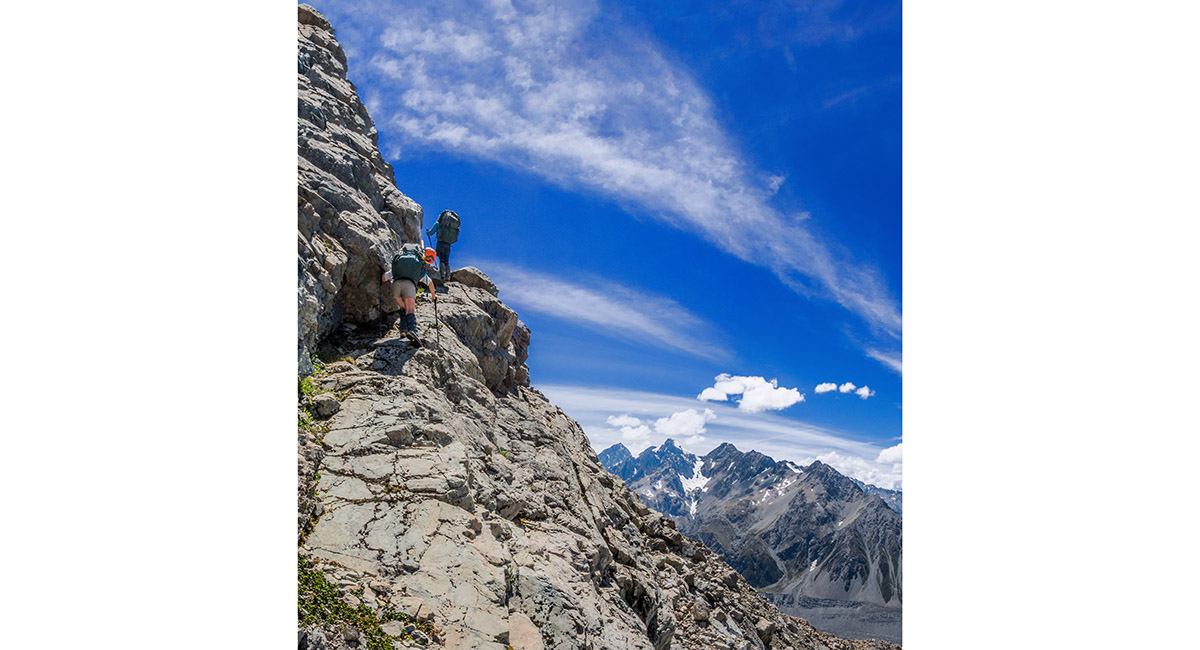
Rounding the ridge at about 1,700m, that leads to the upper section of the western side Ball Pass route. The Pass is in the obvious dip in the ridge above the snow

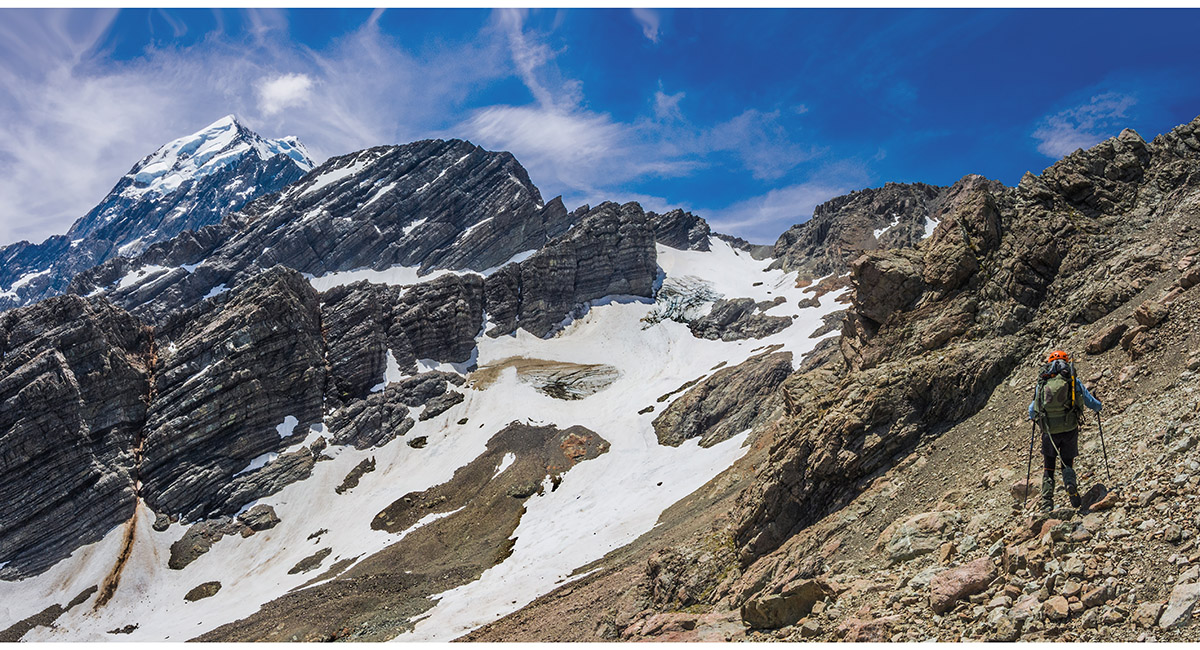
At about 1,700m, pondering the upper section of the western side Ball Pass route. The Pass is in the obvious dip in the ridge above the snow


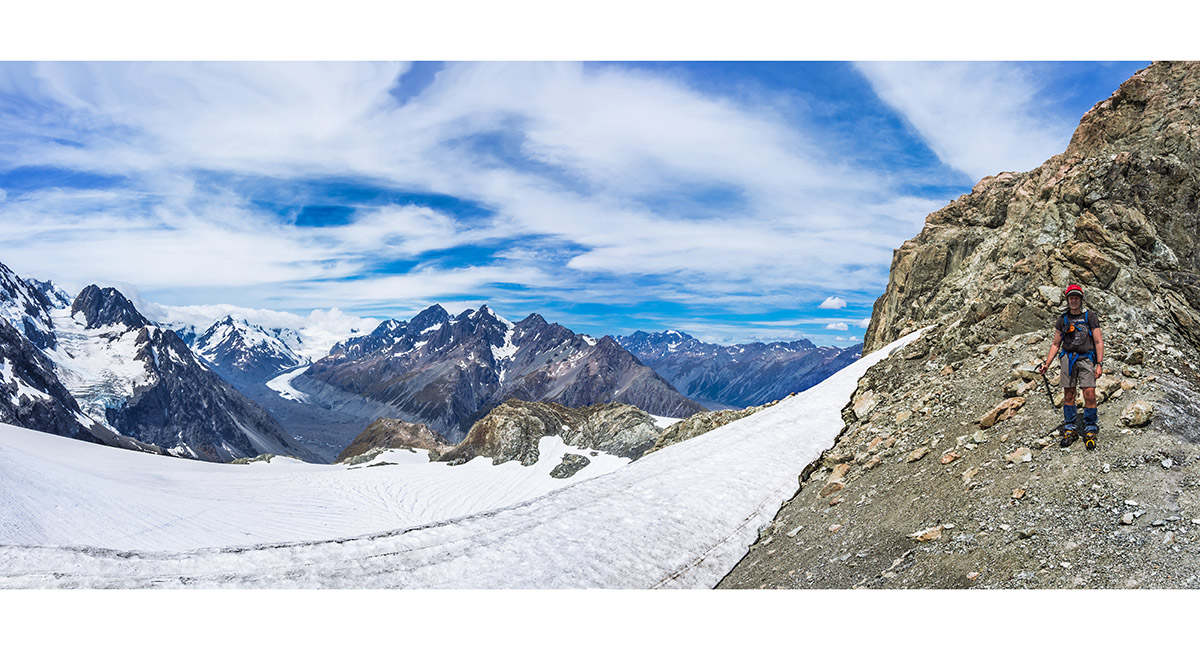
A view from about 1,900m, looking back to the ridge that gives access to the upper section of the western side route


At about 2,000m, just below the Pass


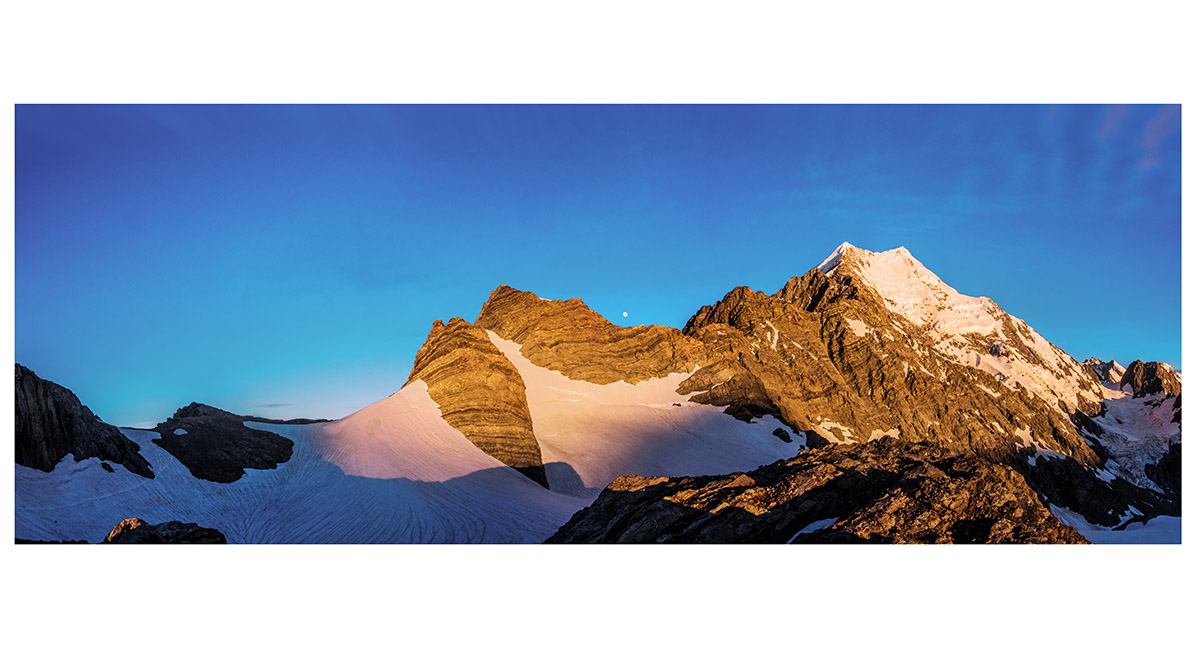
The final snow free section leading on to the Pass. Kaitiaki Peak (2,222m) is behind

On Ball Pass (2,121m), here looking north to Aoraki Mt Cook

On Ball Pass (2,121m), here looking west to the Main Divide and Hooker Lake below

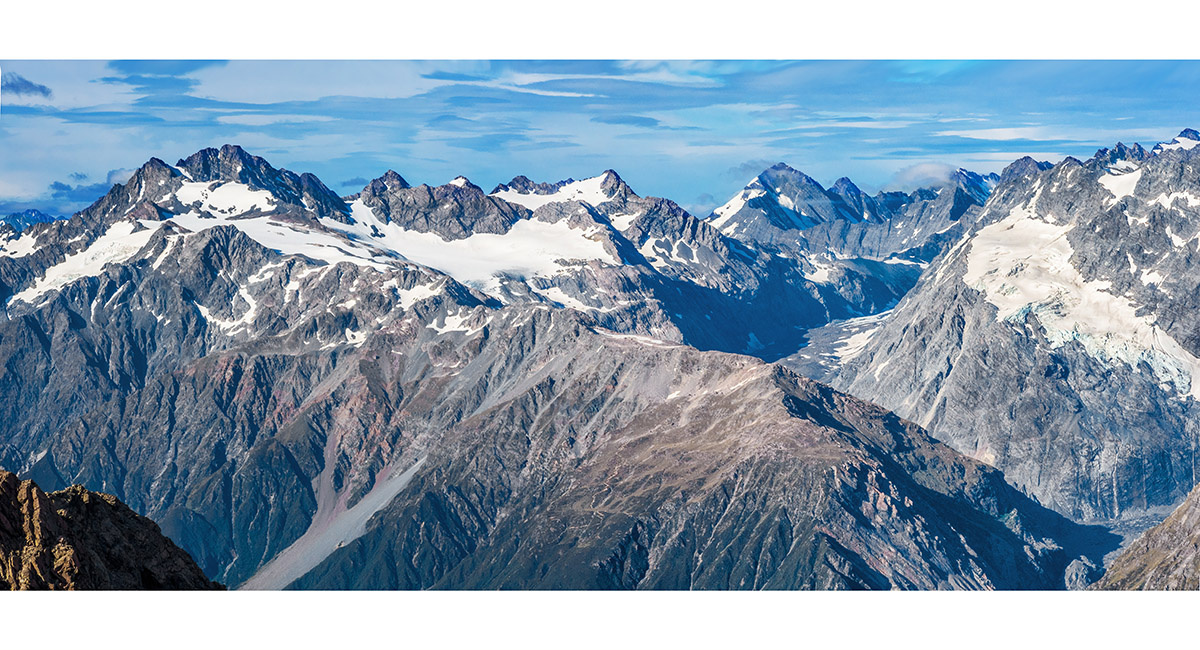
On Ball Pass (2,121m), here looking north east to the ANZAC Peaks left, the Minarets, Malte Brun Range centre and Liebig Range


On Ball Pass (2,121m), here looking back down the upper section of the western side route, with Hooker Lake below

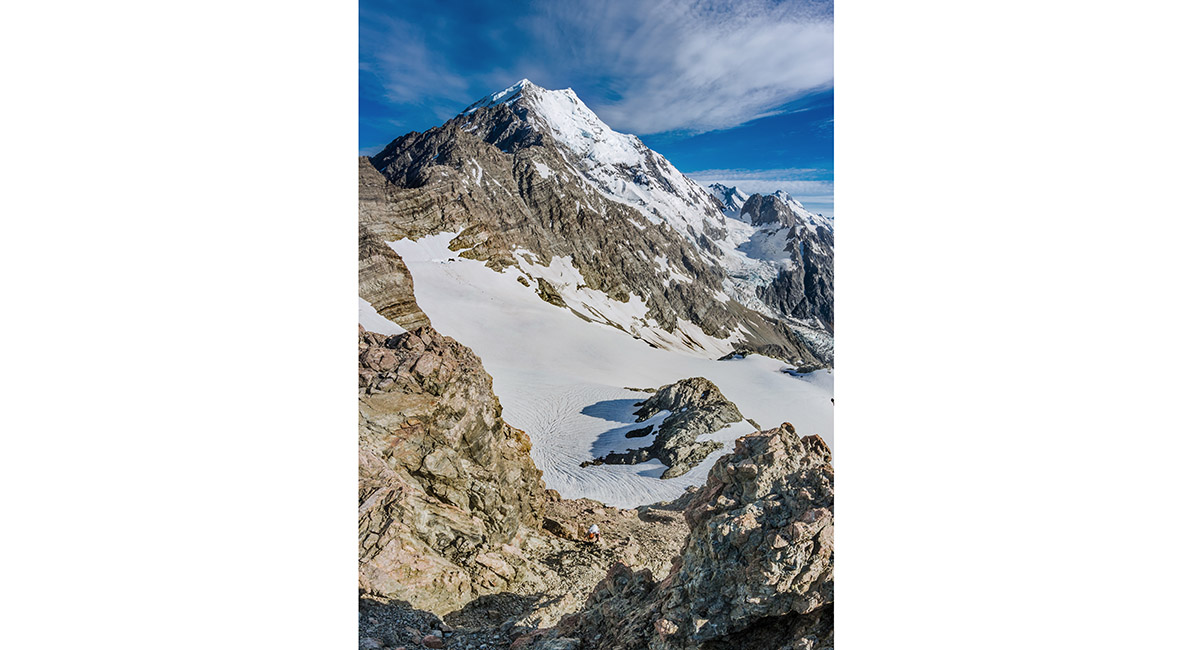
On the snow field on the eastern side of Ball Pass, just before the camp site. Looking north are Turner Peak (2,338m), Pibrac (2,514m), Nazomi (2,925m) and Aoraki Mt Cook (3,724m)

A view from the camp site at 2,100m, looking northeast to the Minarets (3,040m) and the Malte Brun Range (3,195m). In the foreground is the rocky ridge that forms most of the eastern side Ball Pass route

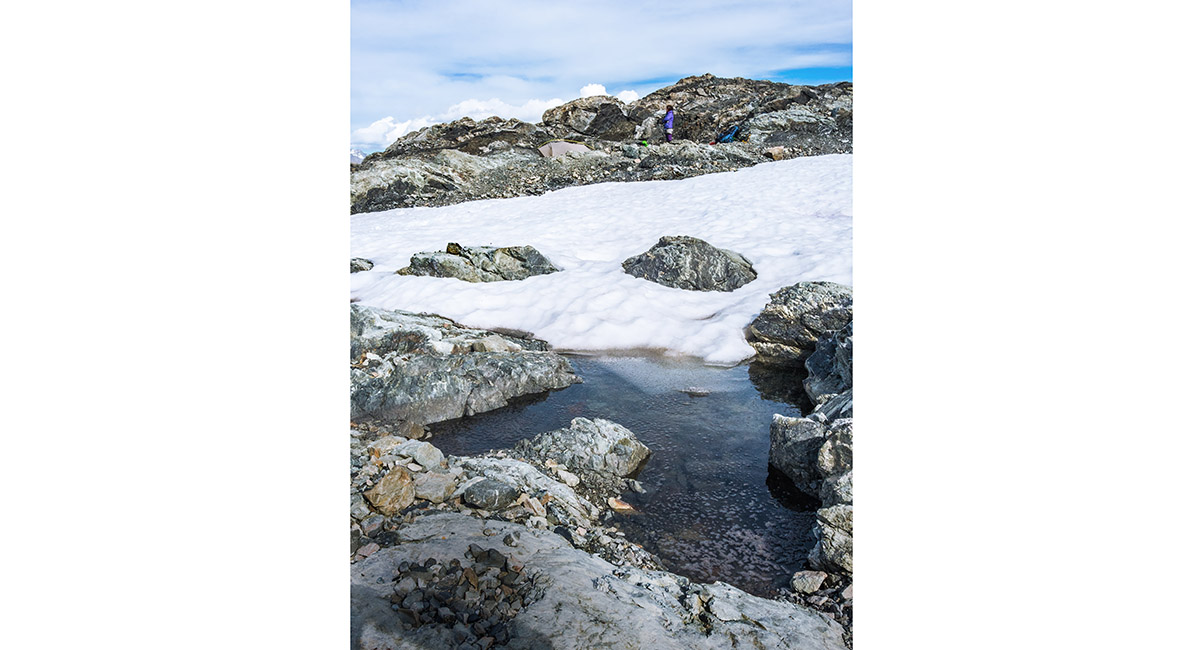
A tiny tarn near the camp site

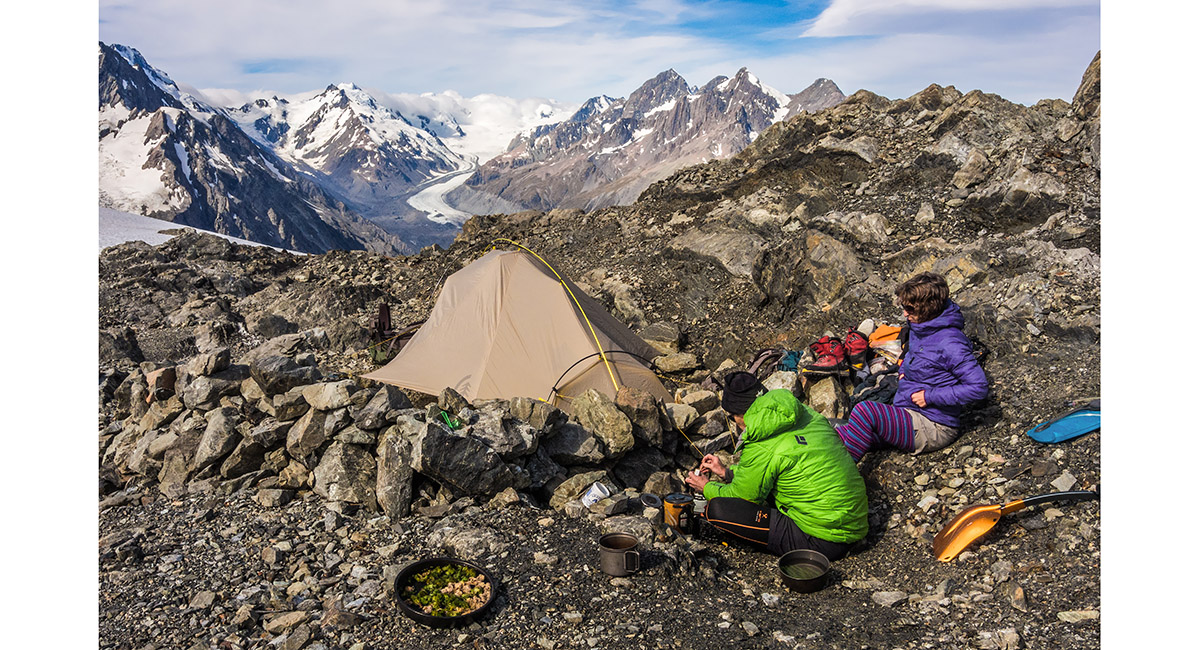
At our camp site, looking towards the Minarets

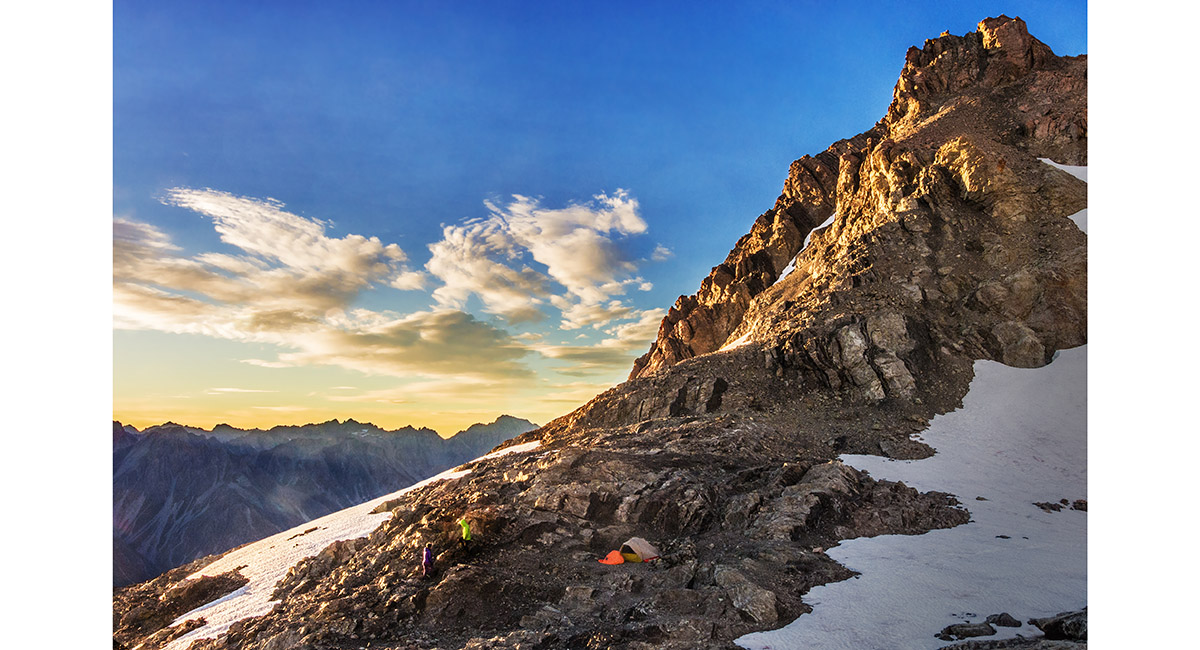
The camp site with Kaitiaki Peak above

The camp site beneath Kaitiaki Peak, far right, with the eastern side ridge route stretching away left to the Tasman Glacier. The Murchison valley is also visible to the right of the Malte Brun Range

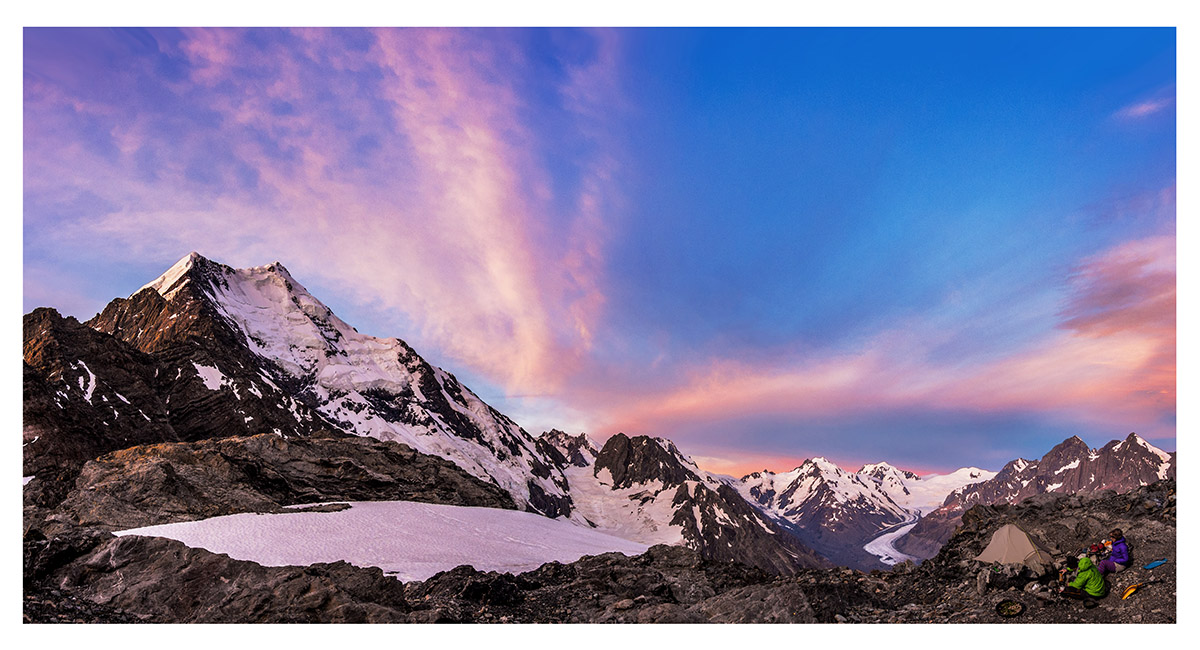
A dusk view from camp of the Caroline face of Aoraki Mt Cook left, stretching away to the Tasman Saddle


A dusk view from camp of the Minarets (3,040m), Elie De Beaumont (3,109m), Hockstetter Dome (2,827m) and the Malte Brun Range

A dusk view from camp of the Minarets (3,040m), Elie De Beaumont (3,109m) and Hockstetter Dome (2,827m)

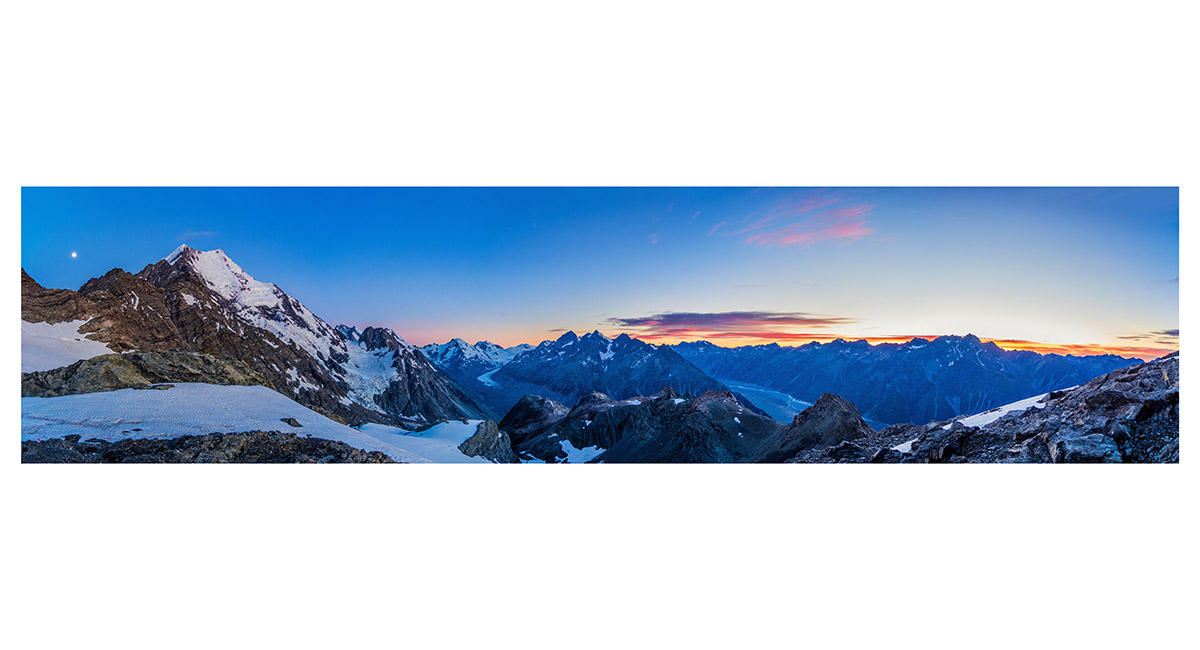
A dawn view at camp of Aoraki Mt Cook and all the other peaks stretching north and east


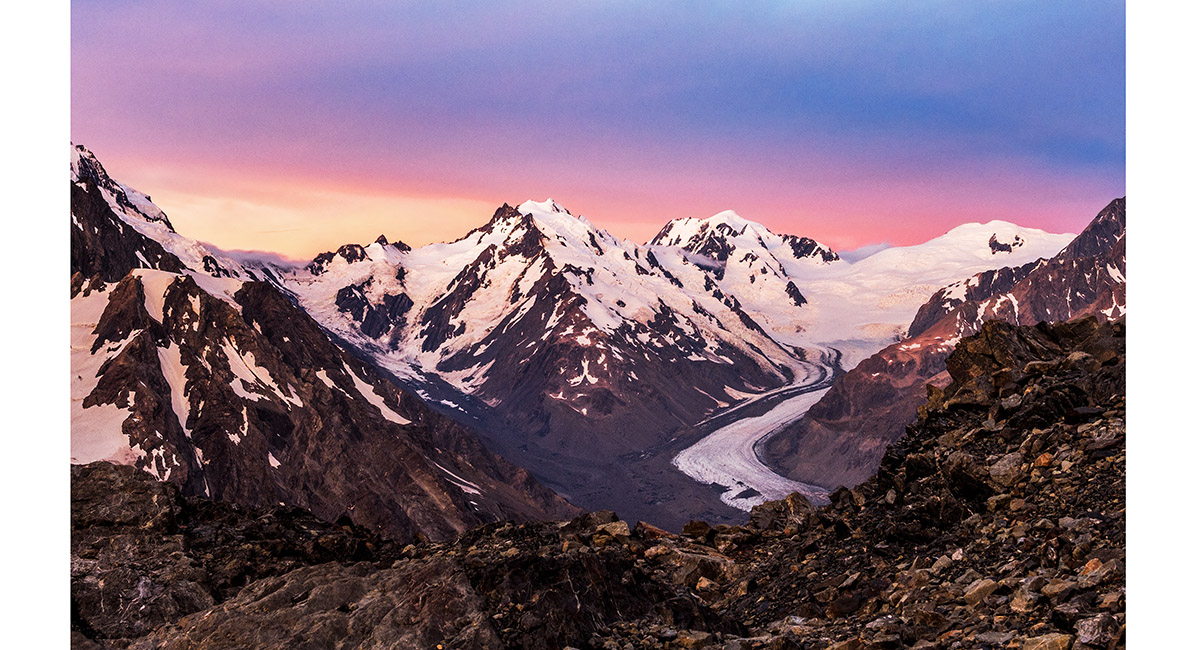
The Caroline Face of Aoraki Mt Cook ablaze in dawn light

The Minarets (3,040m) and Elie De Beaumont (3,109m) at dawn

A dawn view of Ball Pass (2,121m), Turner Peak (2,338m), Pibrac (2,514m), Nazomi (2,925m) and Aoraki Mt Cook (3,724m)

At dawn, the camp site with Kaitiaki Peak above

Looking down the steepest section of Kaitiaki Peak, with Aoraki Mt Cook behind


Looking down the steepest section of Kaitiaki Peak

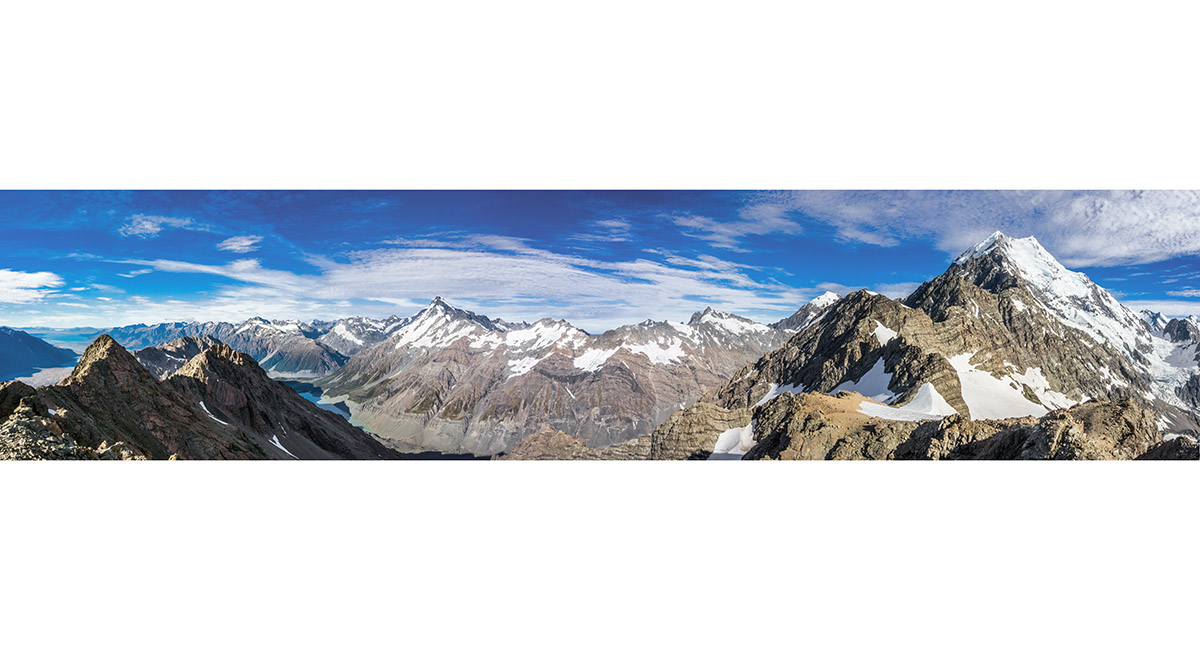
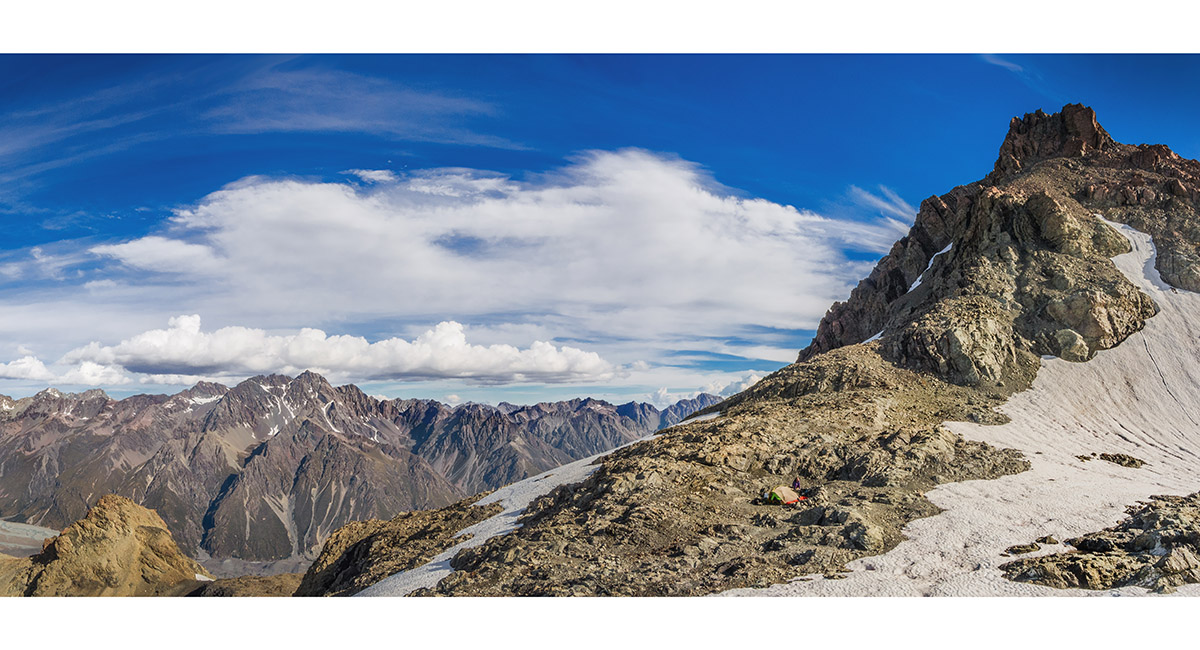
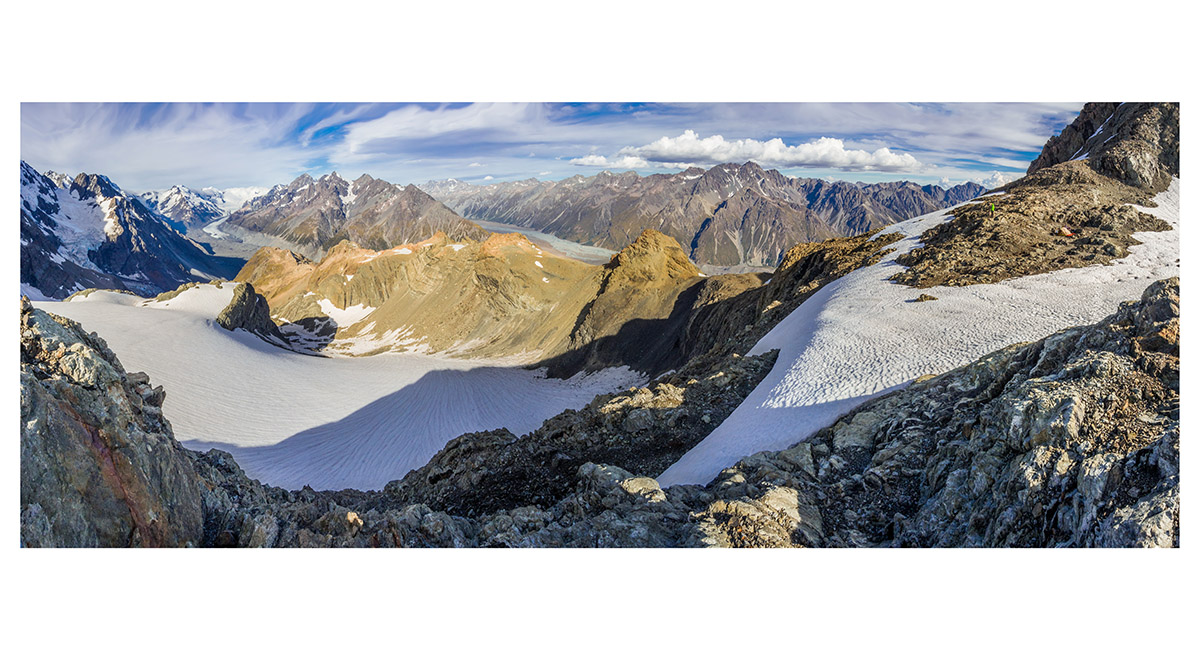
A wide panorama from Kaitiaki Peak (2,222m), looking north to Aoraki Mt Cook and then west and south to Mt Sefton and the Wakefield ridge

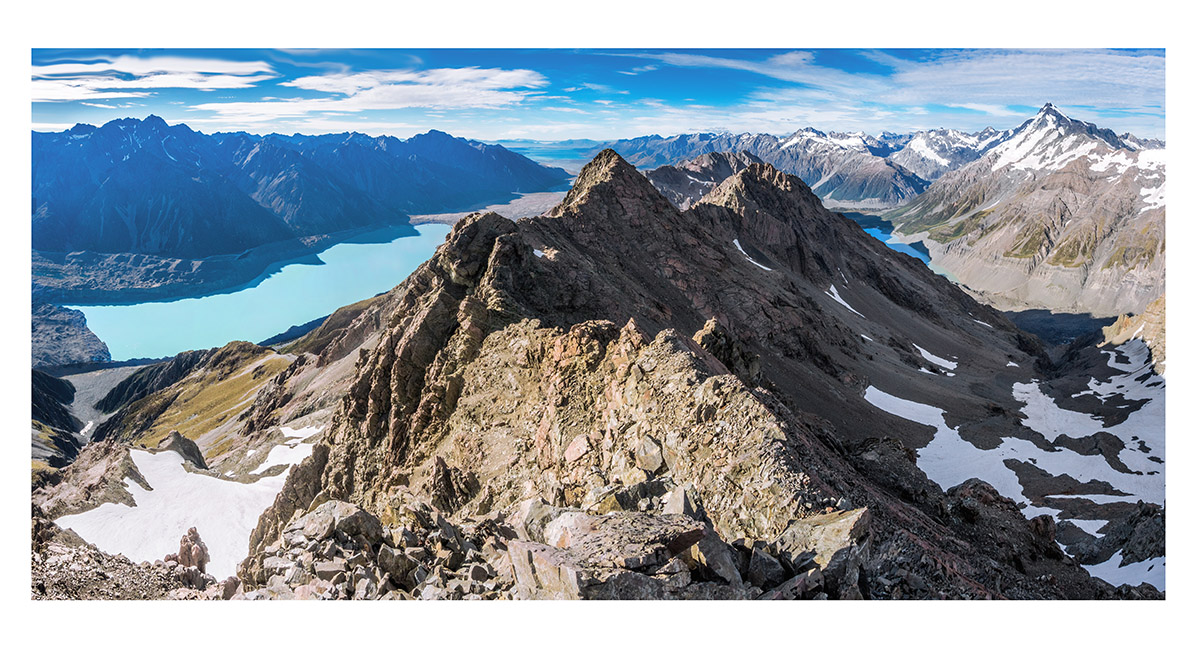
From Kaitiaki Peak, looking south along the lower section of the ridge - the next peak is Mt Rosa (2,161m), with Tasman Lake at left and Mt Sefton right

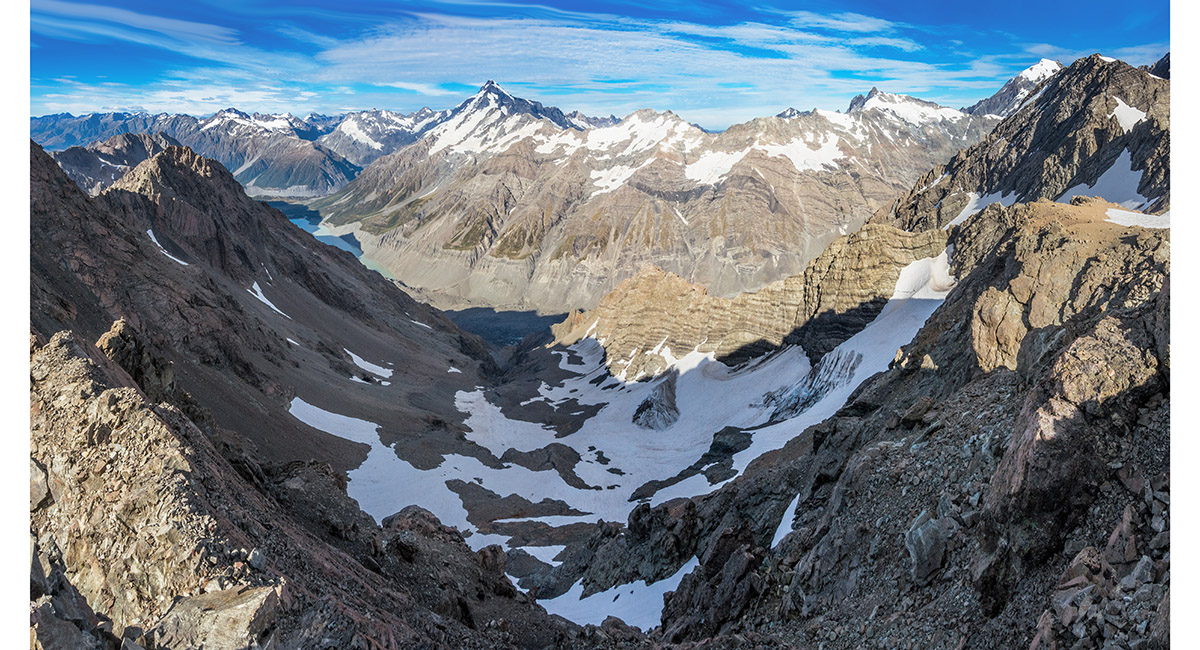
From Kaitiaki Peak, looking west down the Ball Pass route, with Mt Sefton (3,151m) on the skyline

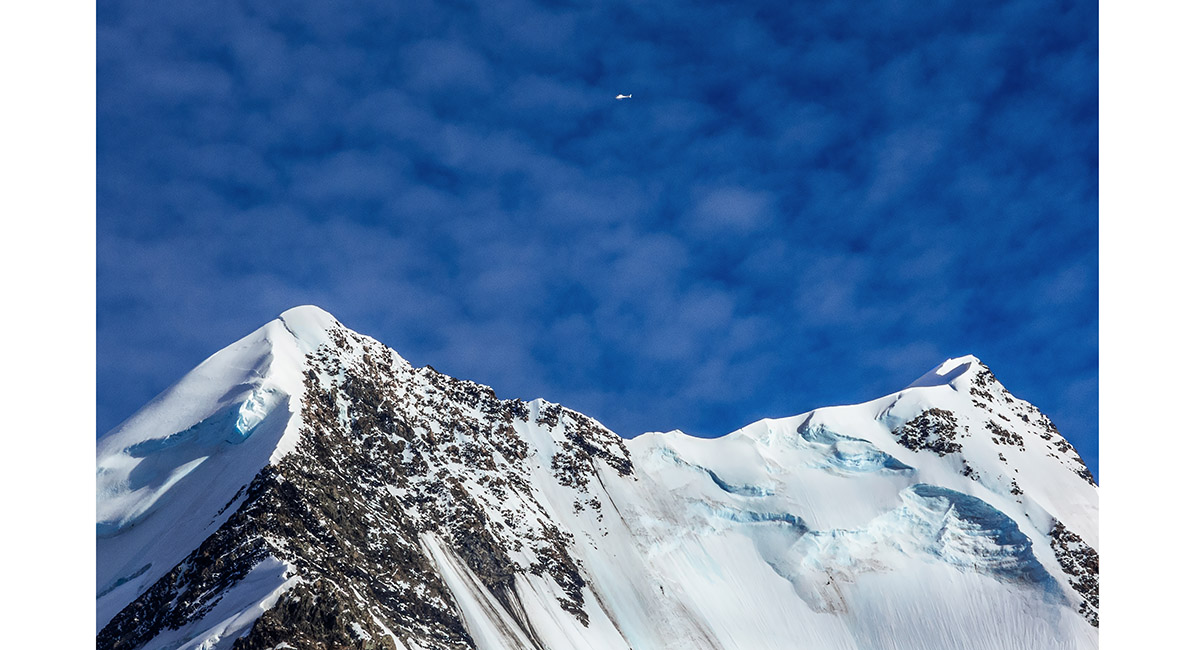
The summit ridge of Aoraki Mt Cook dwarfs a passing helicopter

A view from Kaitiaki Peak to the Sealy Range, with the eastern flanks of Mt Sefton and Mueller Glacier at right and Mt Sealy (2,627m) and Annette Plateau left

Mt Sefton (3,151m)

Beneath the summit of Kaitiaki Peak, looking north to Aoraki Mt Cook and beyond

Departing the camp site, with Tasman Lake and the ridge that the Ball Pass route traverses on the eastern side

Heading down the ridge at about 2,100m, with the Caroline face of Aoraki Mt Cook left


Heading down the ridge at about 2,050m, with the Malte Brun Range ahead

Heading down the ridge at about 2,000m, with the Caroline face of Aoraki Mt Cook left

Heading down the ridge at about 1,950m, with the Caroline face of Aoraki Mt Cook left

Heading down the ridge at about 1,900m, with the Caroline face of Aoraki Mt Cook left

Heading down the ridge at about 1,900m, with the Malte Brun Range ahead

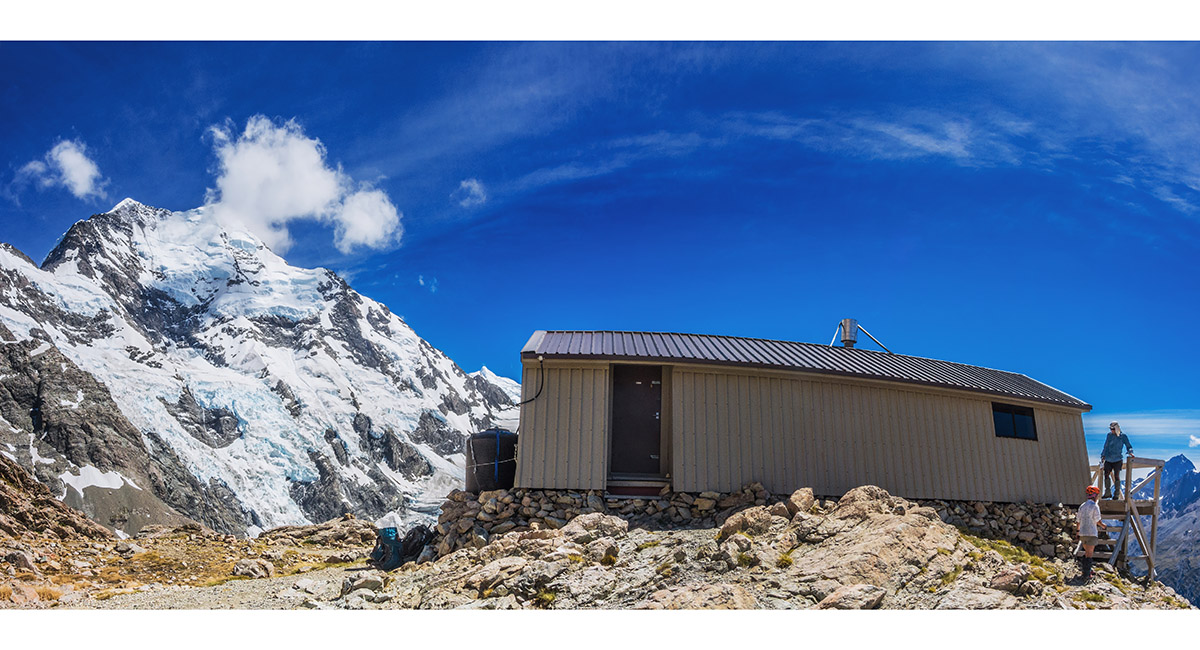
Caroline Hut (1,800m) and its namesake, the Caroline face behind

North of Caroline Hut, regaining access to the ridge

Another view of the Caroline face at about 1,700m

On the ridge at a wide spot, looking north to the Minarets (3,040m), Elie De Beaumont (3,109m) and Hockstetter Dome (2,827m)

Continuing the ridge descent, looking north to the Minarets, Elie De Beaumont and Hockstetter Dome

The last good view of the Caroline face before the route drops off the now crumbling ridge

Continuing the ridge descent, looking north to the Minarets, Elie De Beaumont, Hockstetter Dome and the Malte Brun Range

A last look at the Caroline face

Where the ridge ends in a fractured chaos of rock and earth. The retreat of the glaciers means that landscape once held together by the pressure of ice is now free to fall apart

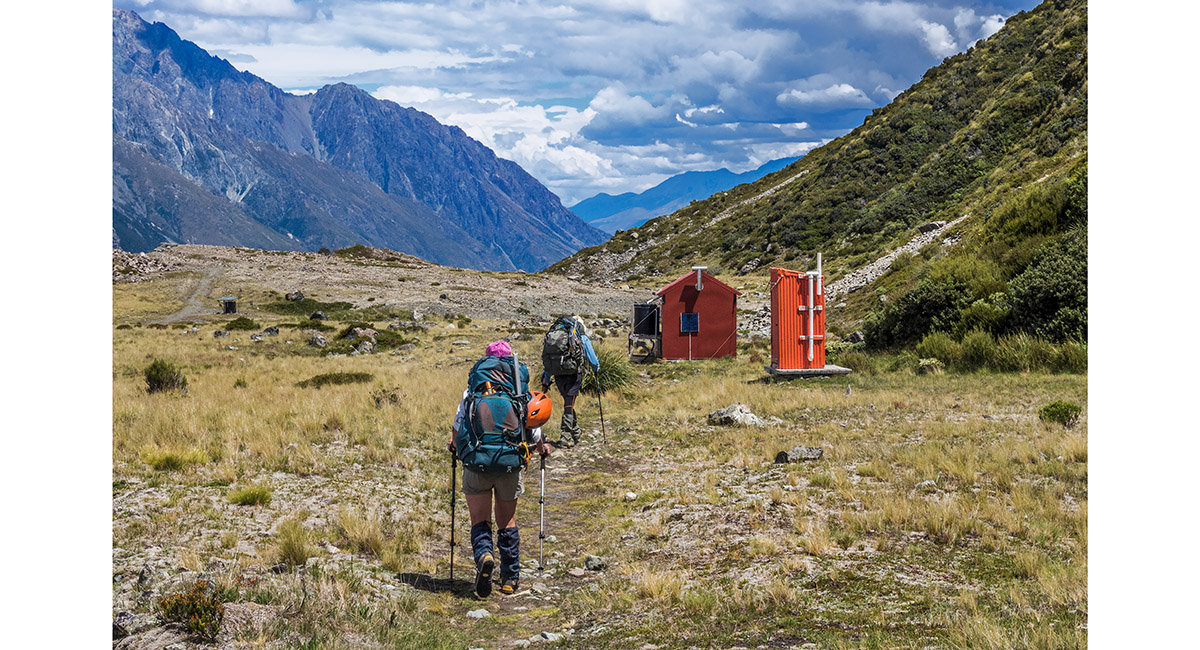
Approaching Ball Hut (1,150m)

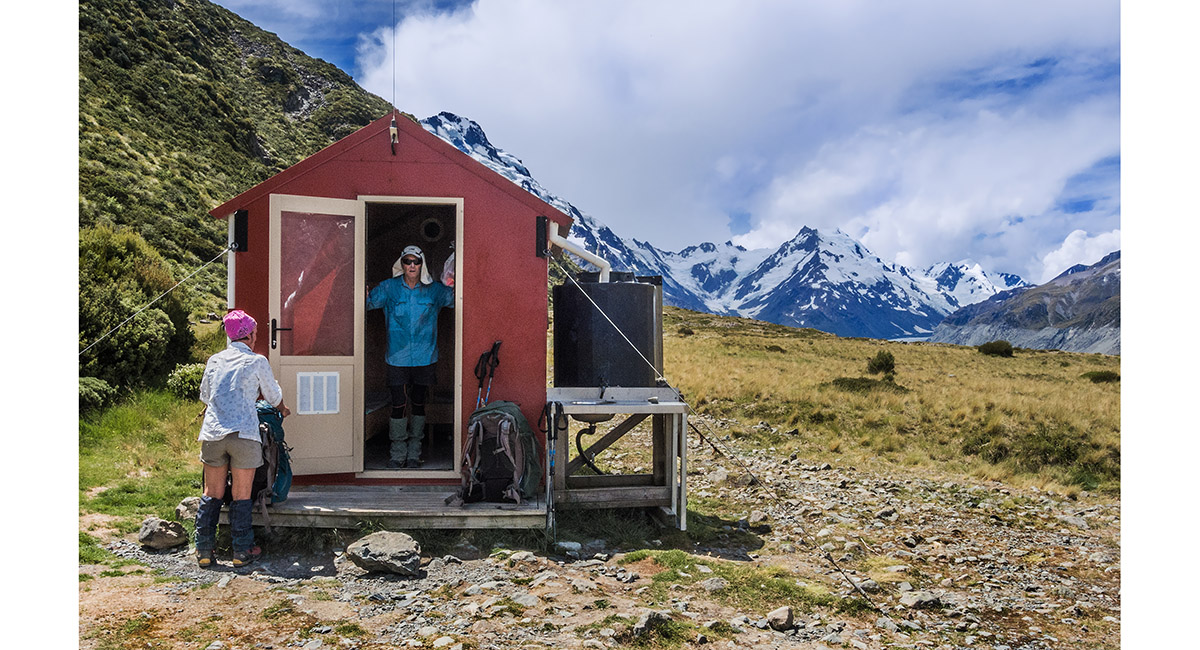
At Ball Hut - the water tank was virtually empty. Bummer!

Heading south along the true right moraine of Tasman Glacier


Approaching the terminal moraine of Tasman Glacier

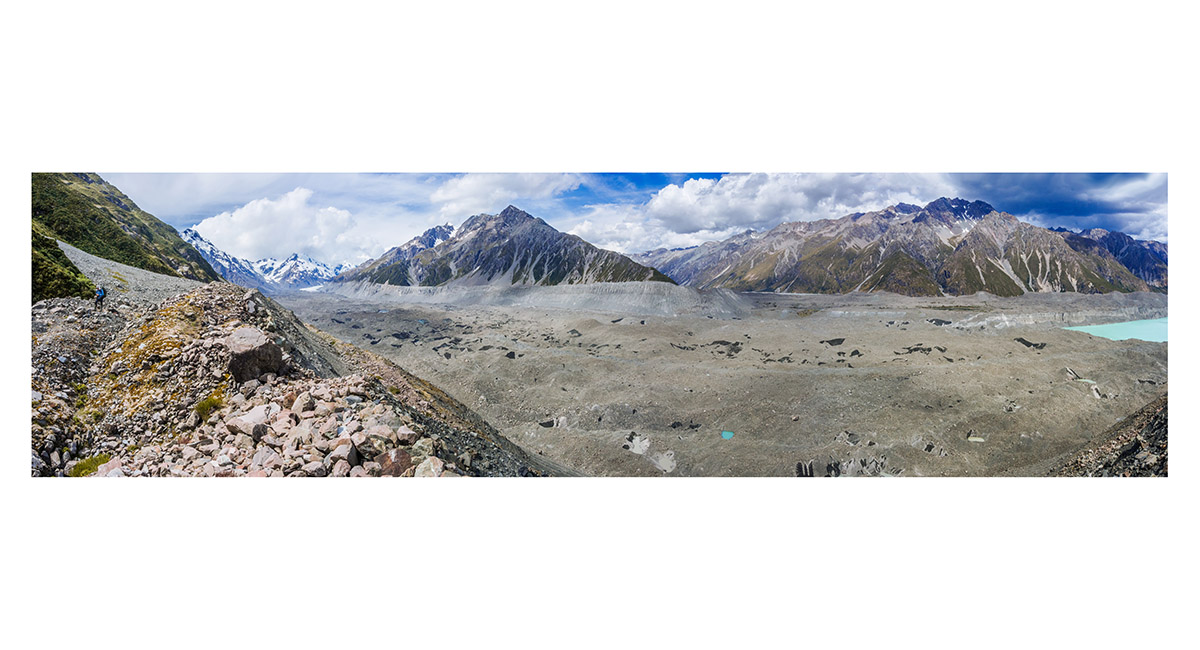
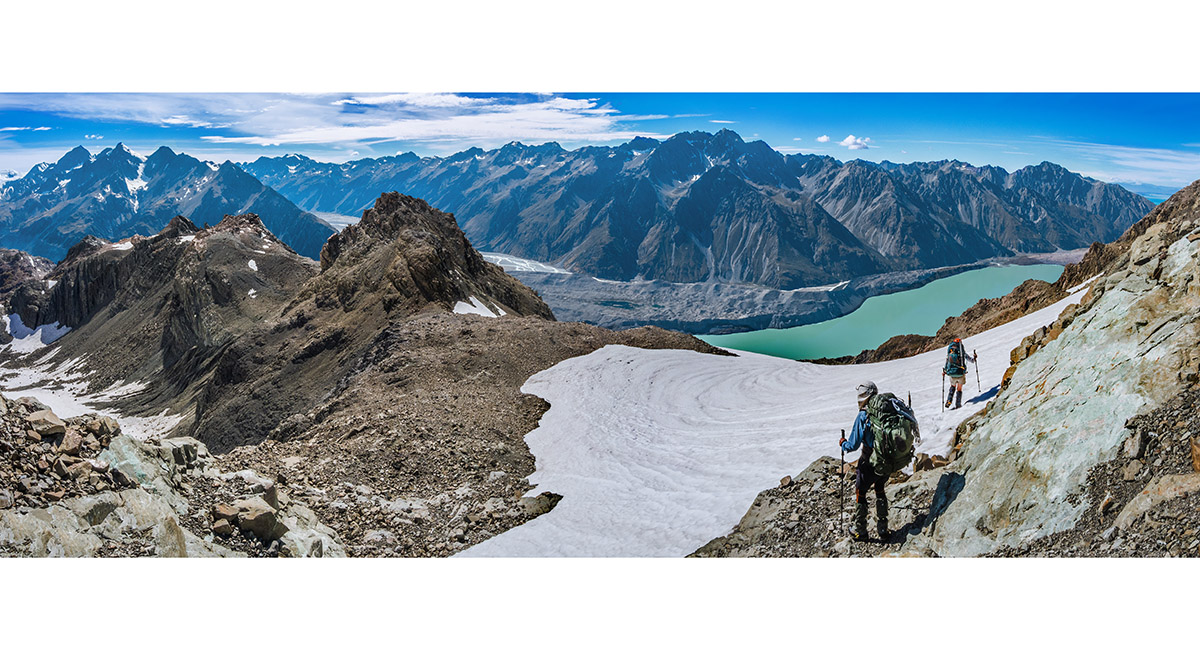
A panorama from the true right moraine, looking back to the Malte Brun Range left of centre and the Liebig Range right. Nearly time for cold beer ...

Read about it Overnighting with a Kaitiaki Vertigo Feb 18 A night with a guardian Wilderness Magazine Nov 19
![]()
To order a print or web resolution file of any image you see in this slide show, just right click the image, click “Copy Image URL” and paste in to the “Your message” box of our Contact Us form. Please also note, for each image, if you want a print or web resolution file. We will get back to you as soon as possible to confirm price and payment details.
Open Contact Us in a new window to paste Image URL(s) easily