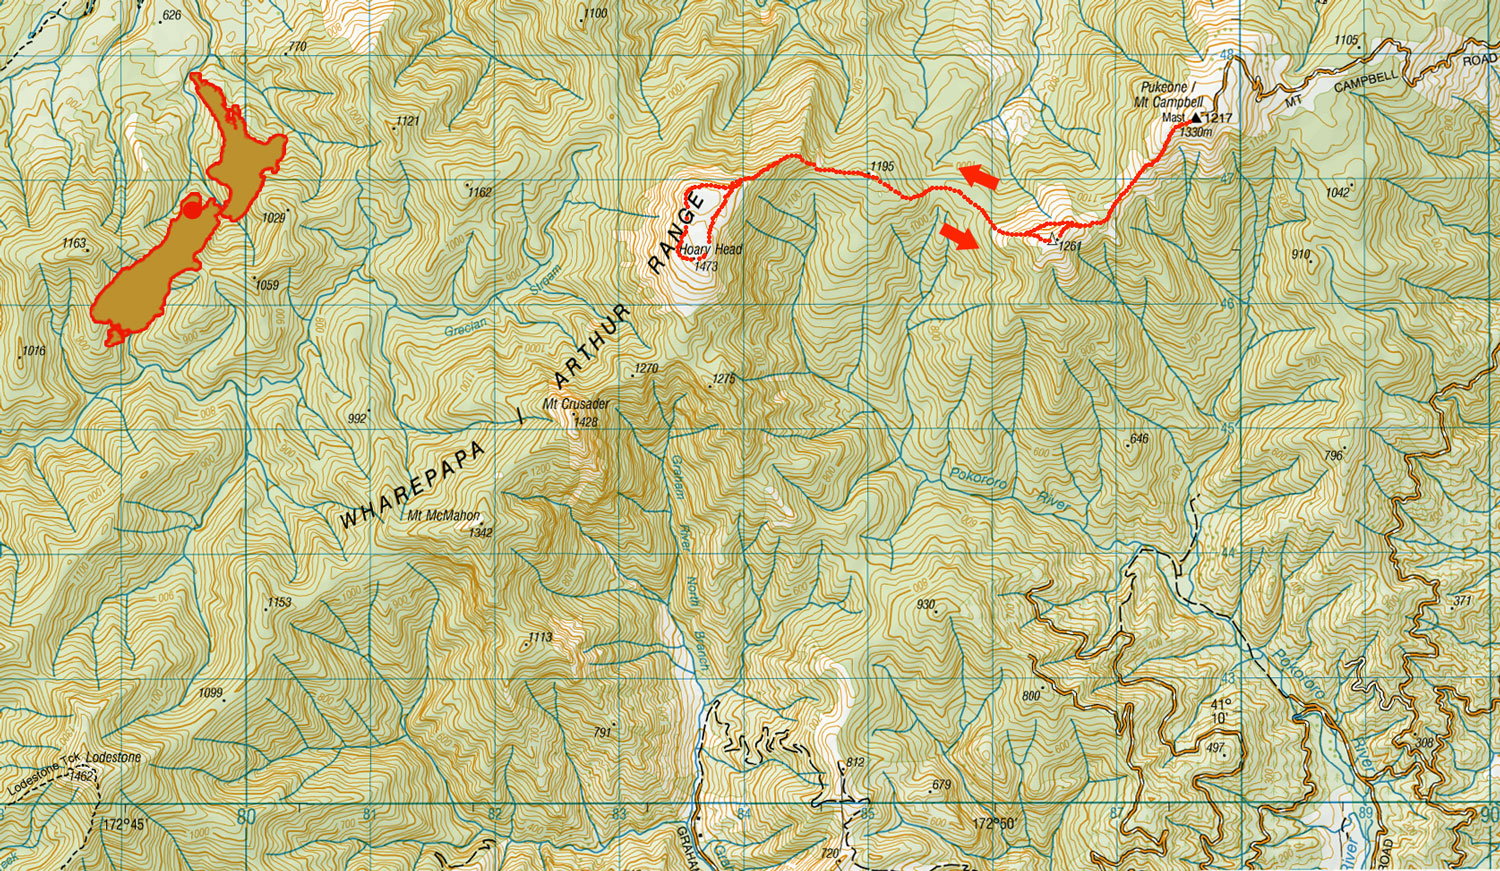
Mt Campbell to Hoary Head return, August 2023
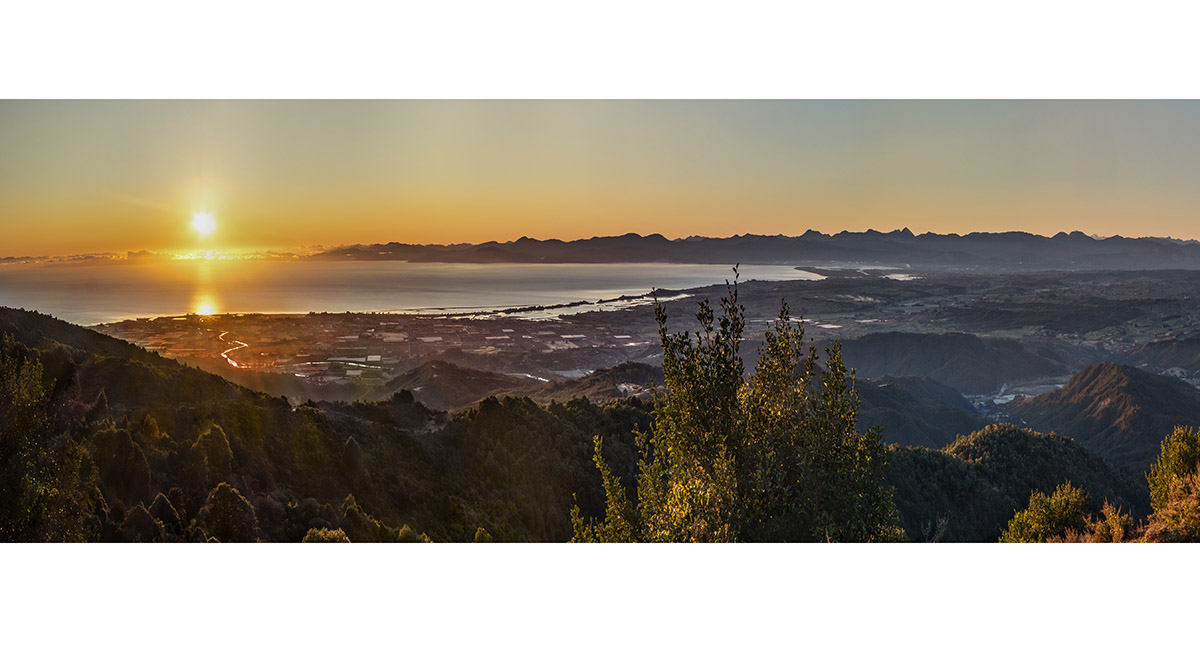
A dawn view from about 1,150 metres on the Mt Campbell Road, to Tasman Bay and the Richmond Range

A dawn view west from the summit of Mt Campbell (1,330m)

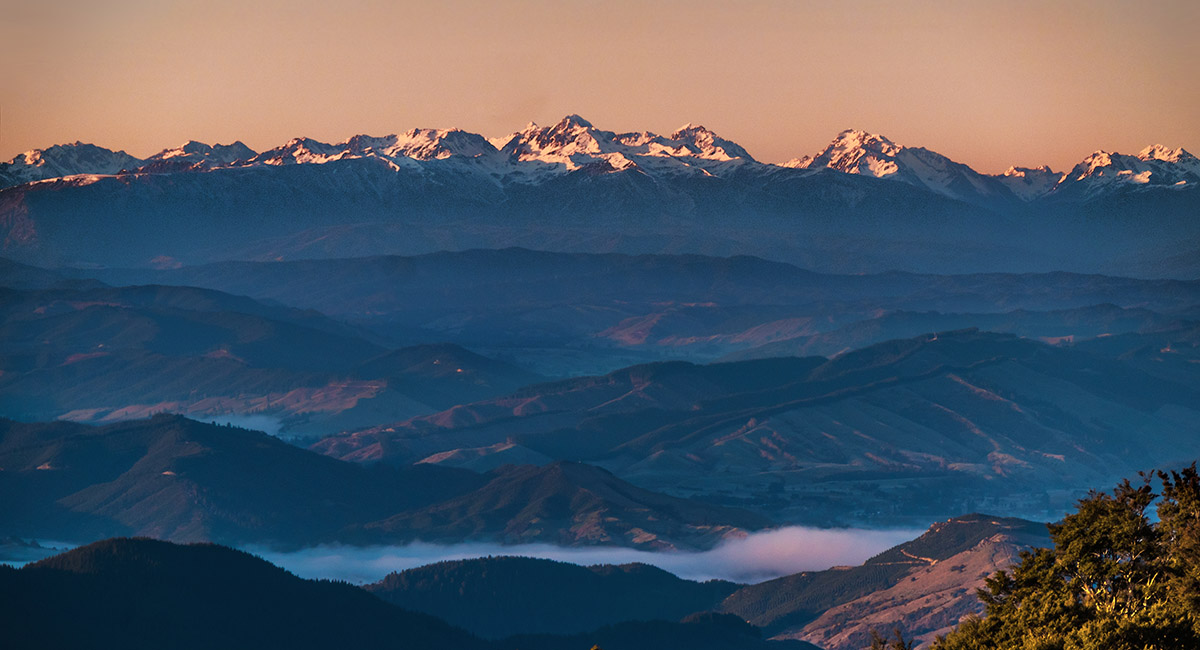
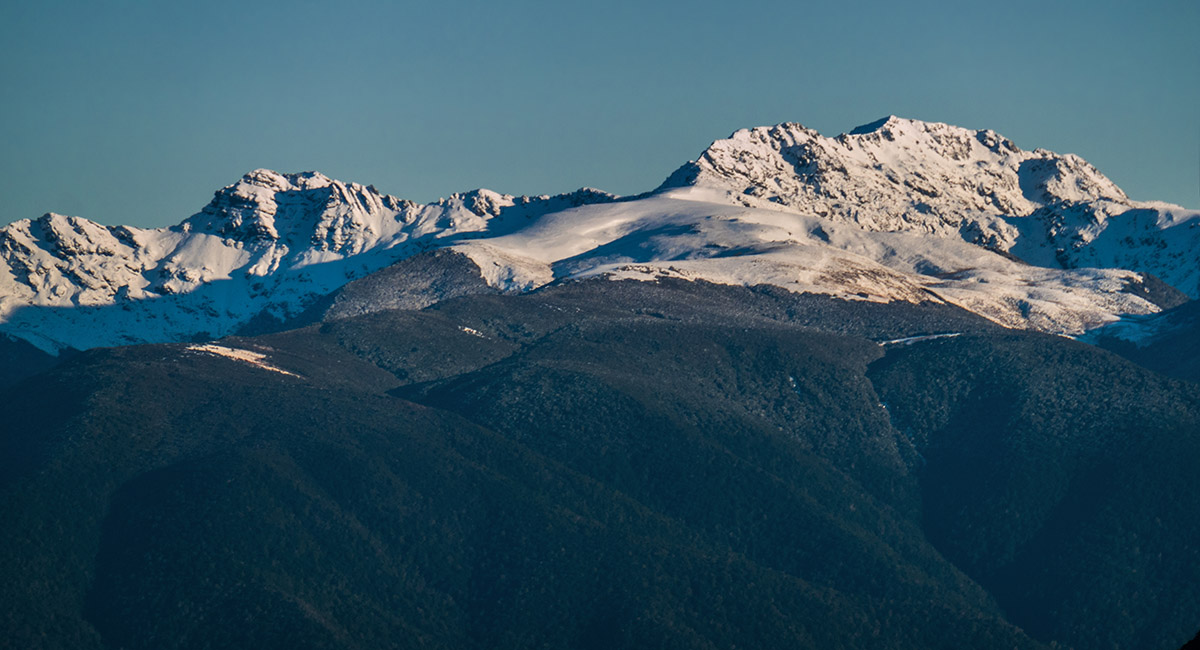
A dawn view east from the summit of Mt Campbell (1,330m). Mt Richmond (1,760m) is right and Mt Fishtail (1,641m) is left

A dawn view north east from the summit of Mt Campbell to the Marlborough Sounds

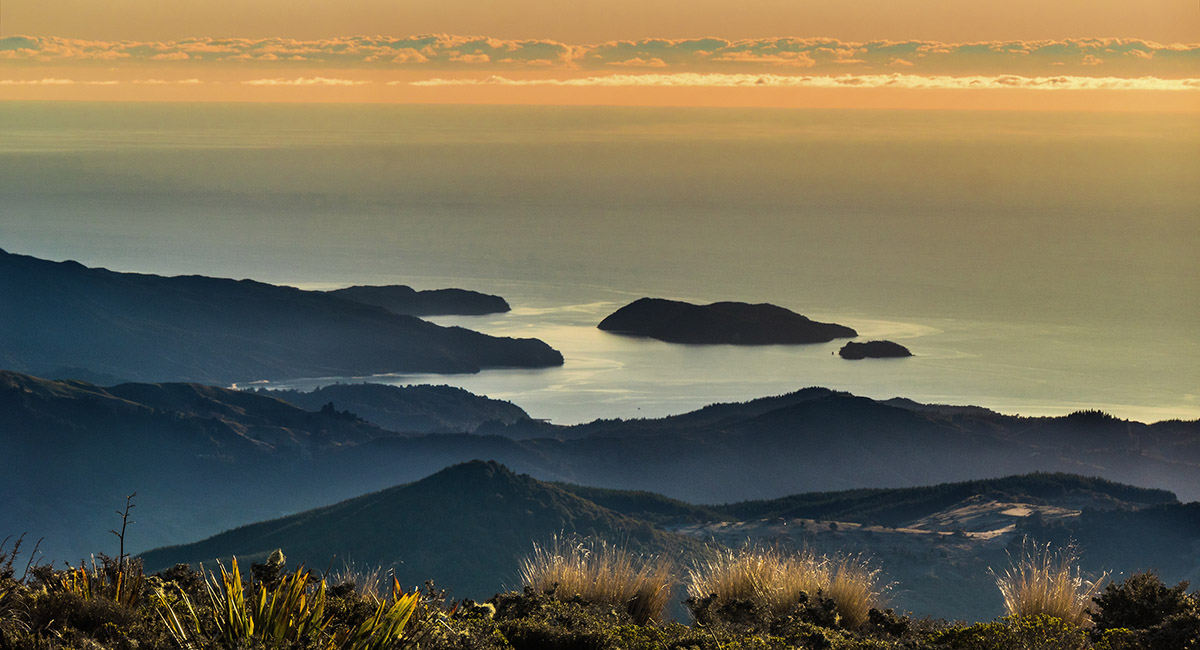
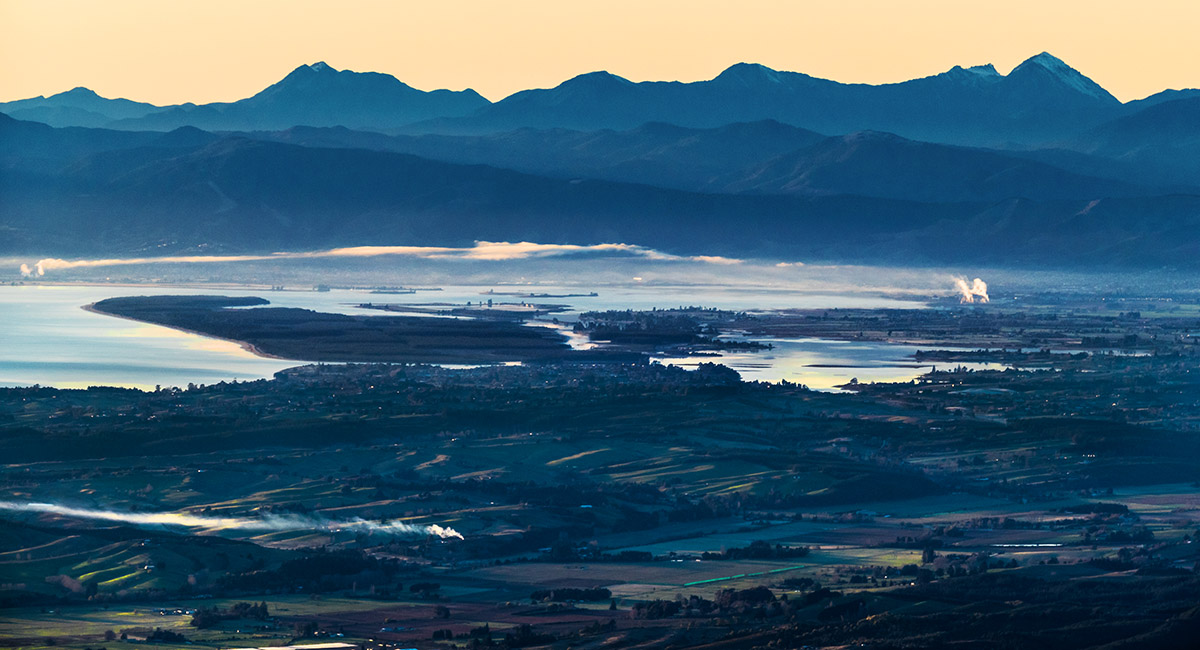
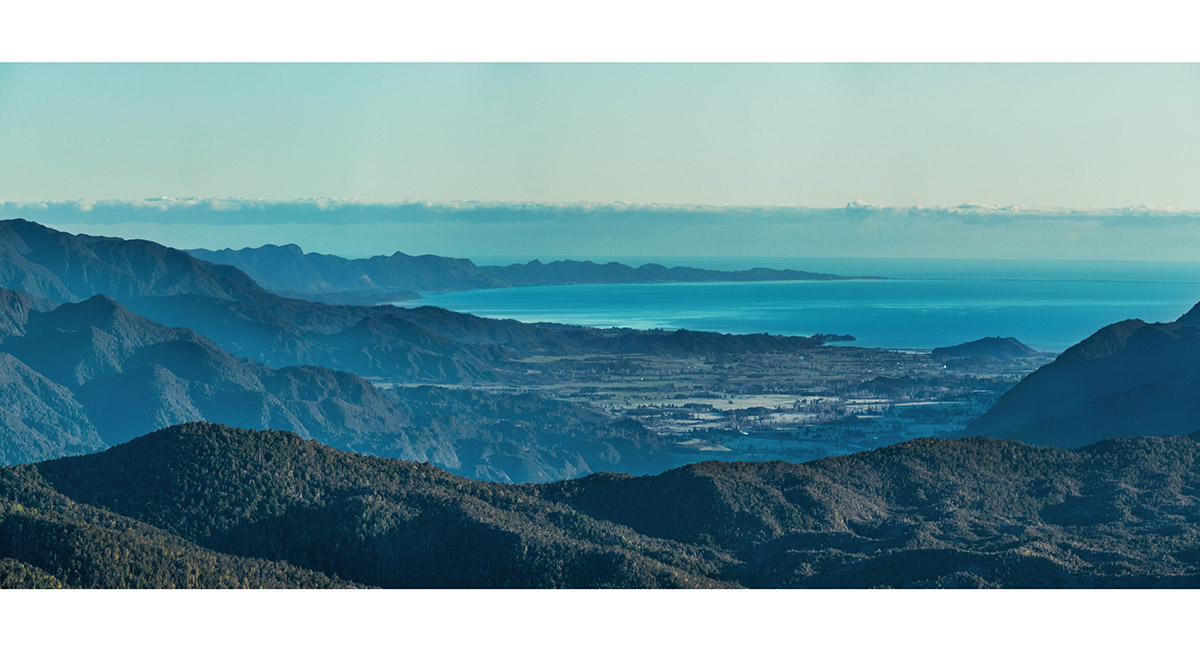
A dawn view from Mt Campbell to the Abel Tasman coastline

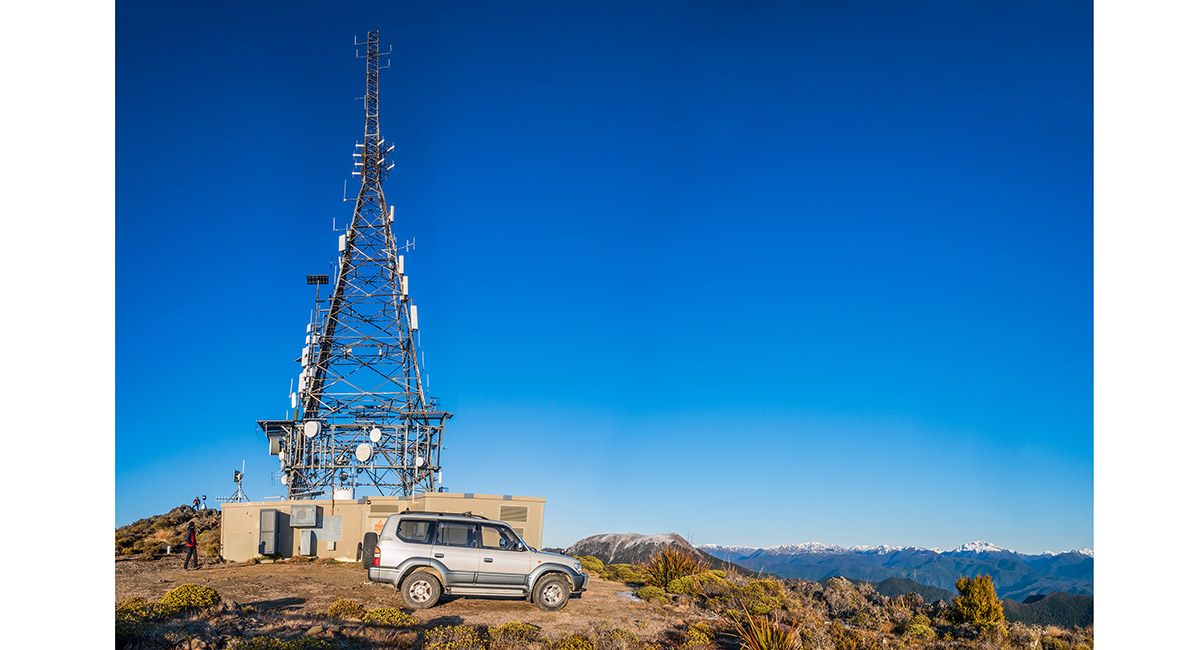
The Mt Campbell transmission tower

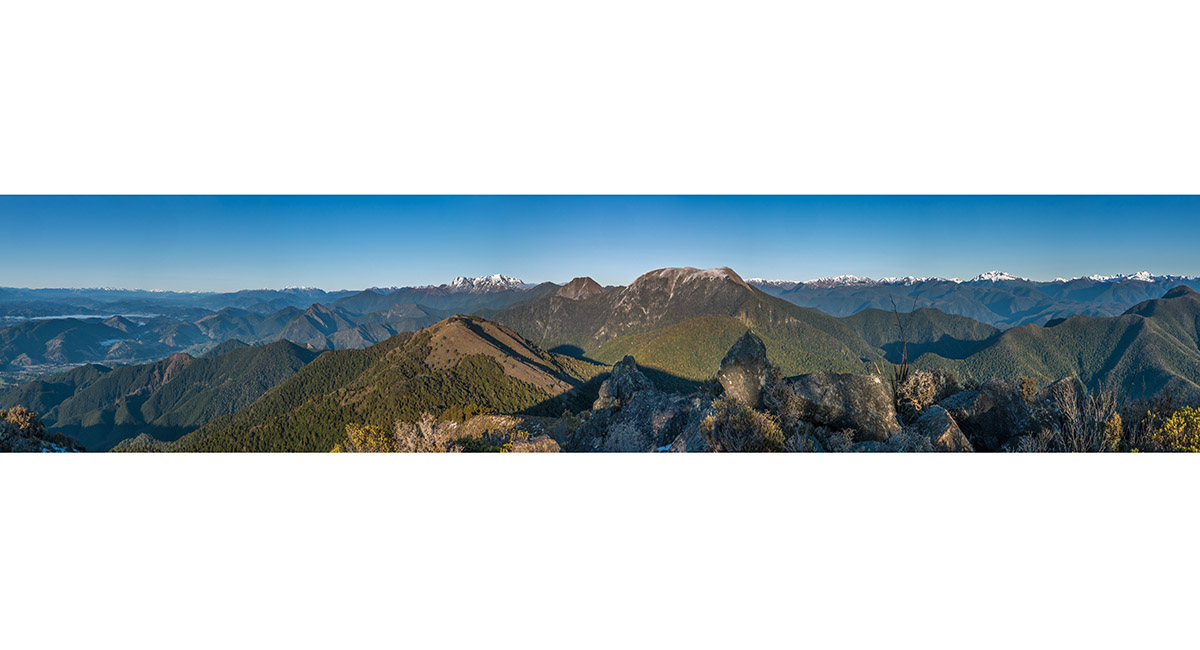
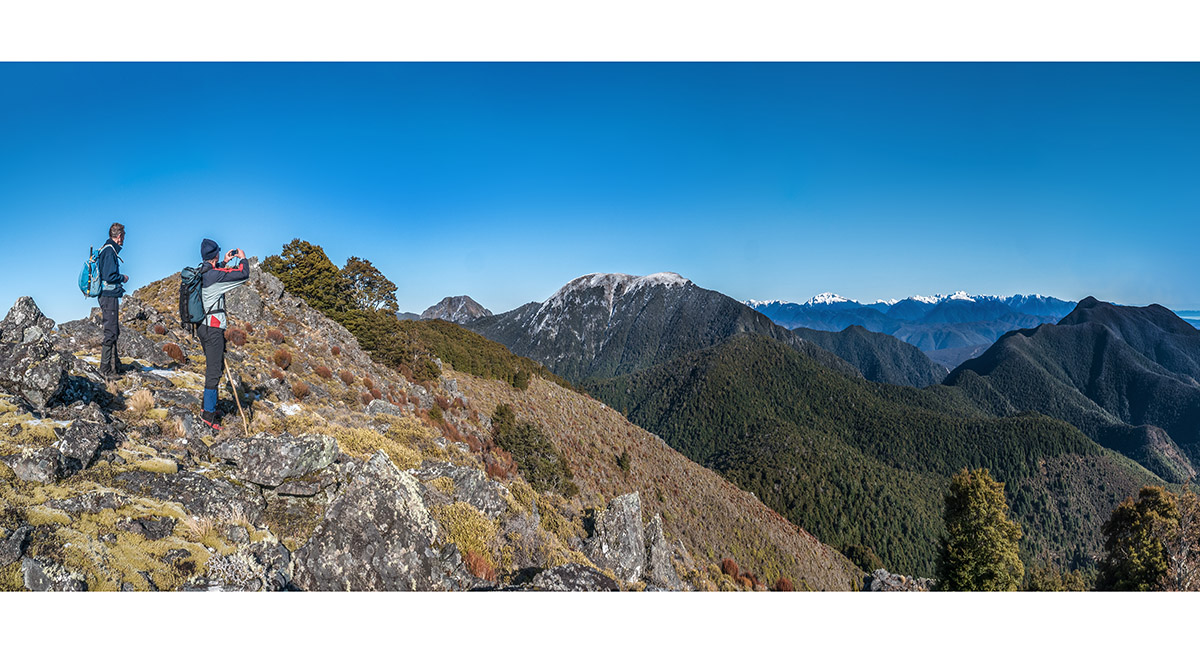
Mt Campbell Summit view with Hoary Head (1,473m) centre. Looking left are Mt Crusader (1,428m), Lodestone (1,462m) and Mt Arthur (1,795m). Looking right are the Peel, Lockett, Snowdon, Devil and Anatoki Ranges

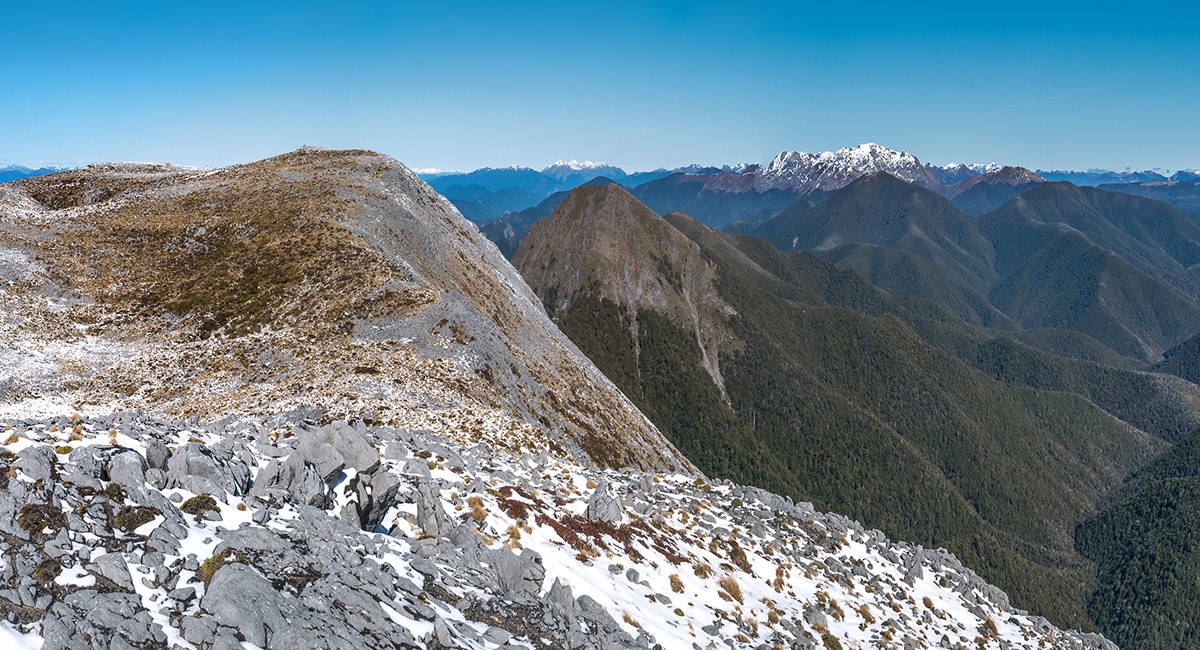
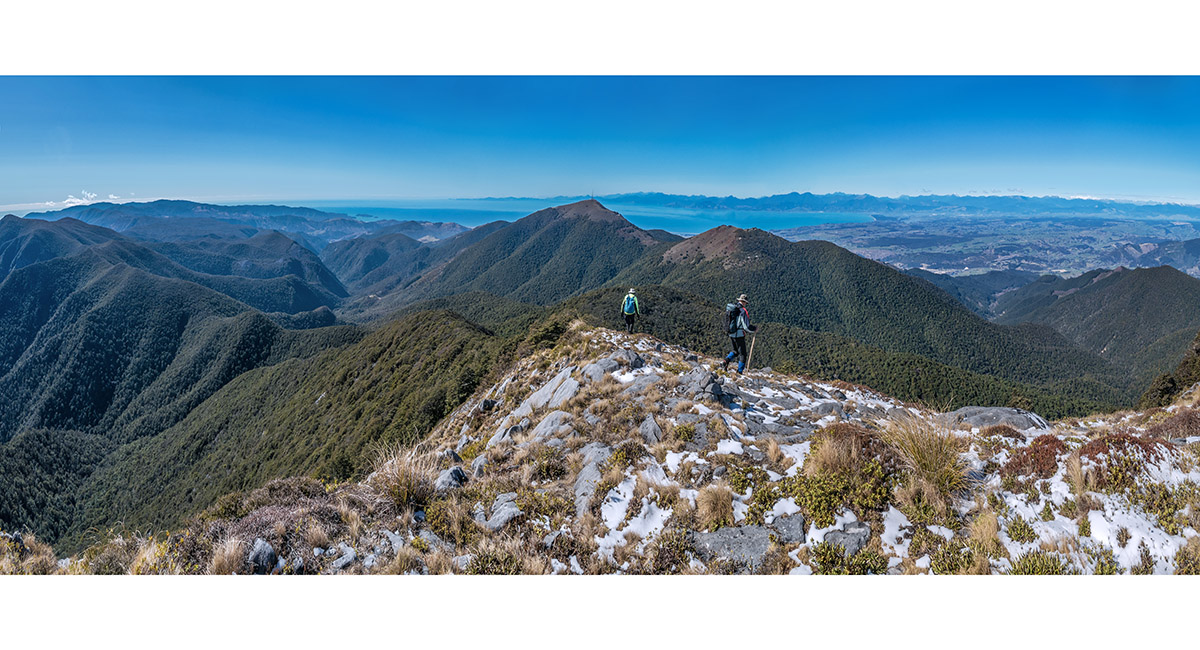
The route over Point 1261 (left foreground), back to Hoary Head (right). Beyond that, stretching left, are Mt Crusader, Lodestone and Mt Arthur


A view north west to the Dragon's Teeth (right) and Mt Snowdon (1,859m, left)

A closer look at part of the Anatoki Range

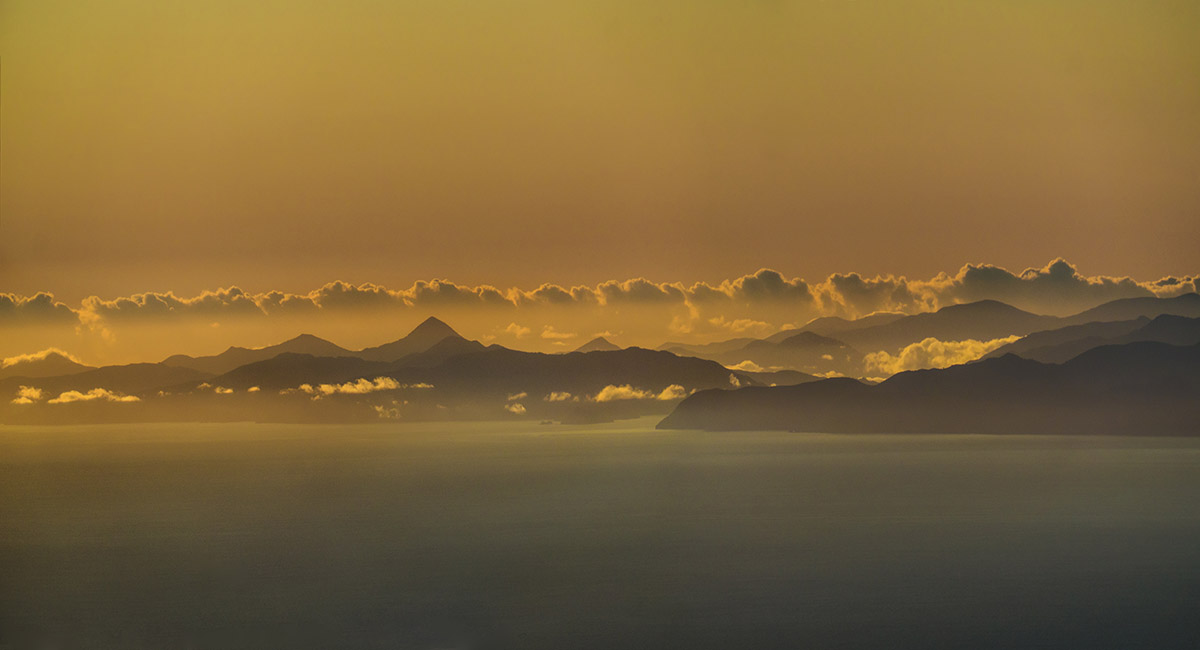
A view from Mt Campbell to Golden Bay


Heading towards Point 1261

On top of Point 1261, with Hoary Head centre

Scrambling up part of the steeper section of the north east side of Hoary Head, here at about 1,350m

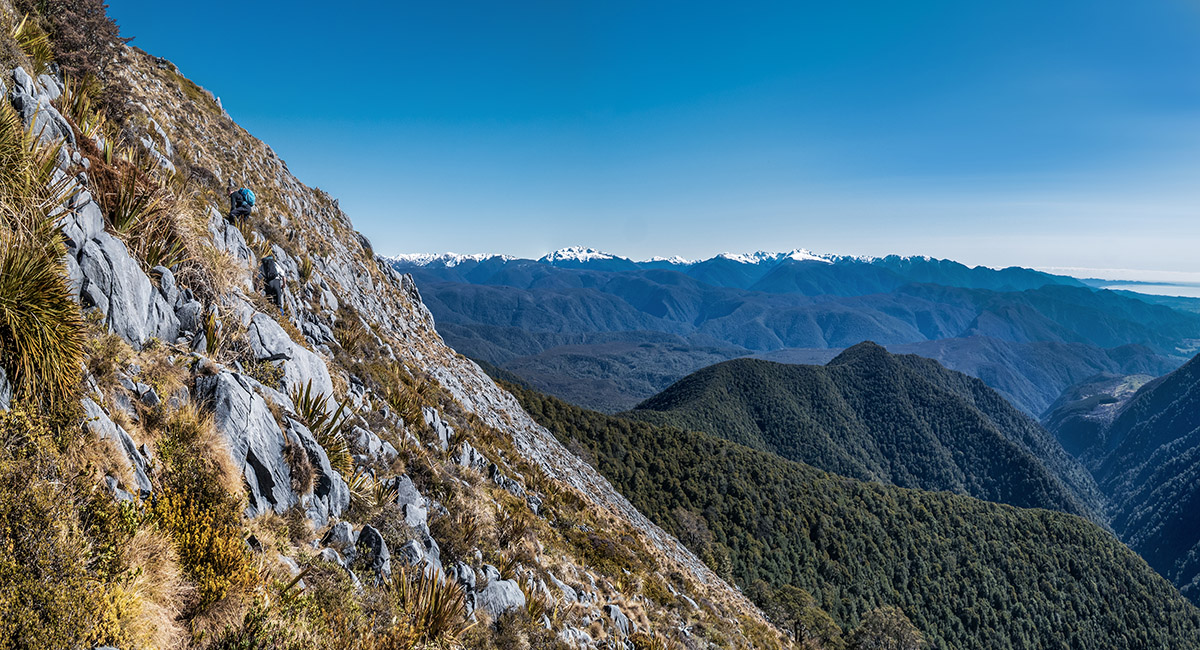
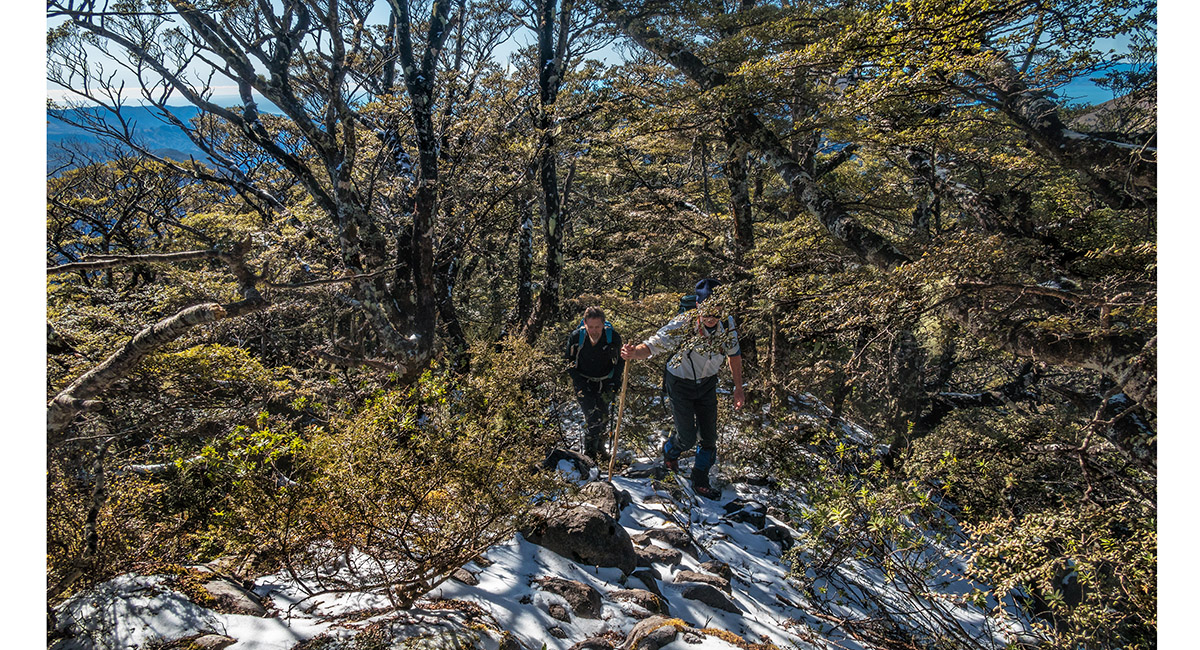
Clearing the bushline on the north east side of Hoary Head, here at about 1,400m


On the broad flat basin of Hoary Head. The highest point (1,473m) is far left

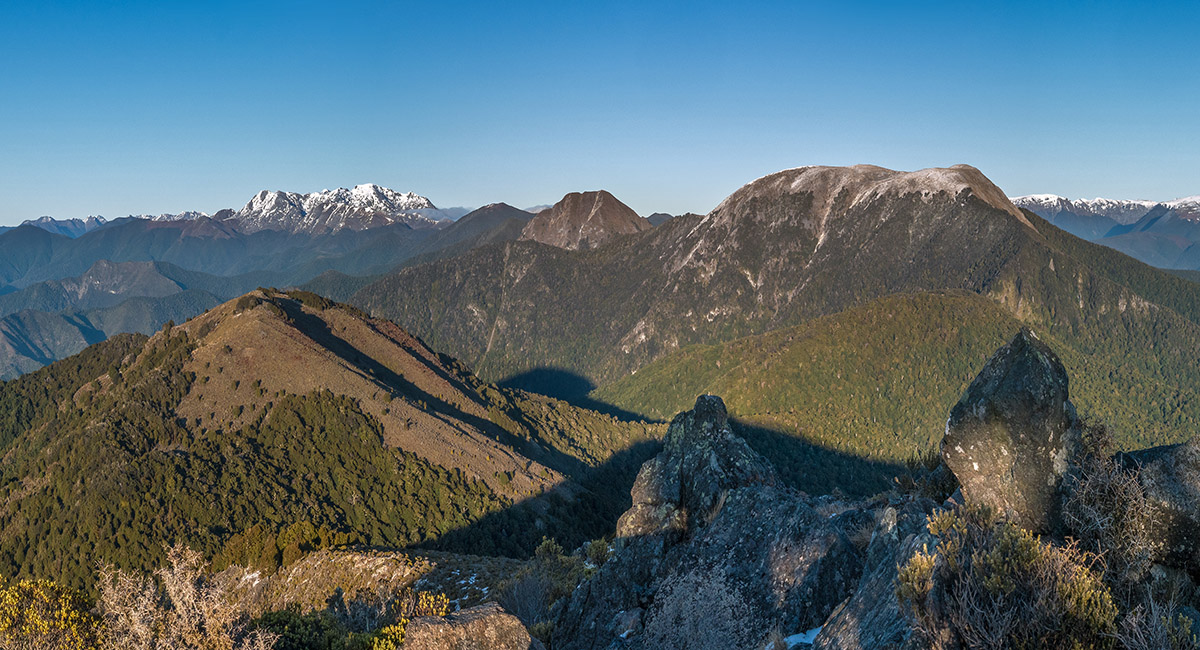
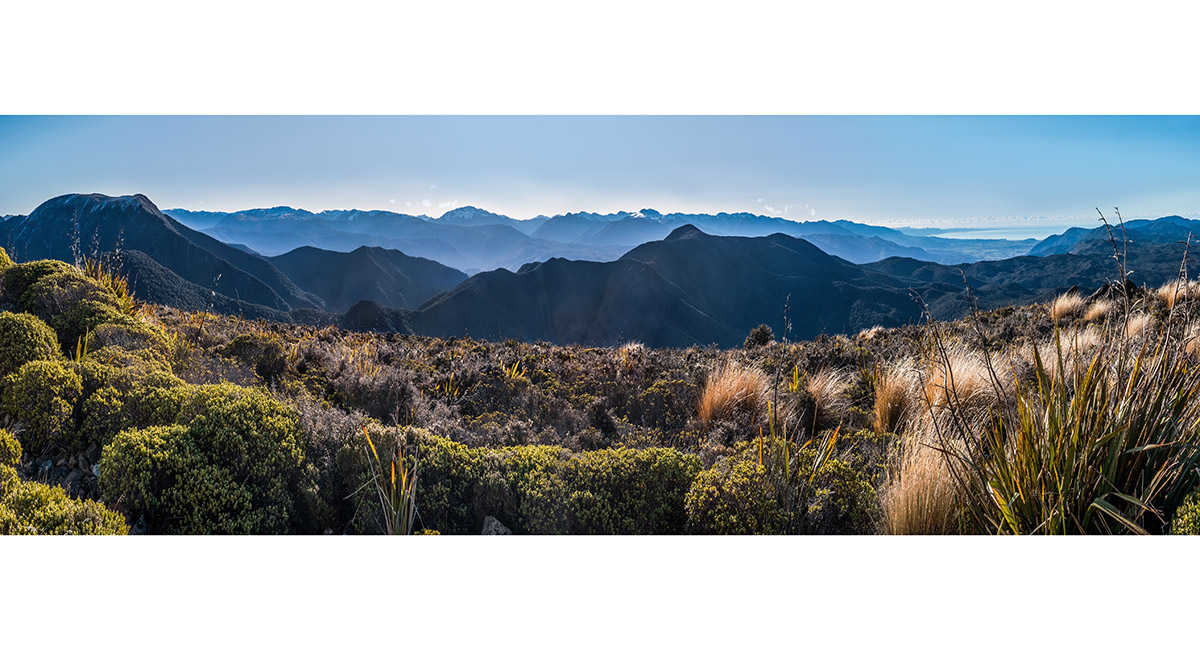
Hoary Head's summit (1,473m) is left, with the steep northern face of Mt Crusader centre and Mt Arthur in the distance


Looking back to Mt Campbell (far right) from Hoary Head

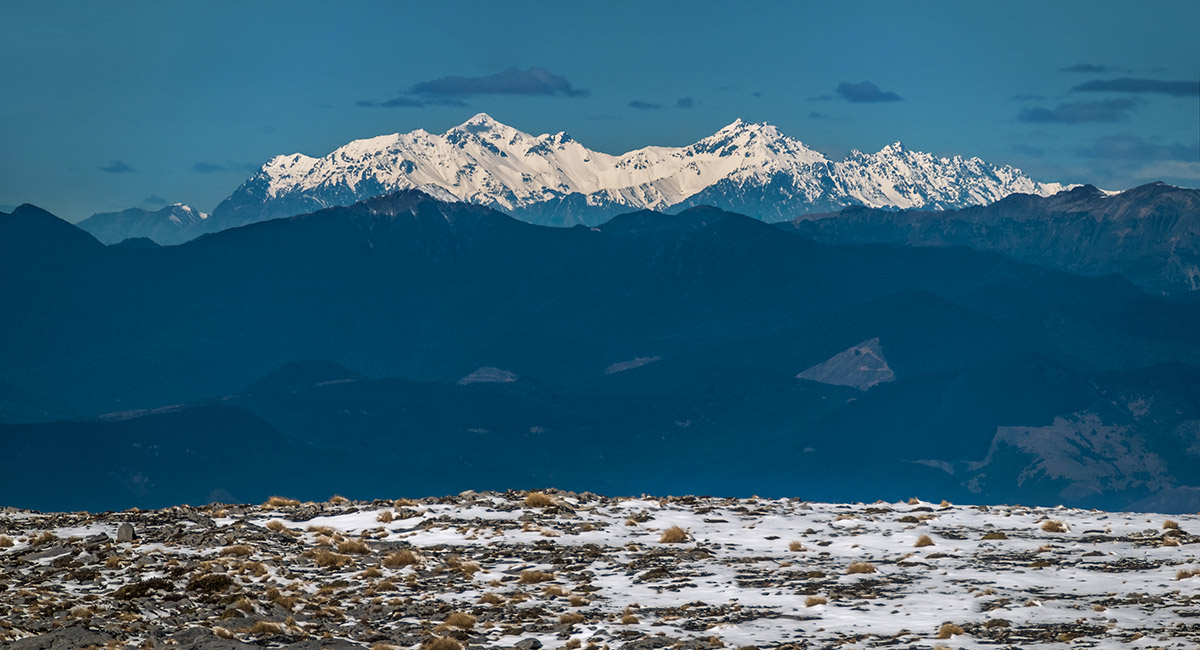
Mt Tapuae-o-Uenuku and Mt Alarm, viewed from Hoary Head

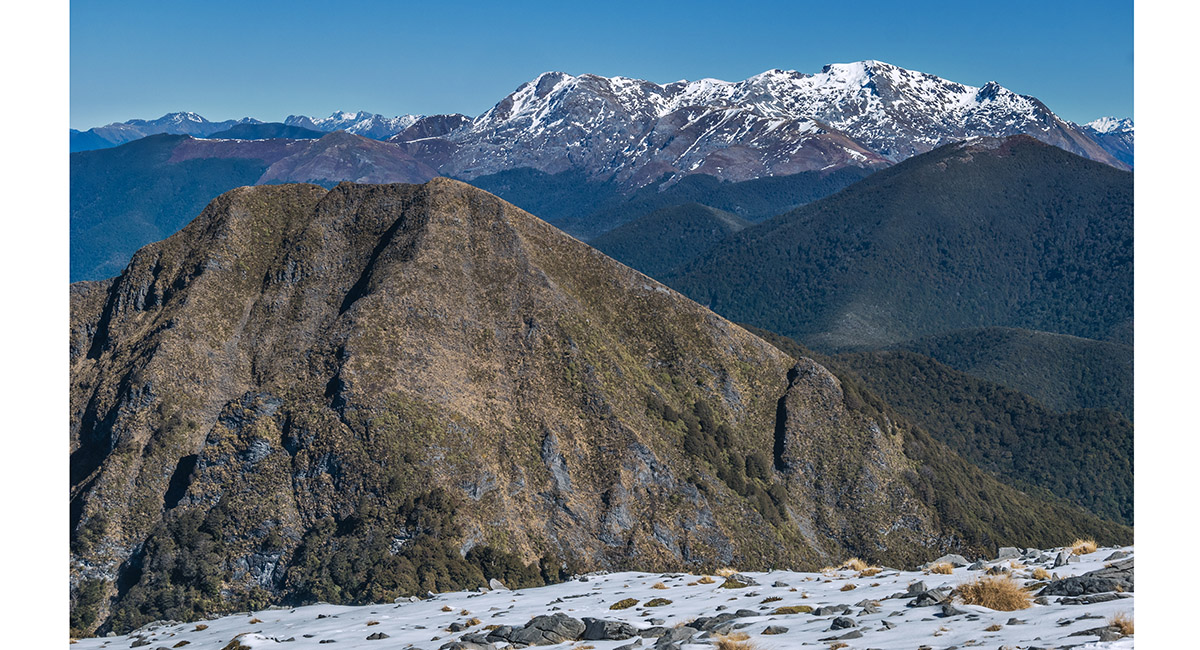
A closer look at the steep northern face of Mt Crusader, then Lodestone (right), with Mt Arthur in the distance. Click for the route between Hoary Head and Crusader

Beginning our descent off Hoary Head, with Mt Campbell dead centre


Back on Mt Campbell at dusk, looking to Tasman Bay

Back on Mt Campbell at dusk,with Hoary Head far left and Golden Bay far right

To order a print or web resolution file of any image you see in this slide show, just right click the image, click “Copy Image URL” and paste in to the “Your message” box of our Contact Us form. Please also note, for each image, if you want a print or web resolution file. We will get back to you as soon as possible to confirm price and payment details.
Open Contact Us in a new window to paste Image URL(s) easily