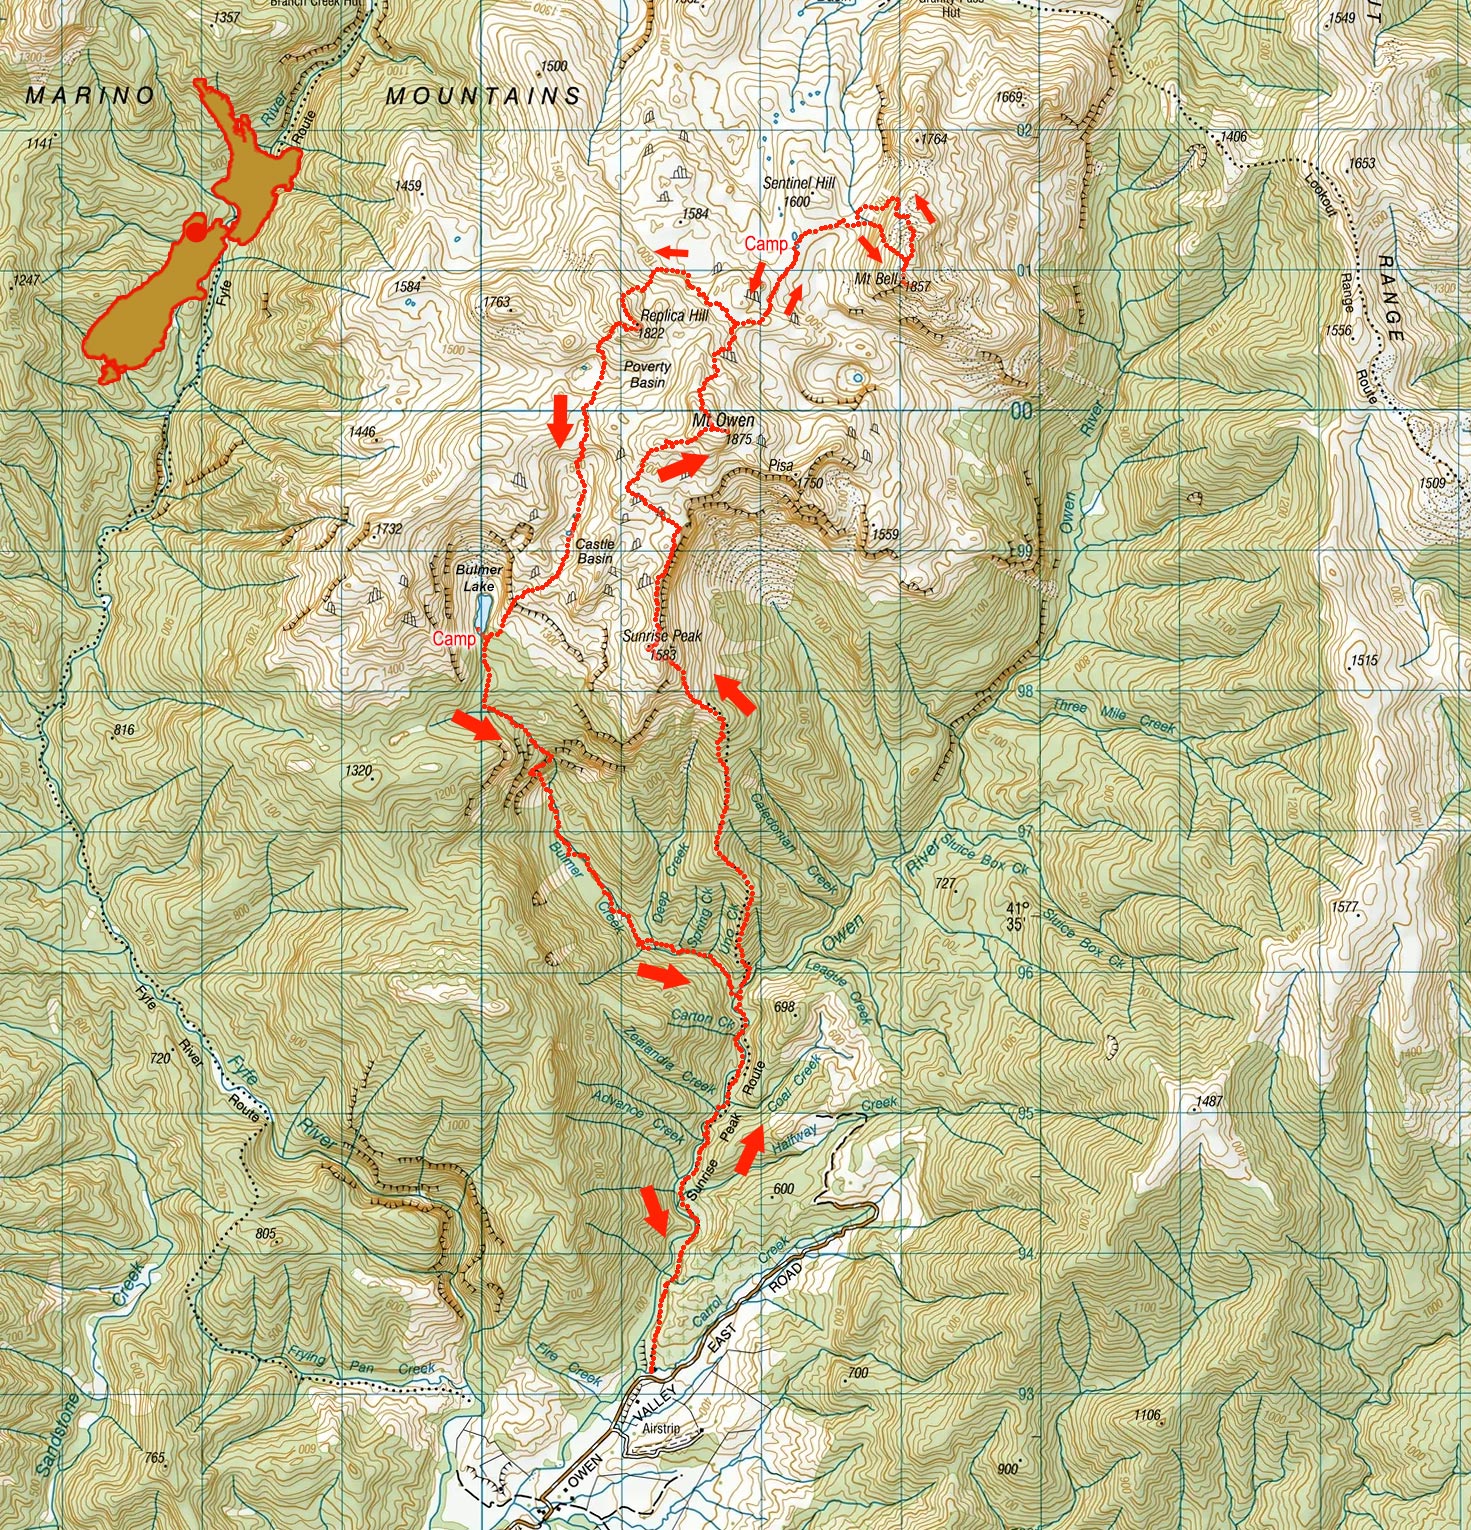
Four summits, Marino Mountains, March 2026
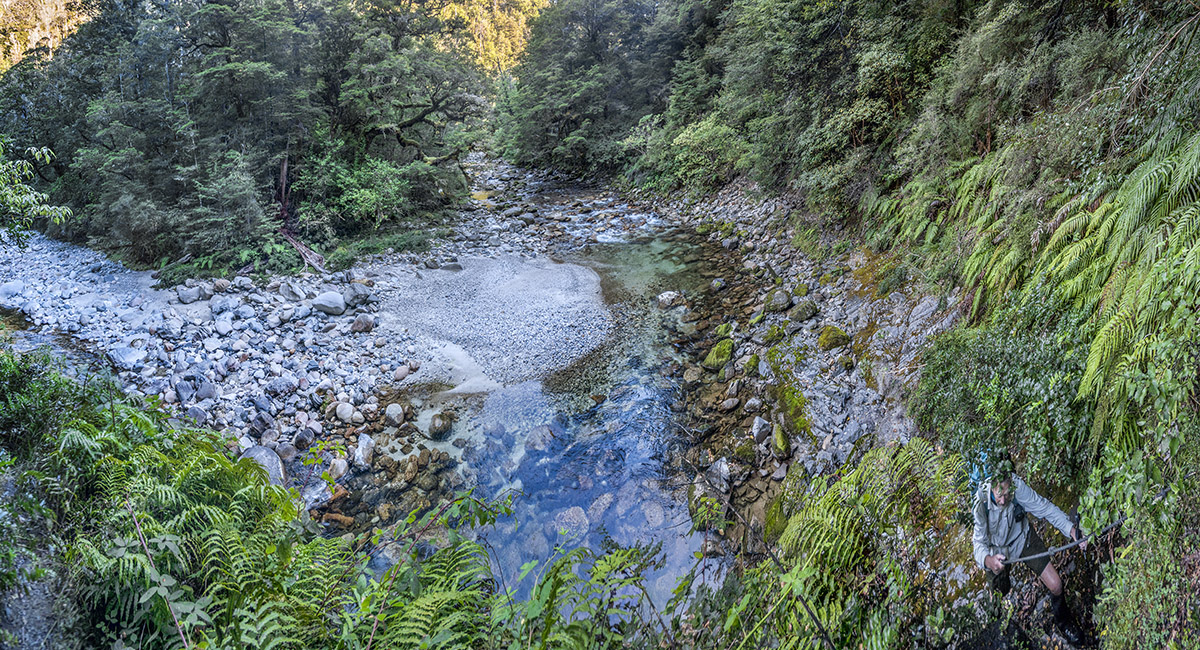
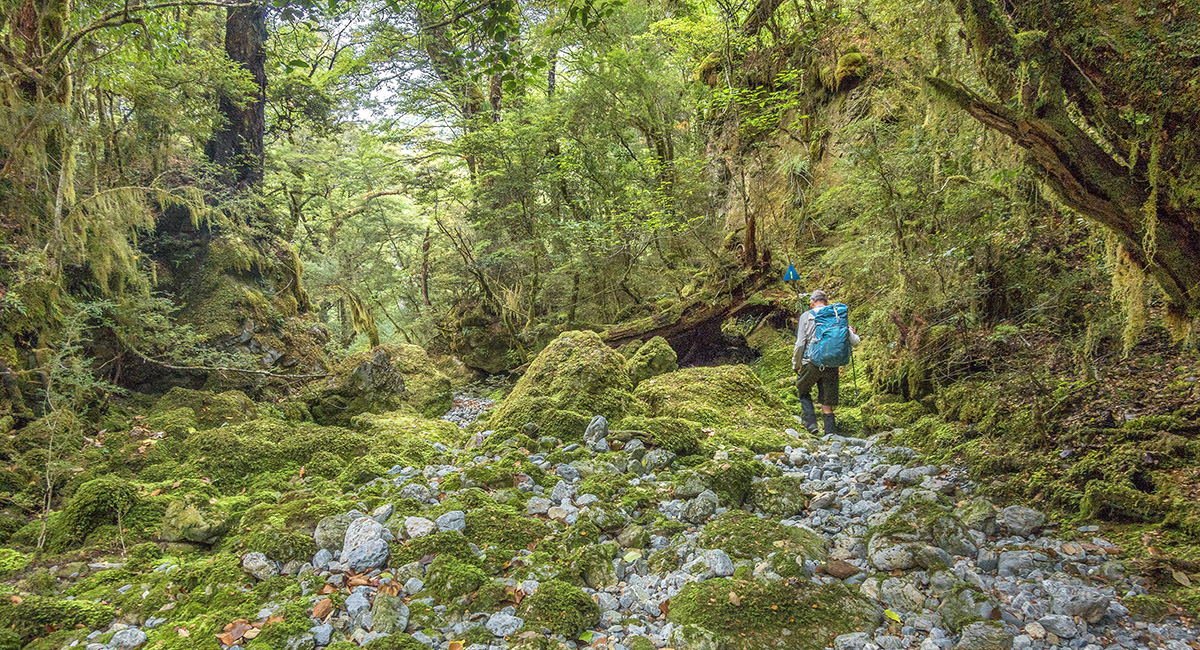
Heading north up Owen River

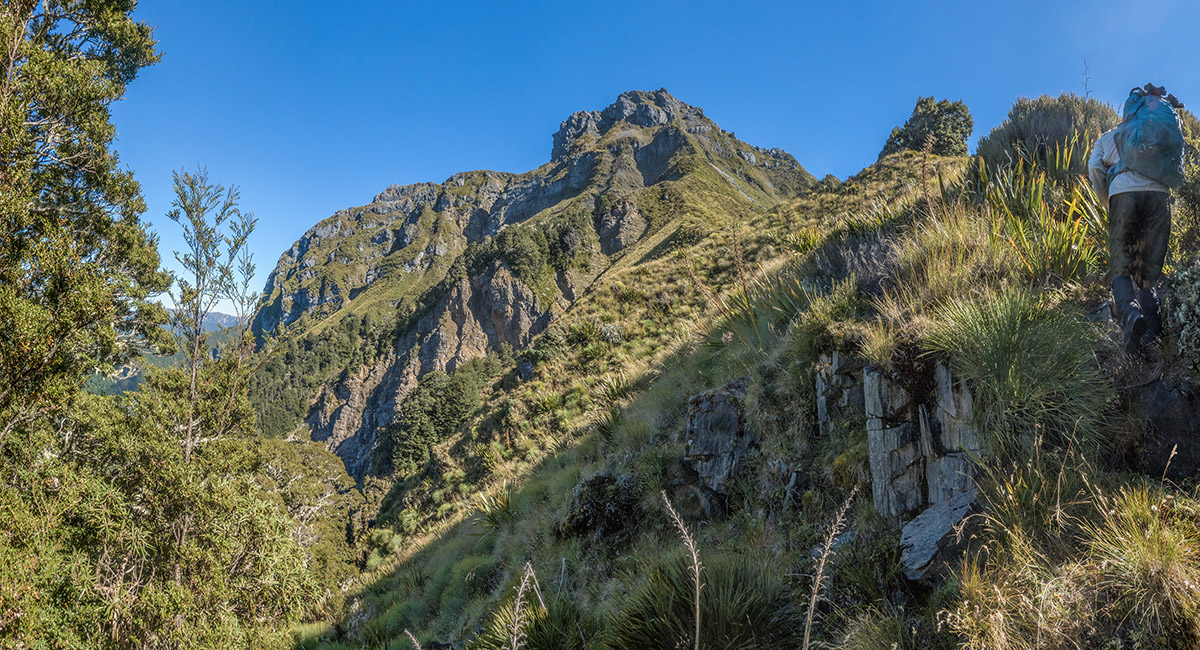
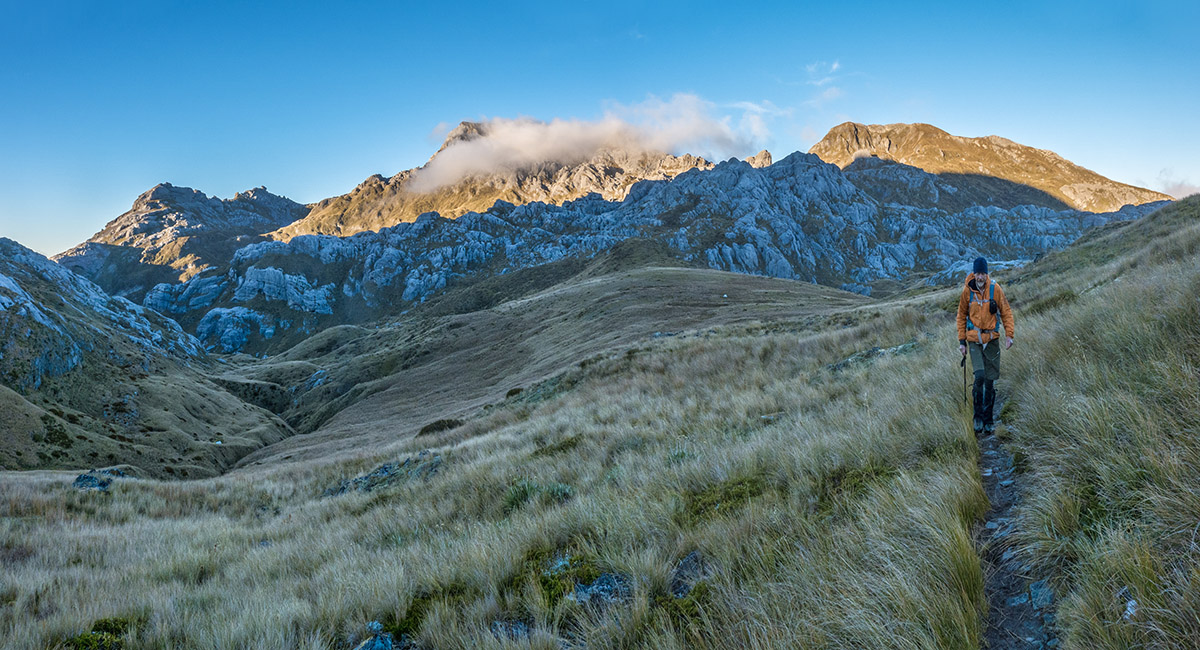
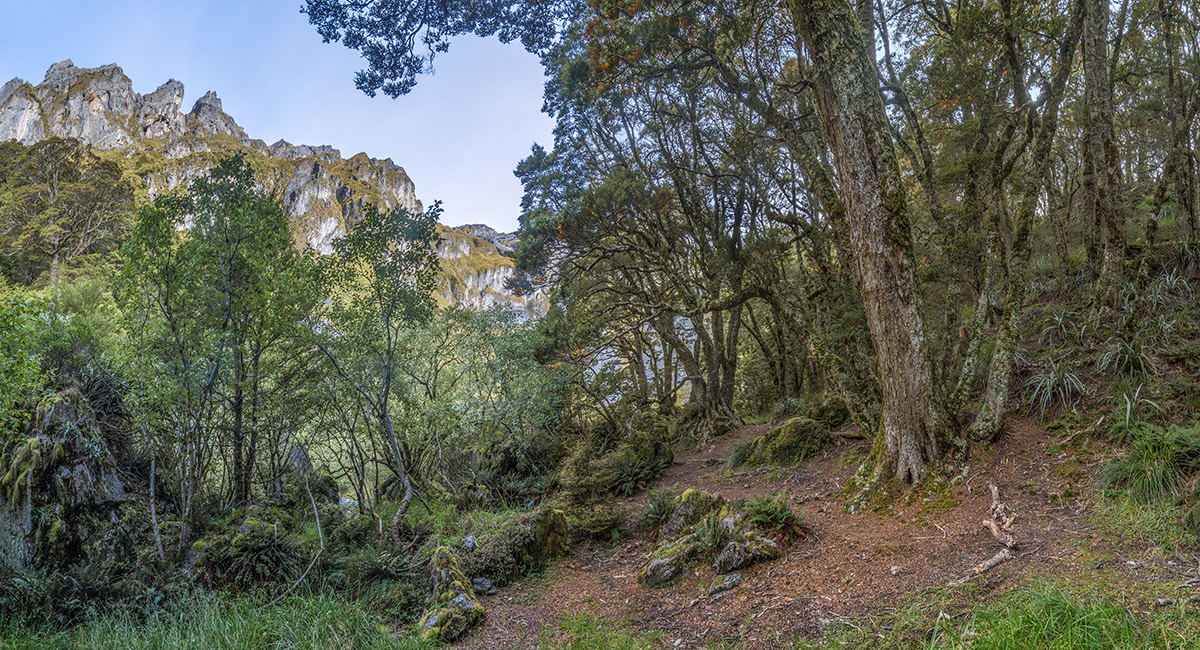
Breaching the treeline, with Sunrise Peak above

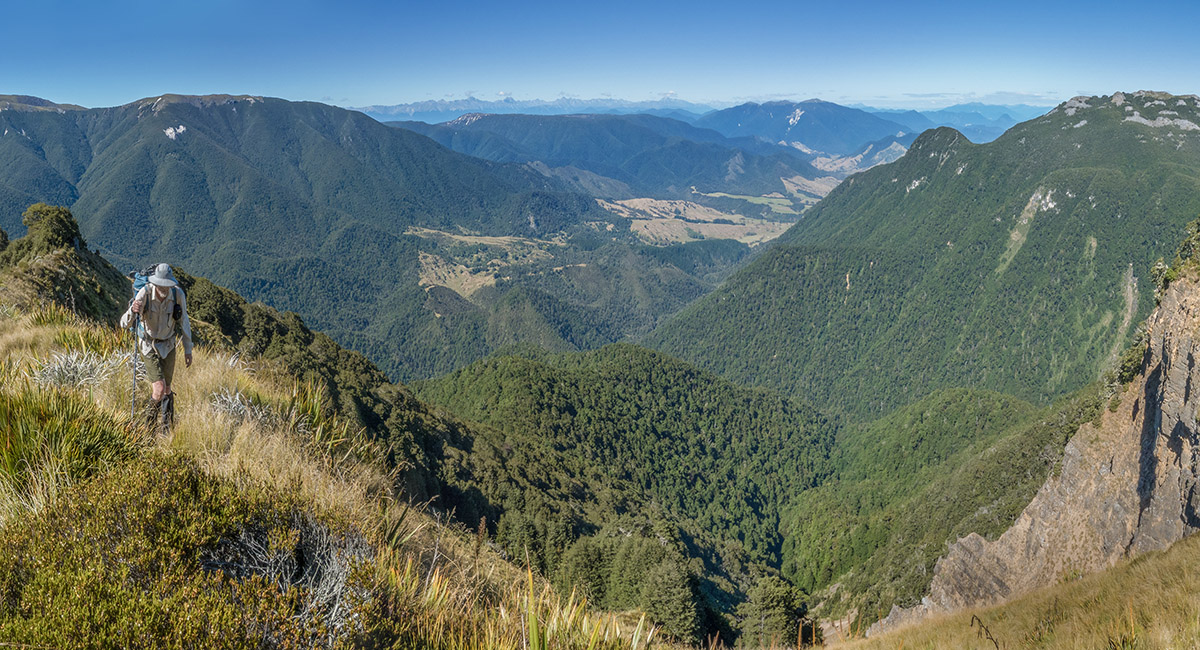
At 1300m, looking south down Owen River

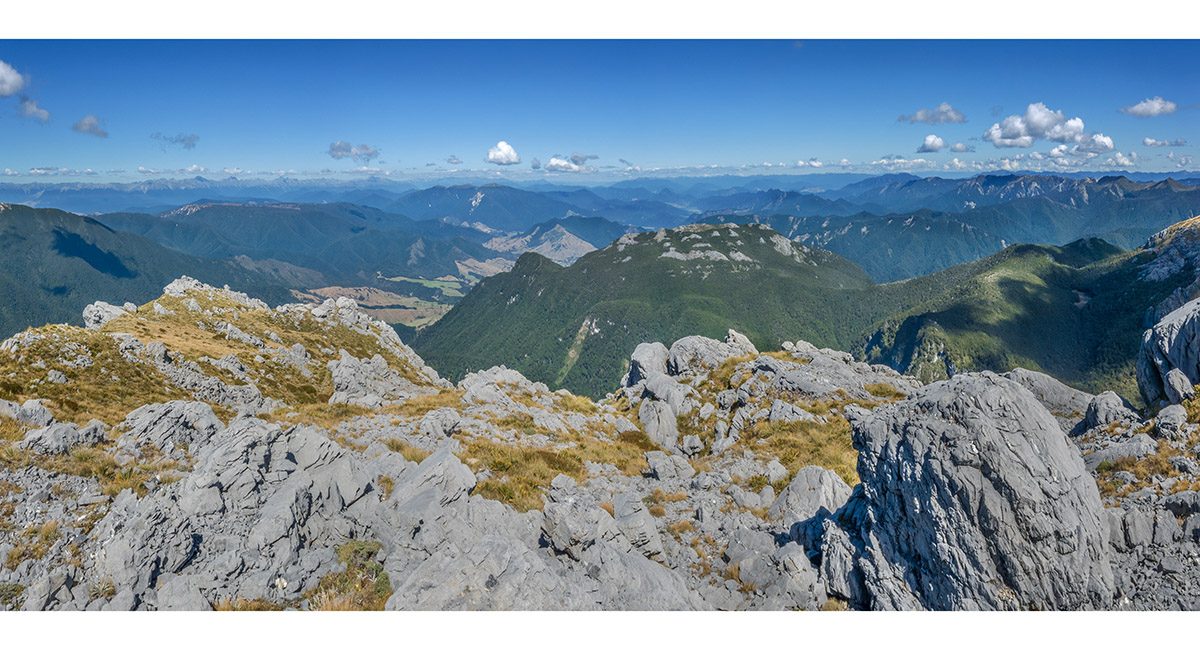
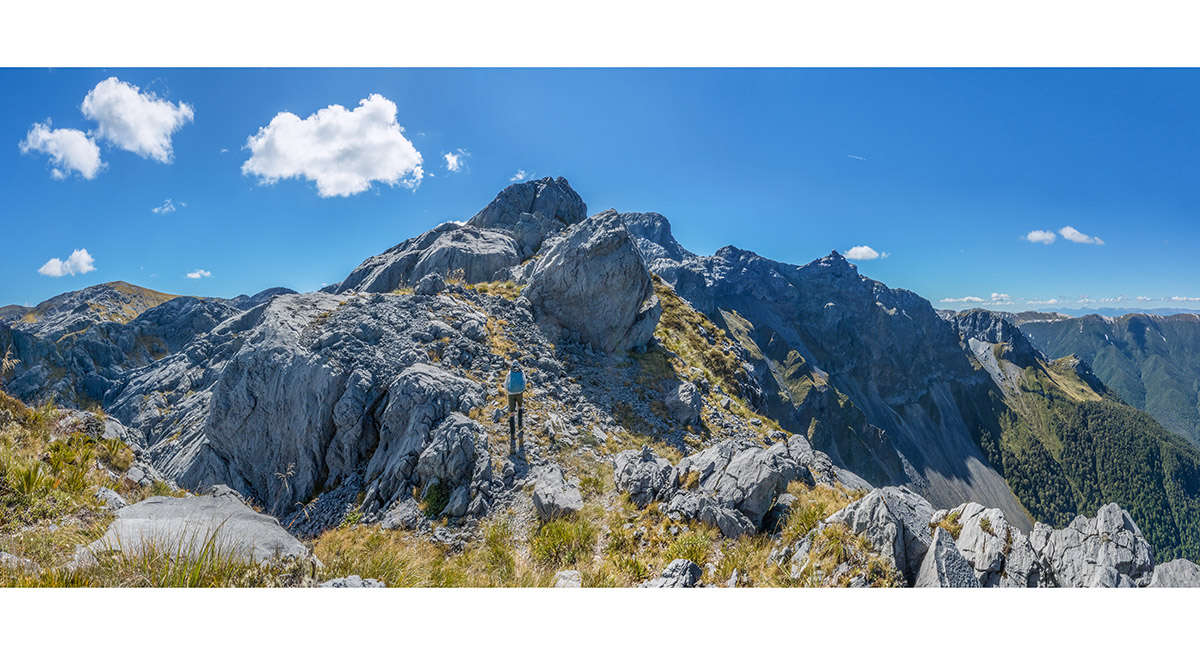
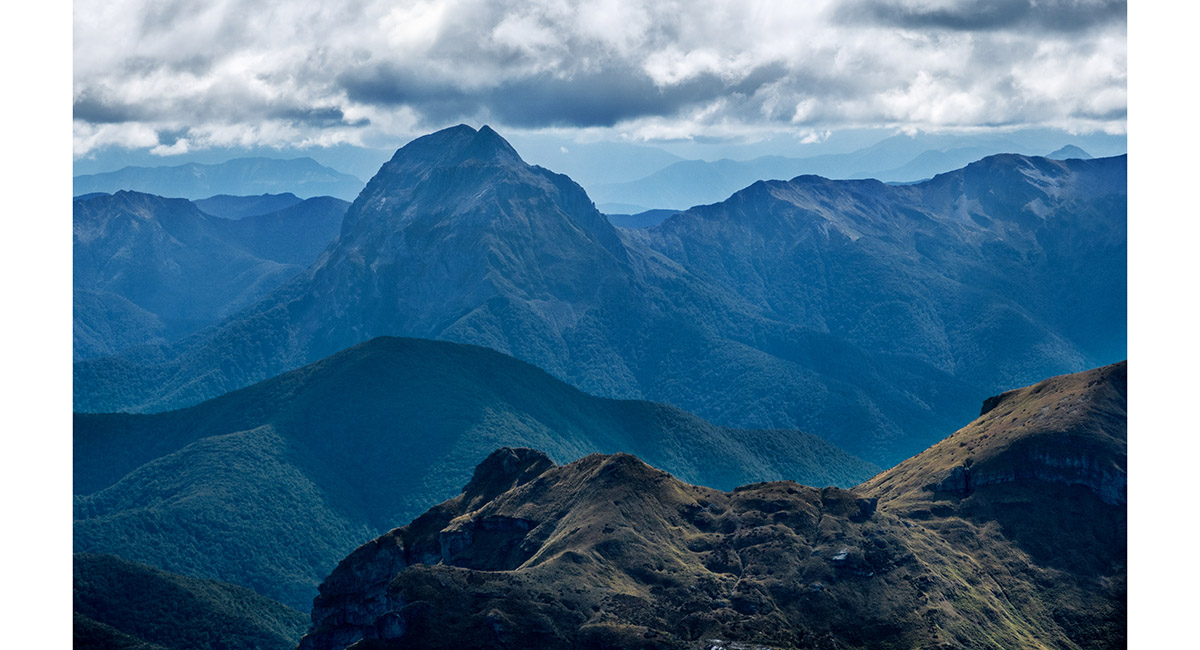
The view south from the summit of Sunrise Peak (1583m)

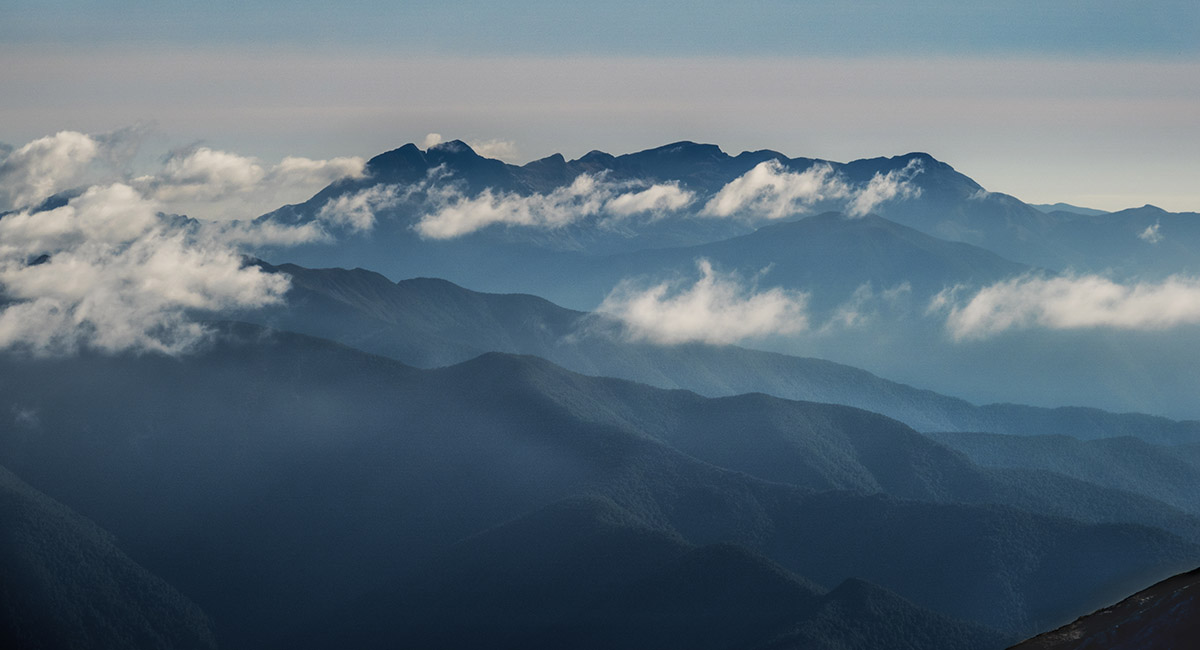
The view north from the summit of Sunrise Peak (1583m) to Mt Owen (1875m, right of centre) and Pisa (1750m, far right)

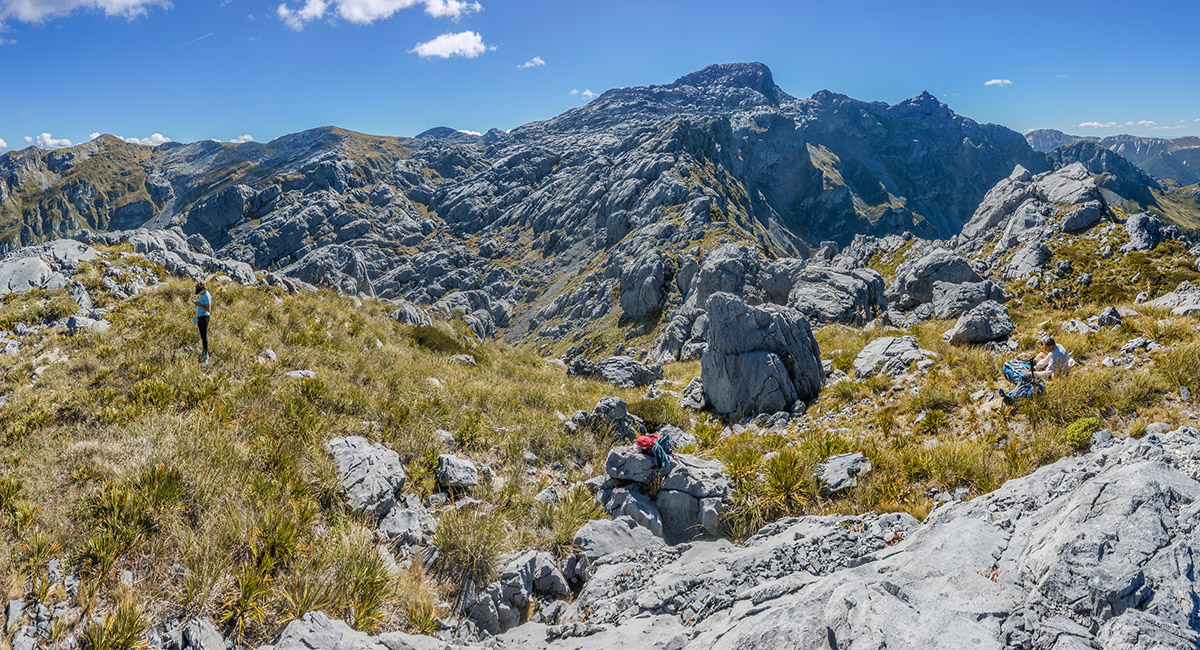
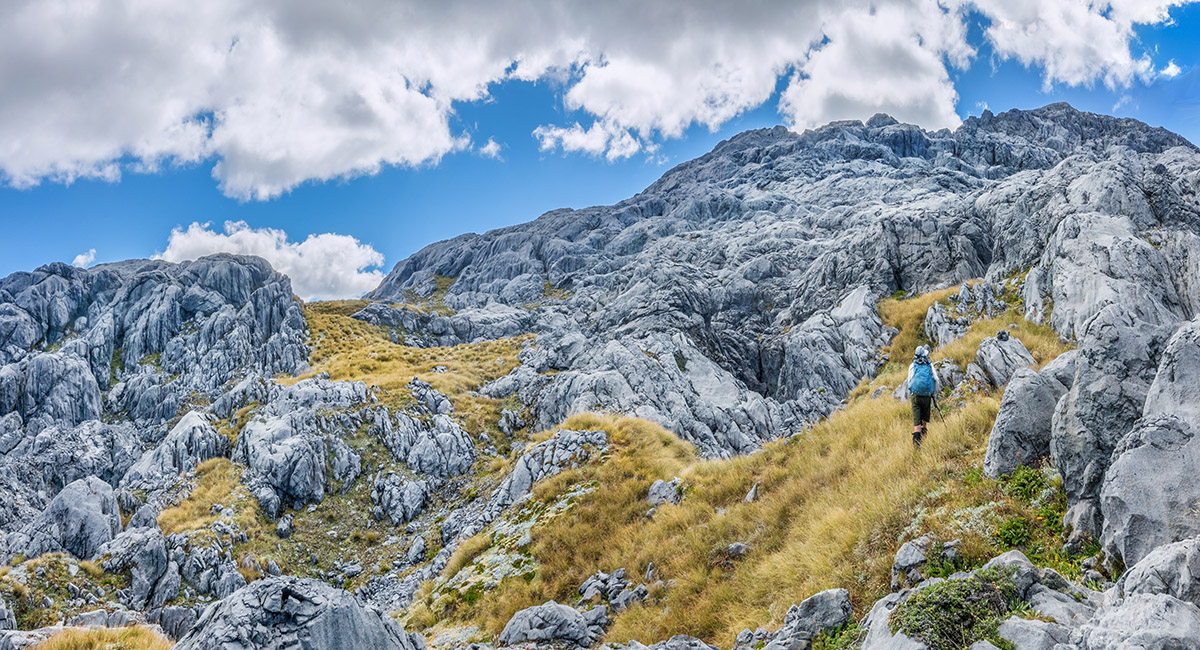
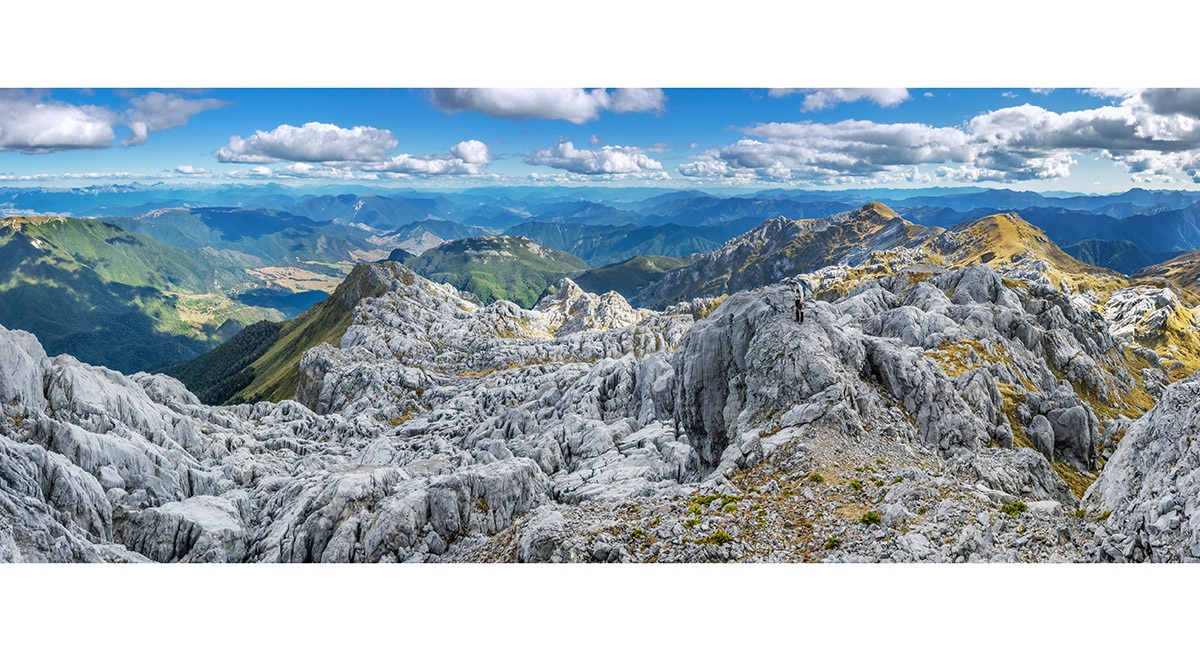
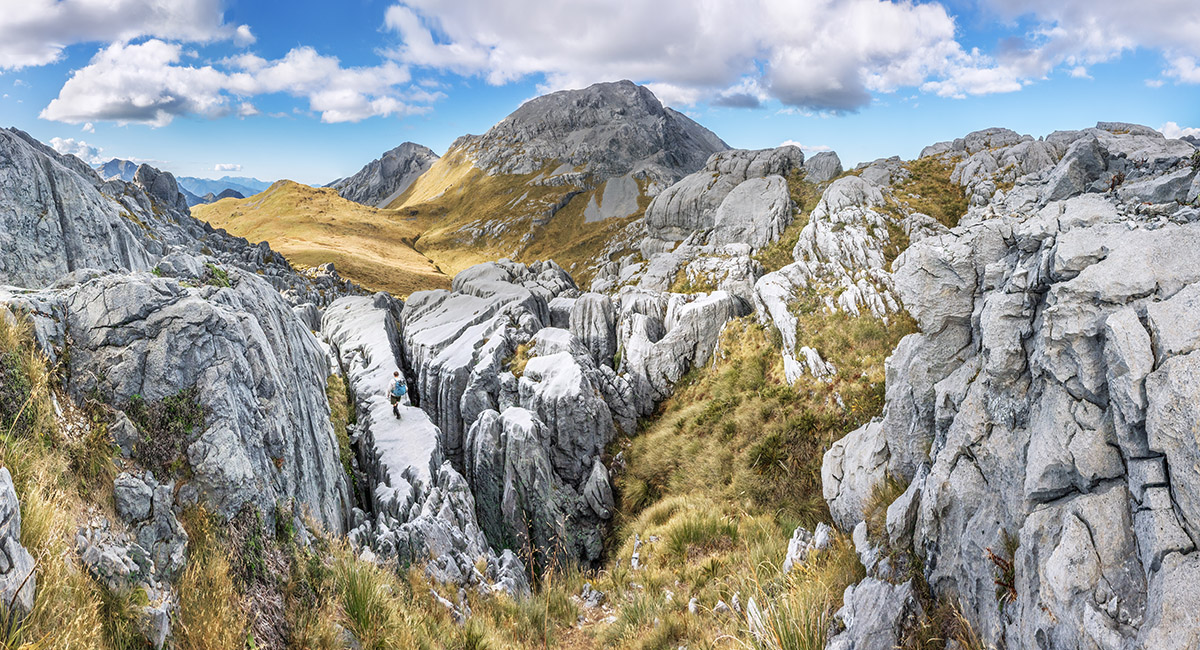
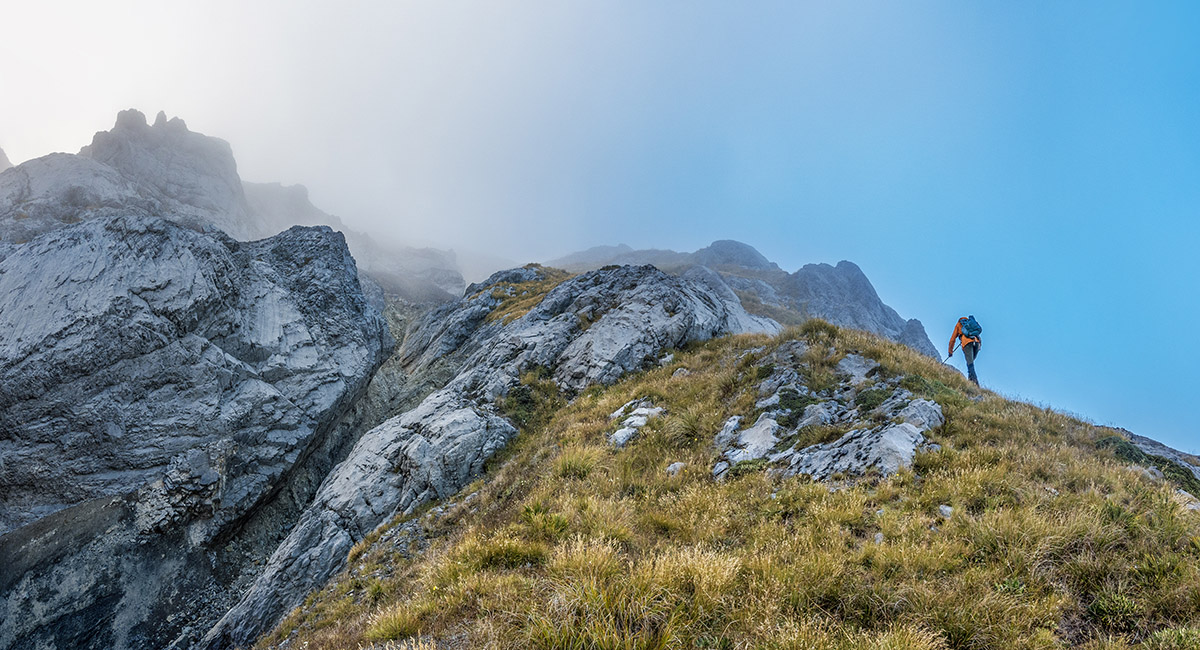
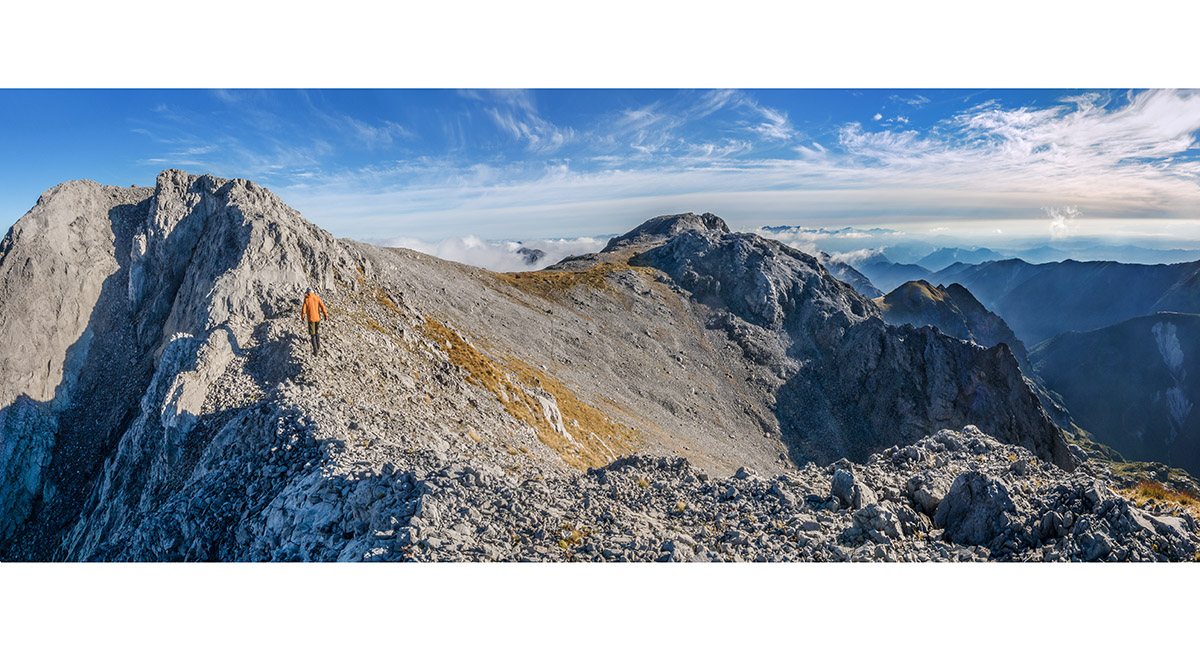
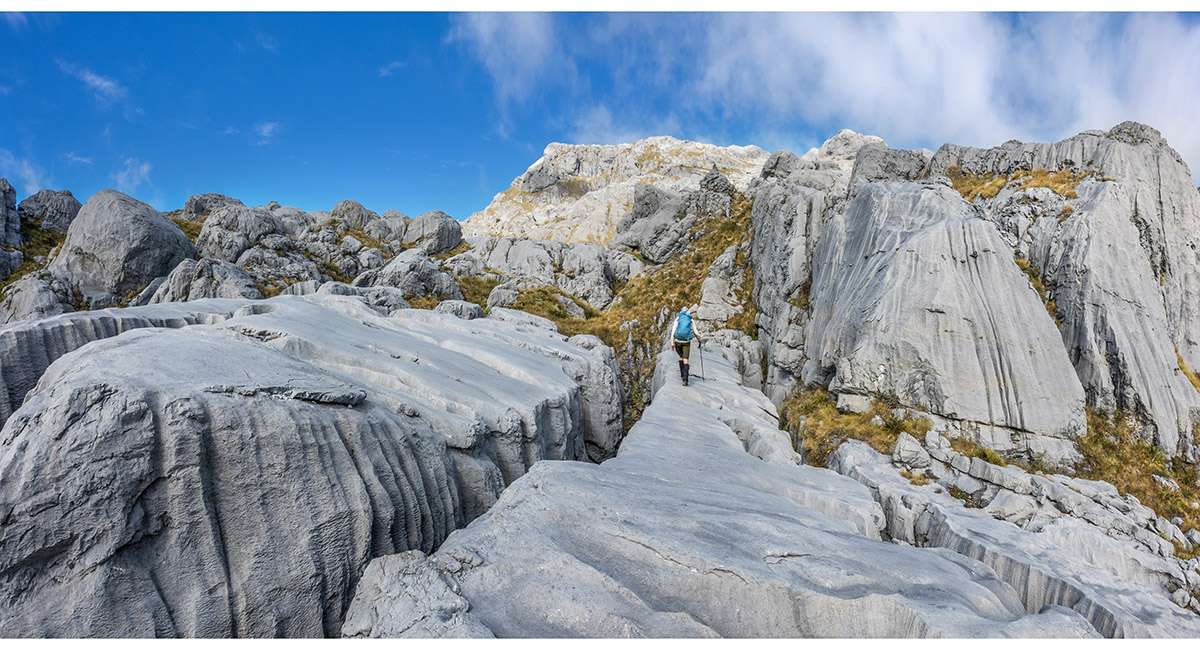
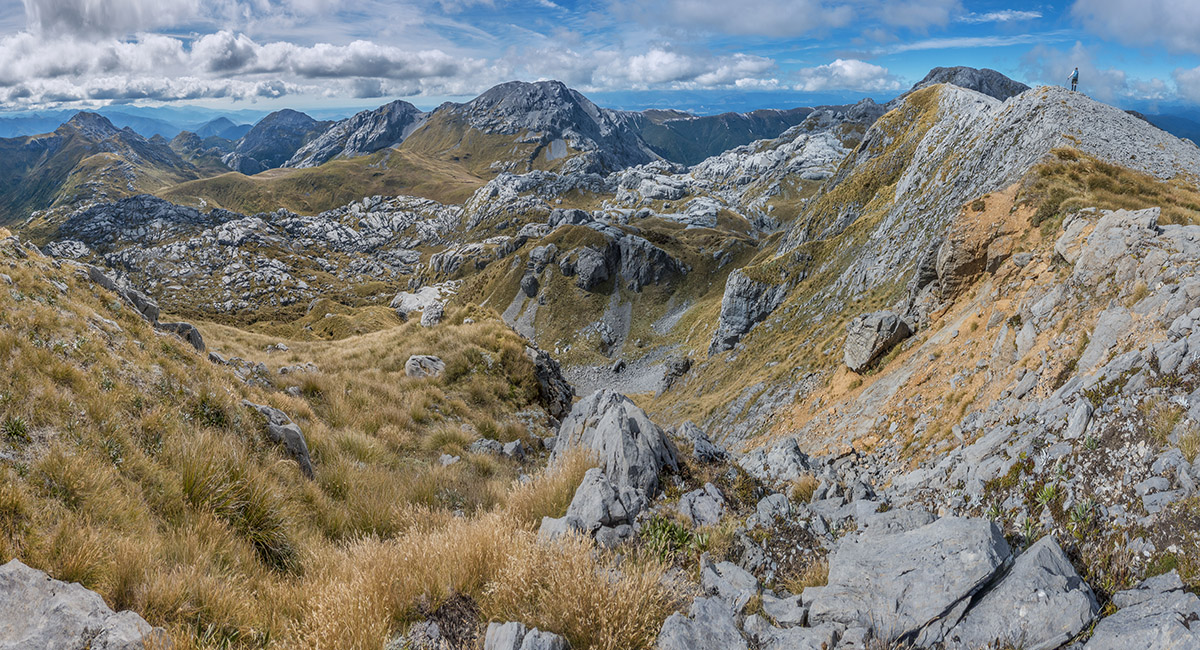
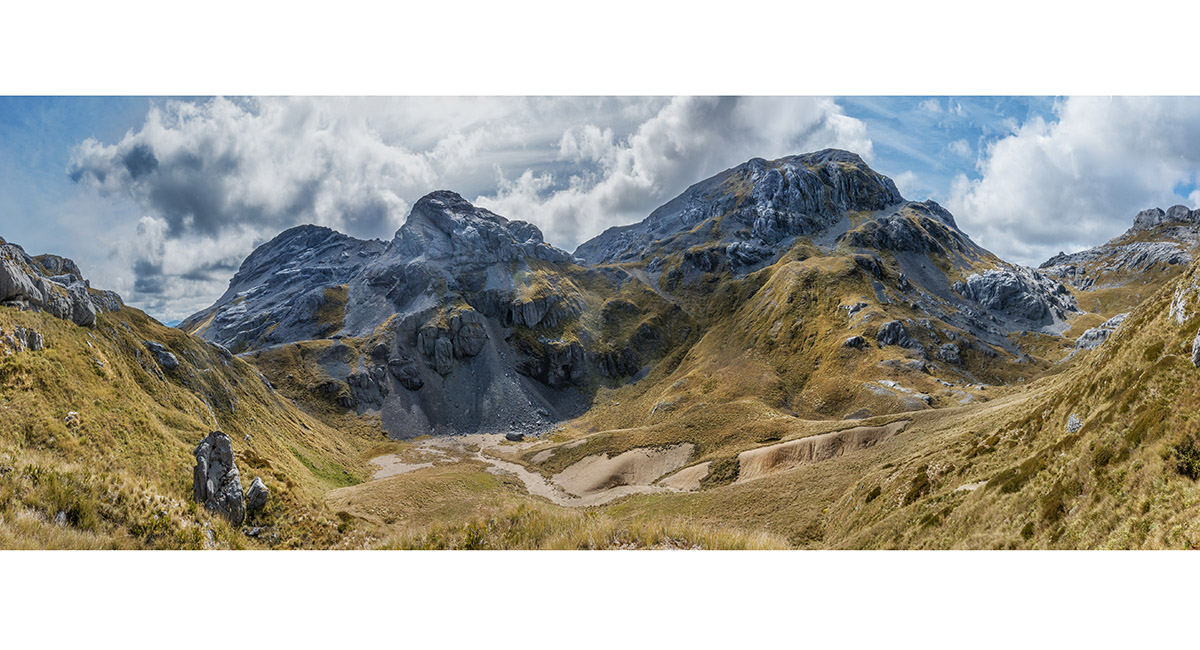
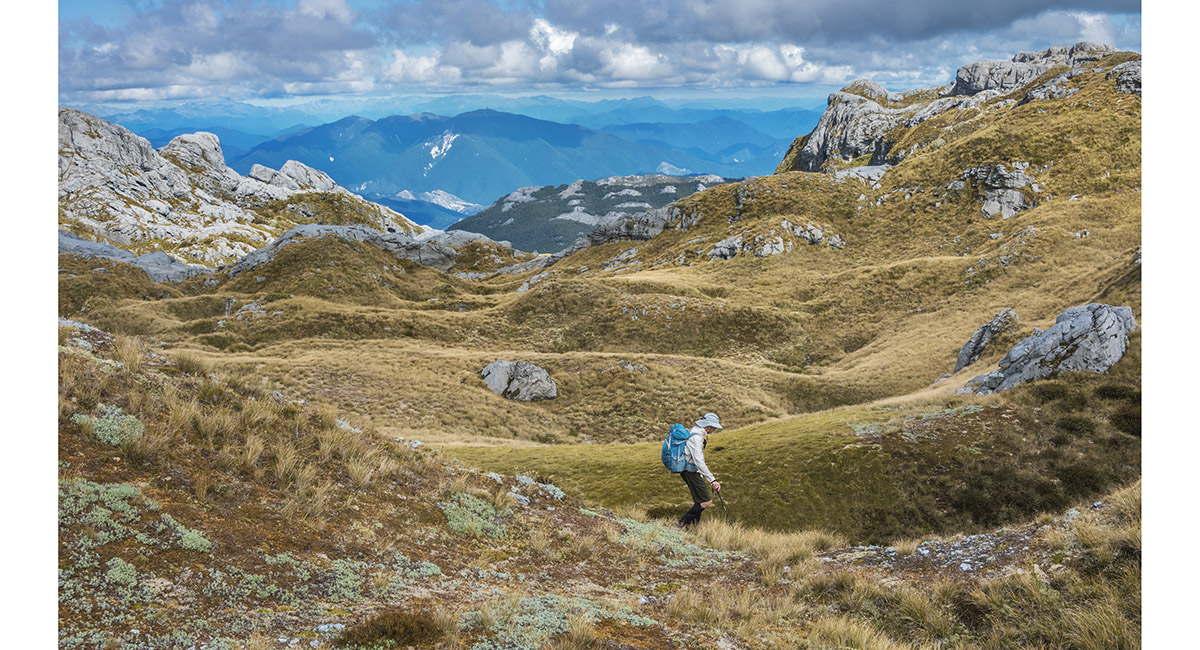
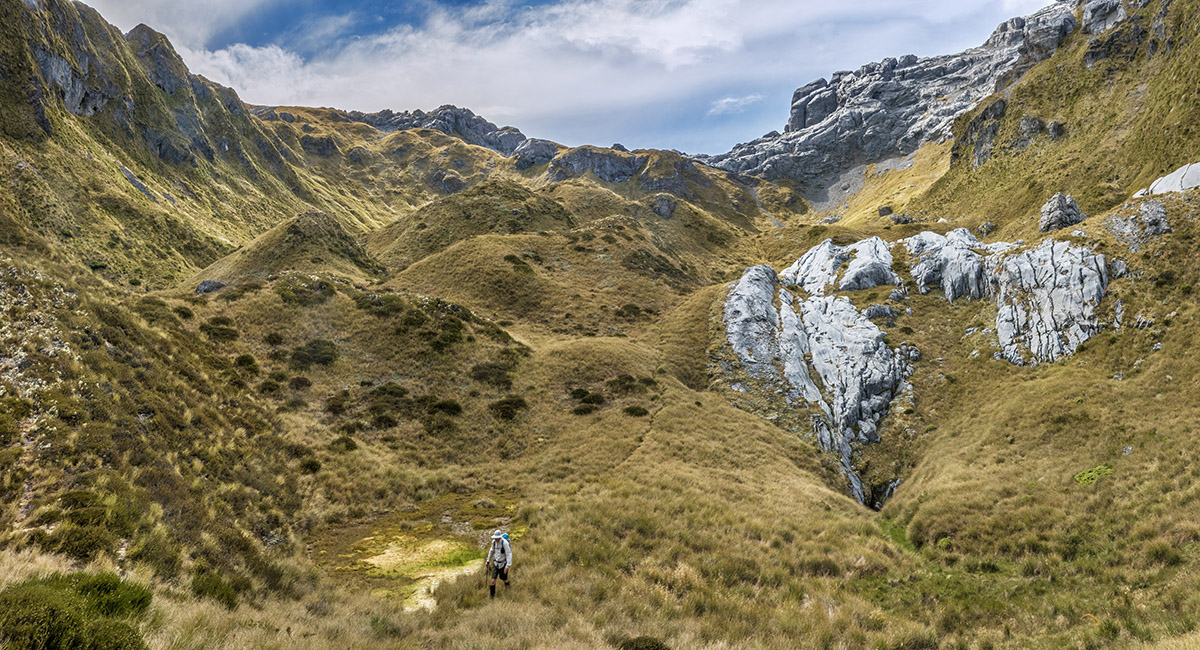
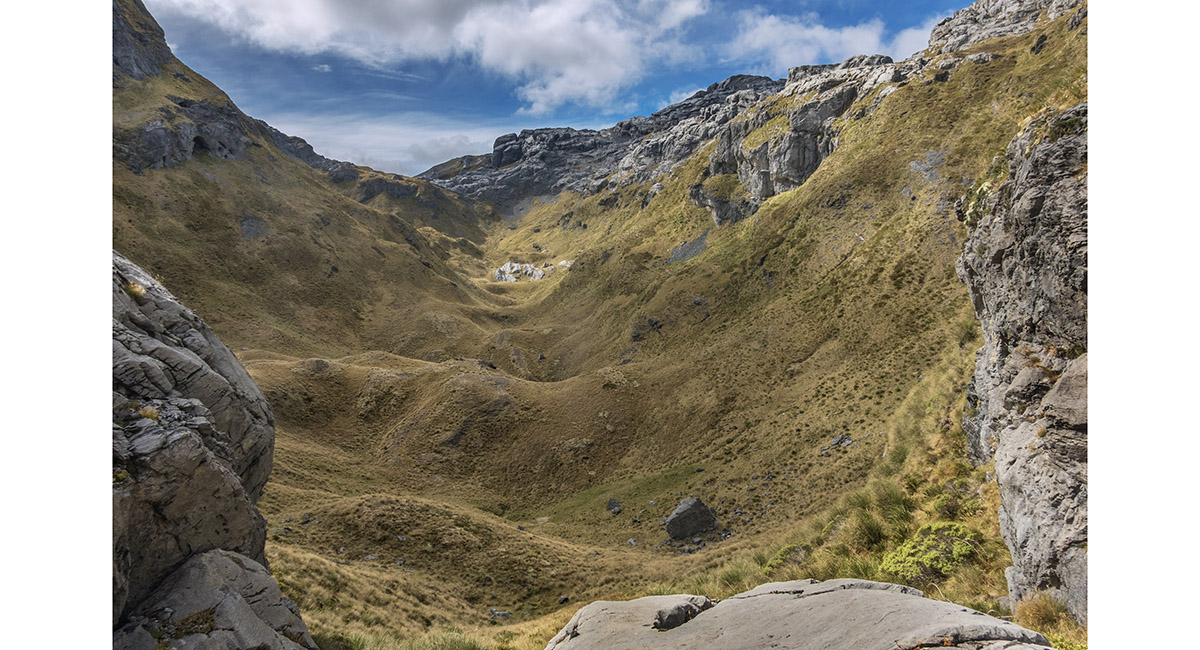
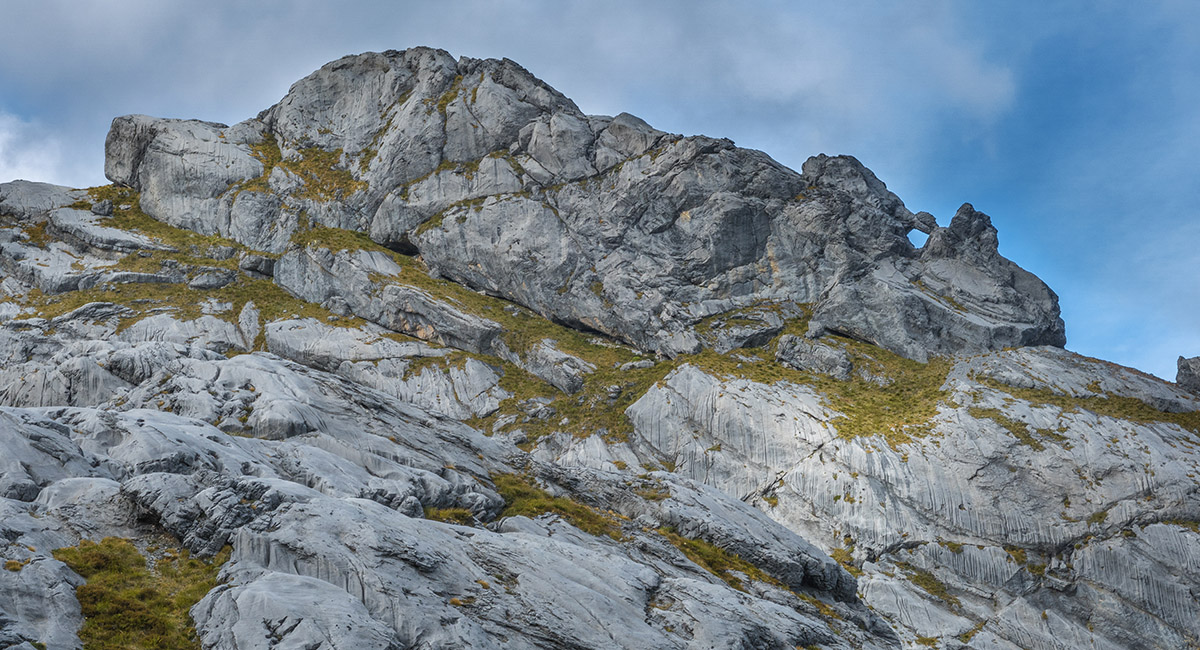
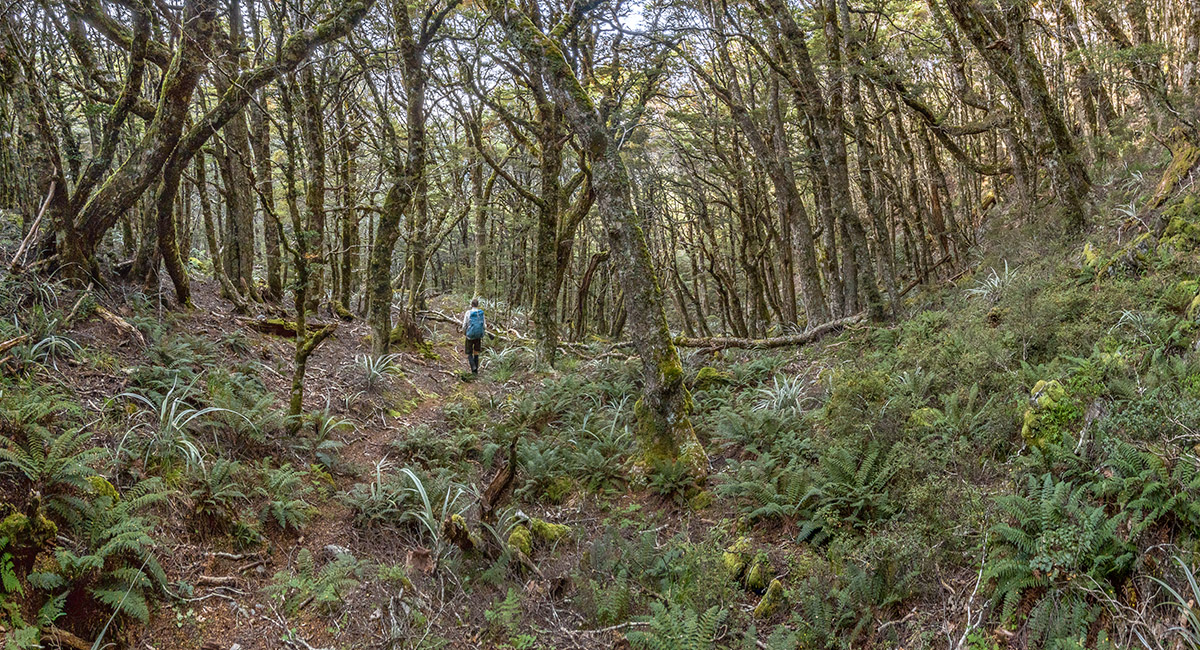
Heading north into the karst labyrinth from Sunrise Peak

Heading north into the karst labyrinth from Sunrise Peak

Heading north into the karst labyrinth from Sunrise Peak, Mt Owen ahead

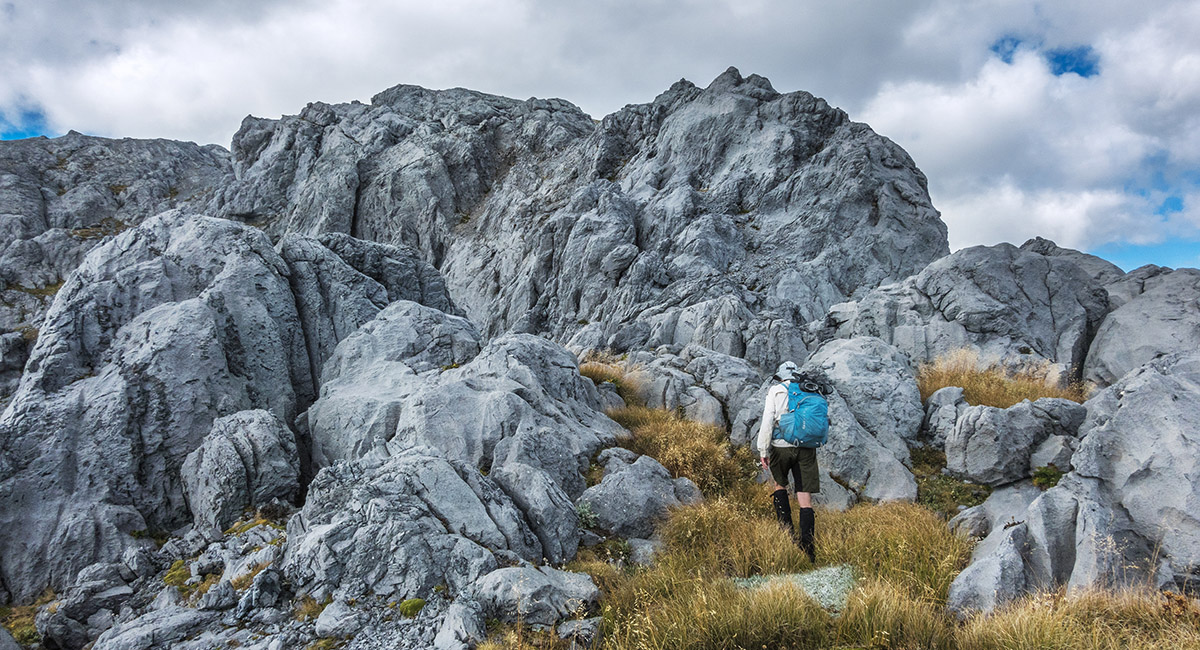
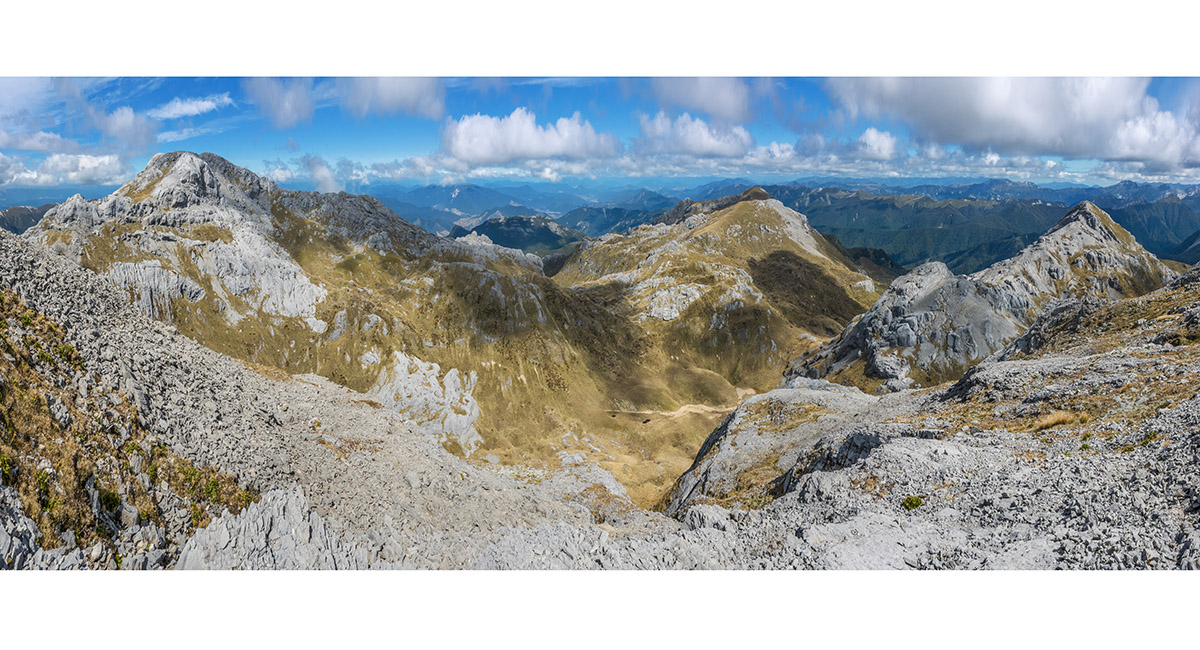
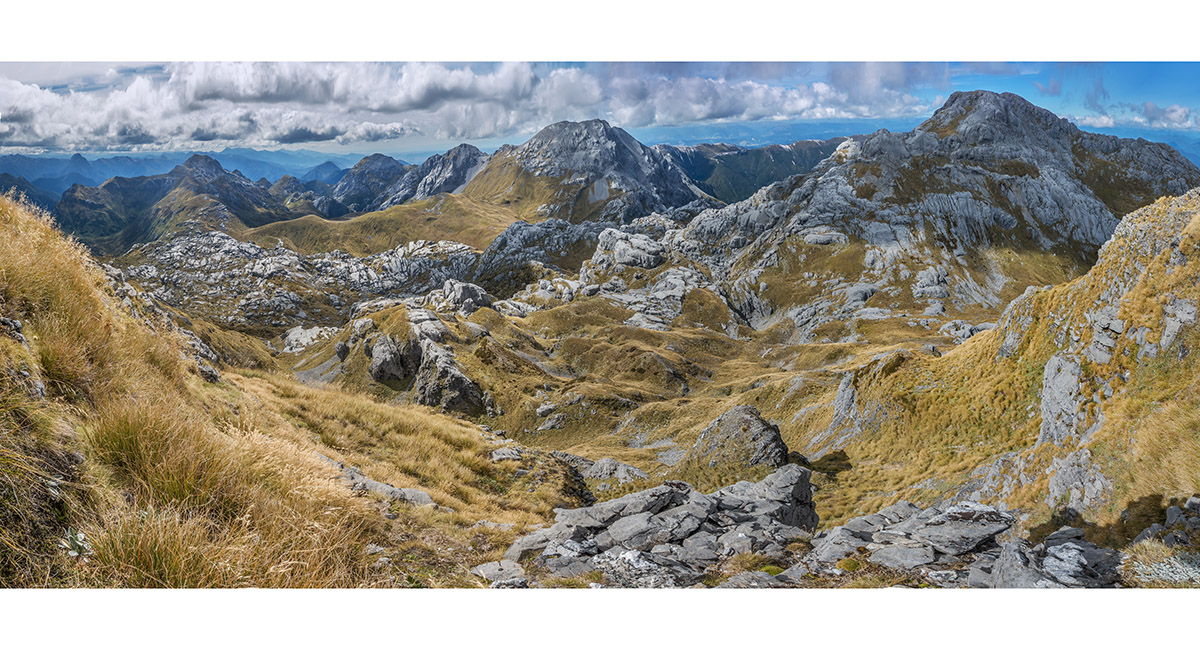
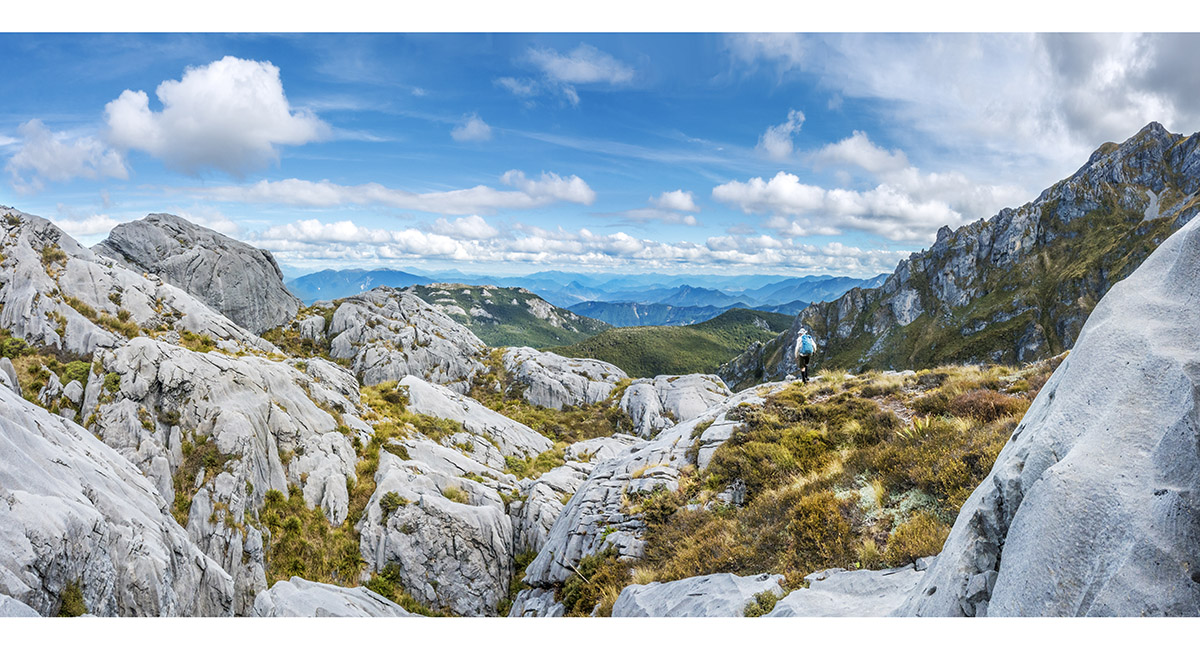
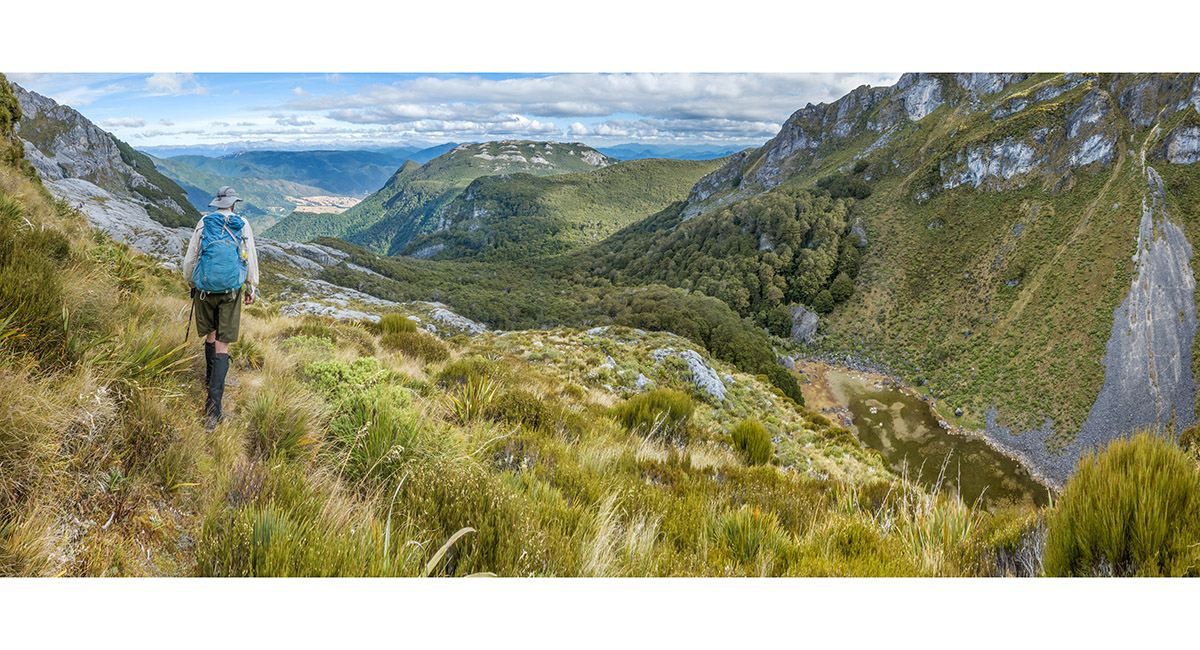
Trending west around the south face of Mt Owen

At 1670m the climb towards Mt Owen's west ridge begins up scree

A view north to Replica Hill (1822m, right) and Pt1763 (left)


On the shoulder of Mt Owen's west ridge at 1780m, pondering the final stretch to the summit (right)

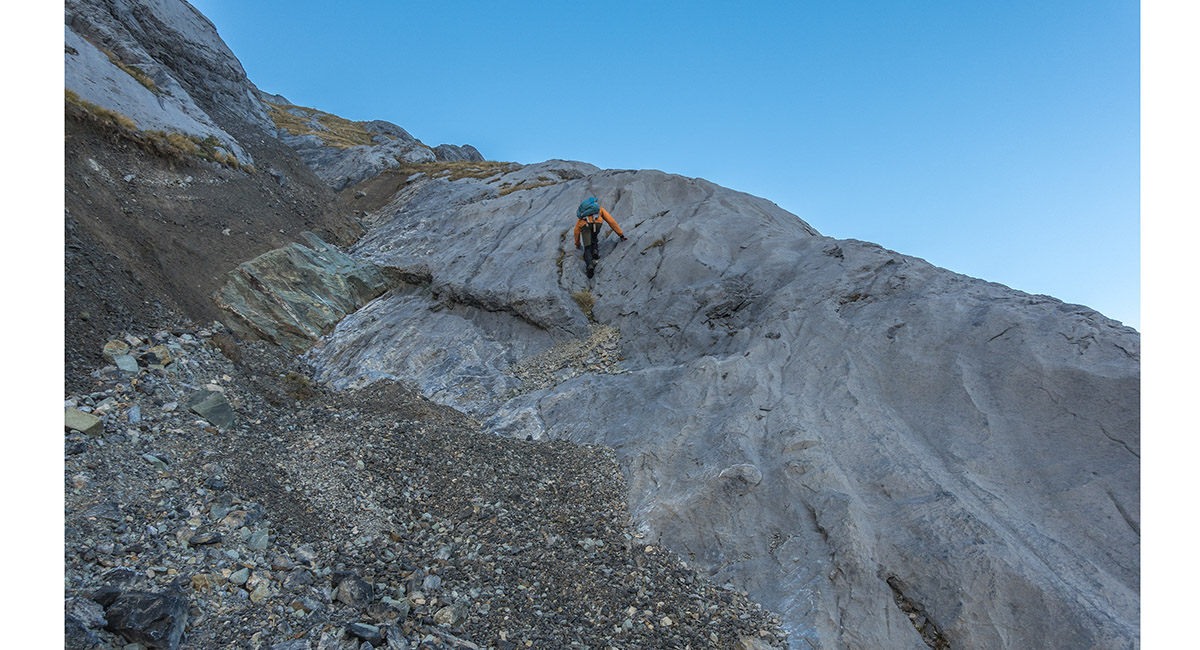
About to tackle a short steep scramble at about 1800m

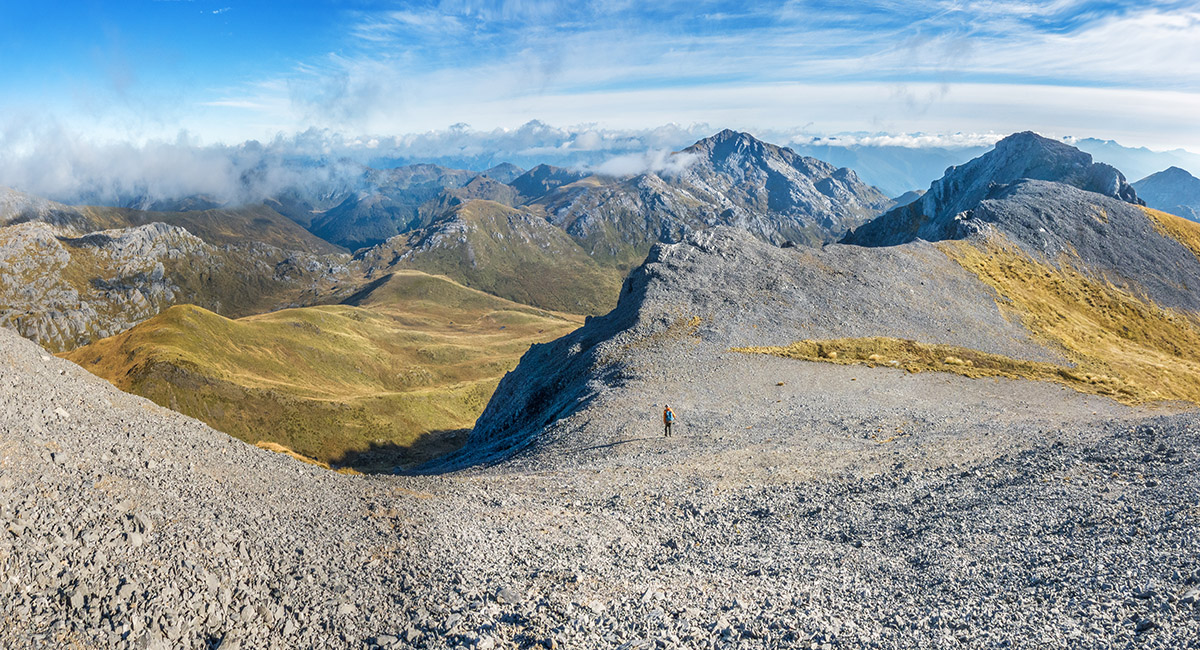
A view south from just below the summit, with sunrise Peak mid left

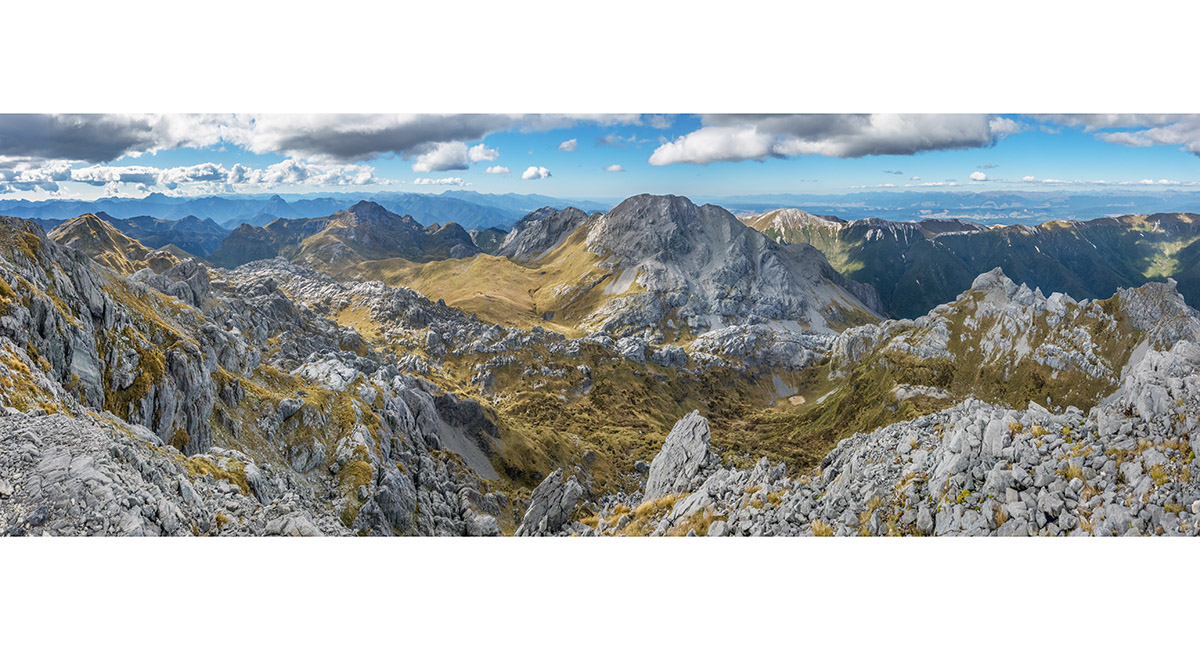
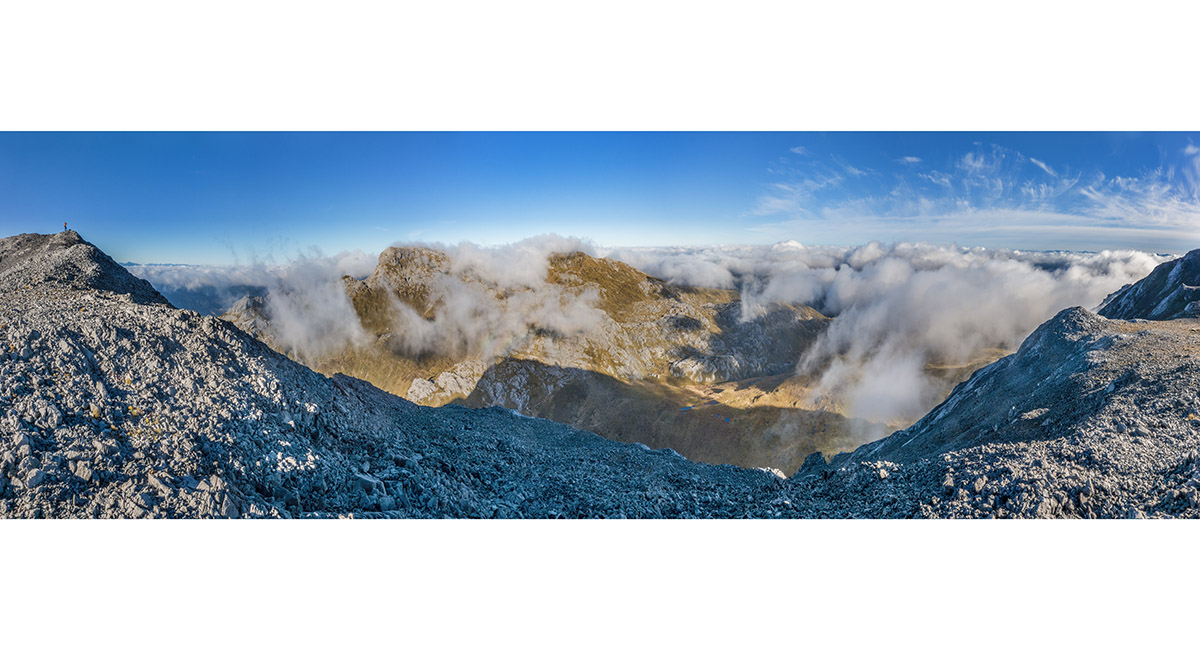
A Mt Owen summit view to Mt Bell (1857m, centre), Pisa (1750m, right), Culliford Hill (1756m, distant left) and Replica Hill (1822m, far left)

At about 1800m on the north face descent of Mt Owen

At about 1800m on the north face descent of Mt Owen, with Mt Bell ahead


A view back up the north face from about 1700m

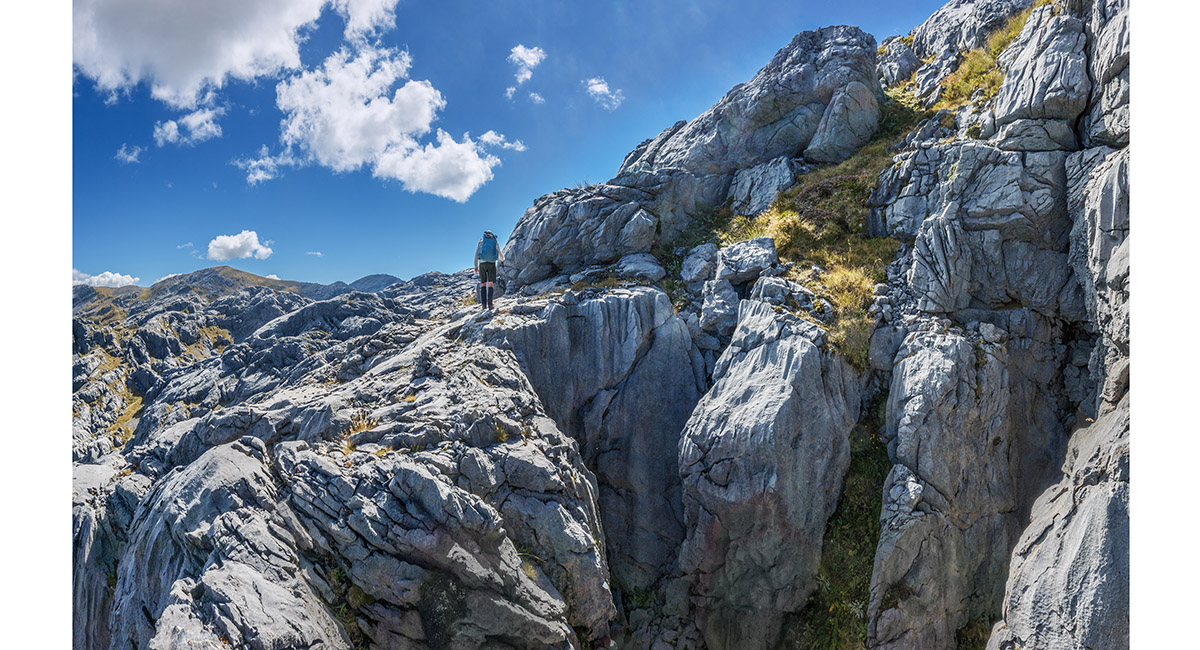
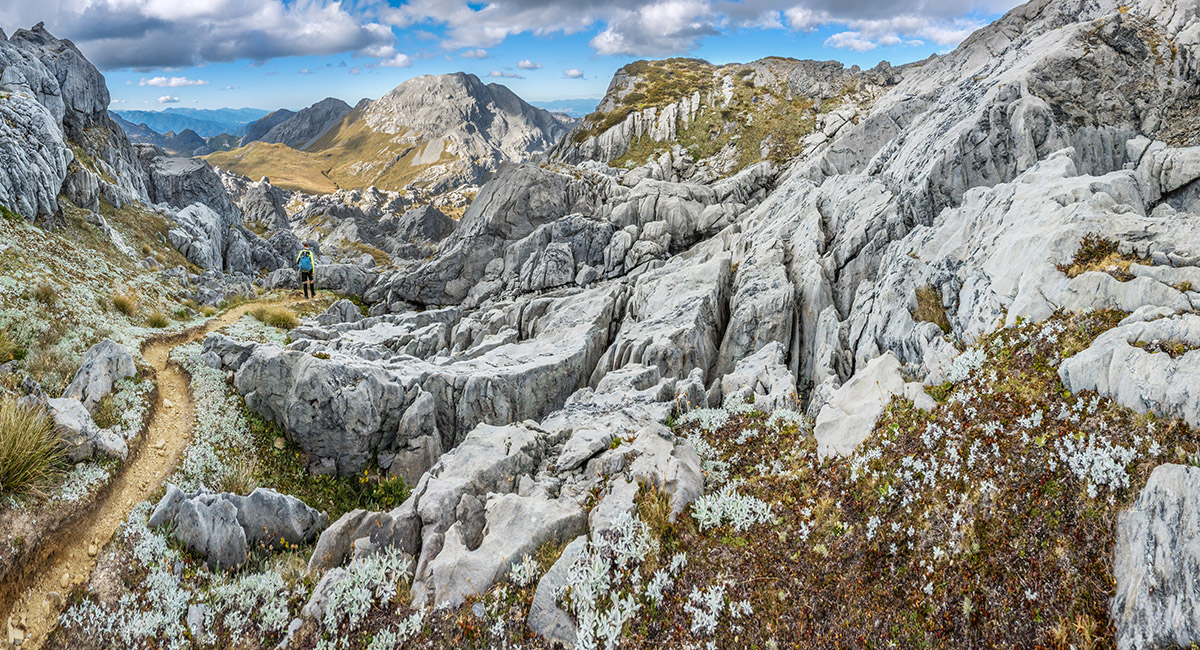
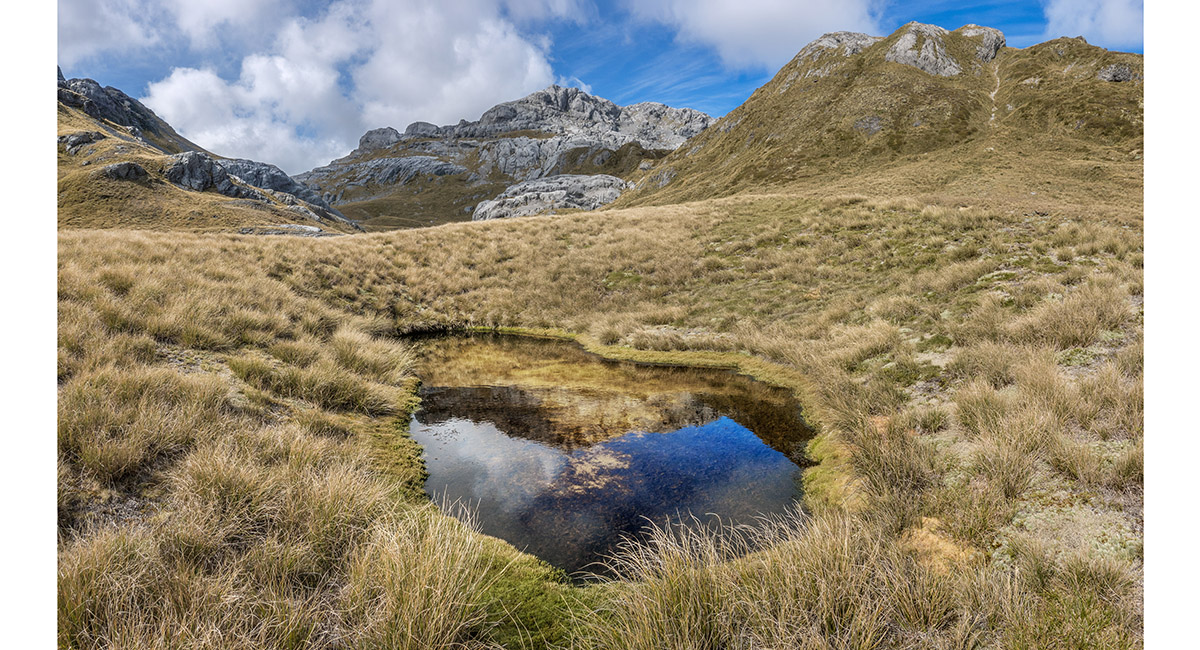
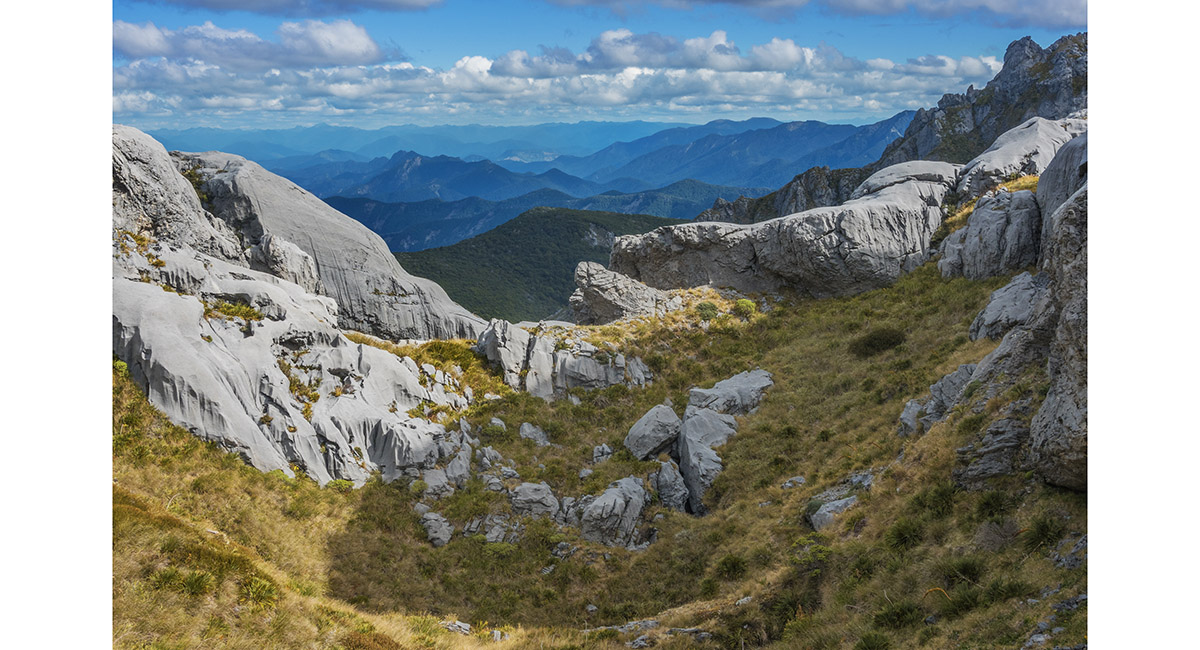
At the famous karst 'crevasse' at about 1550m

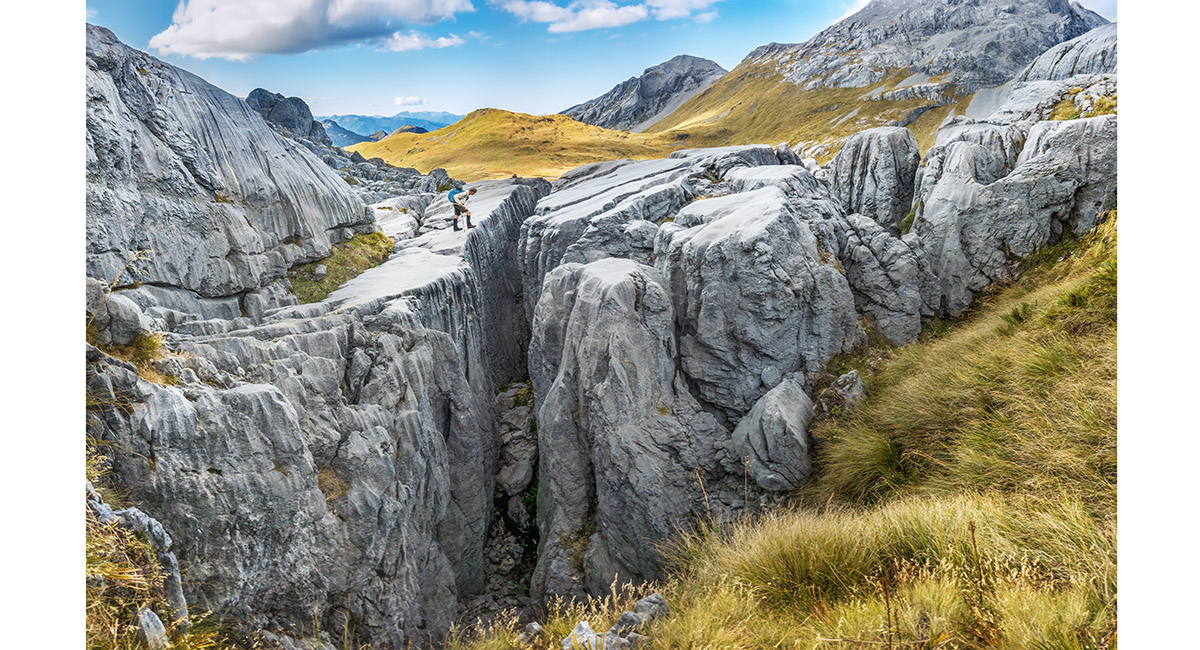
At the famous karst 'crevasse' at about 1550m


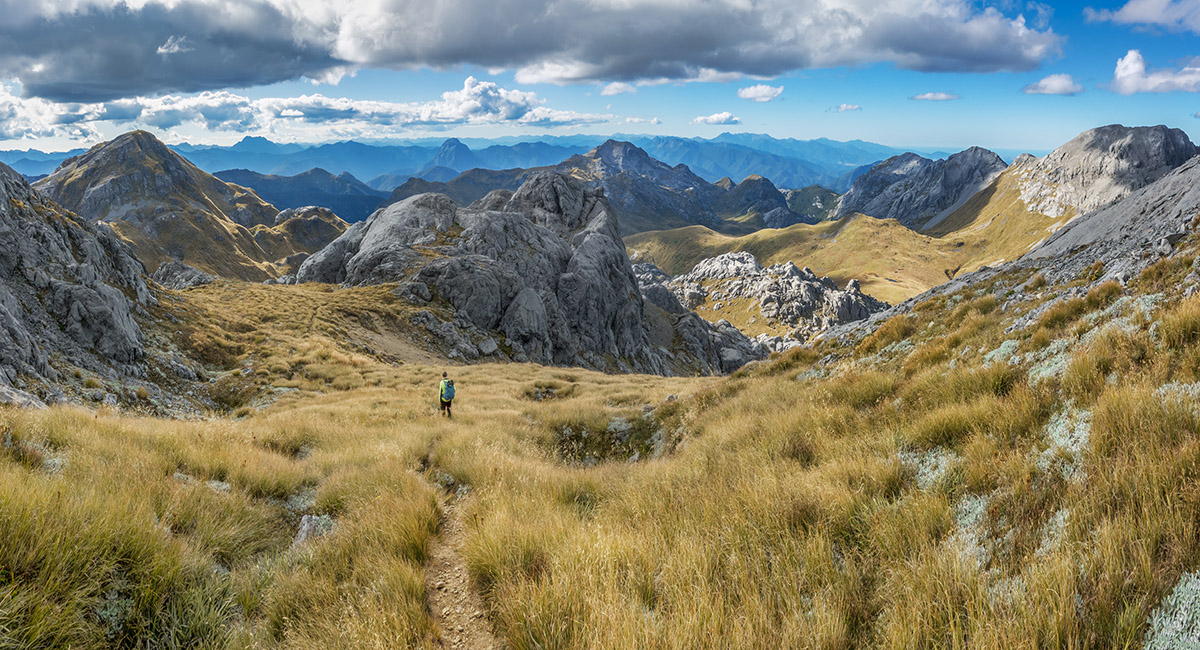
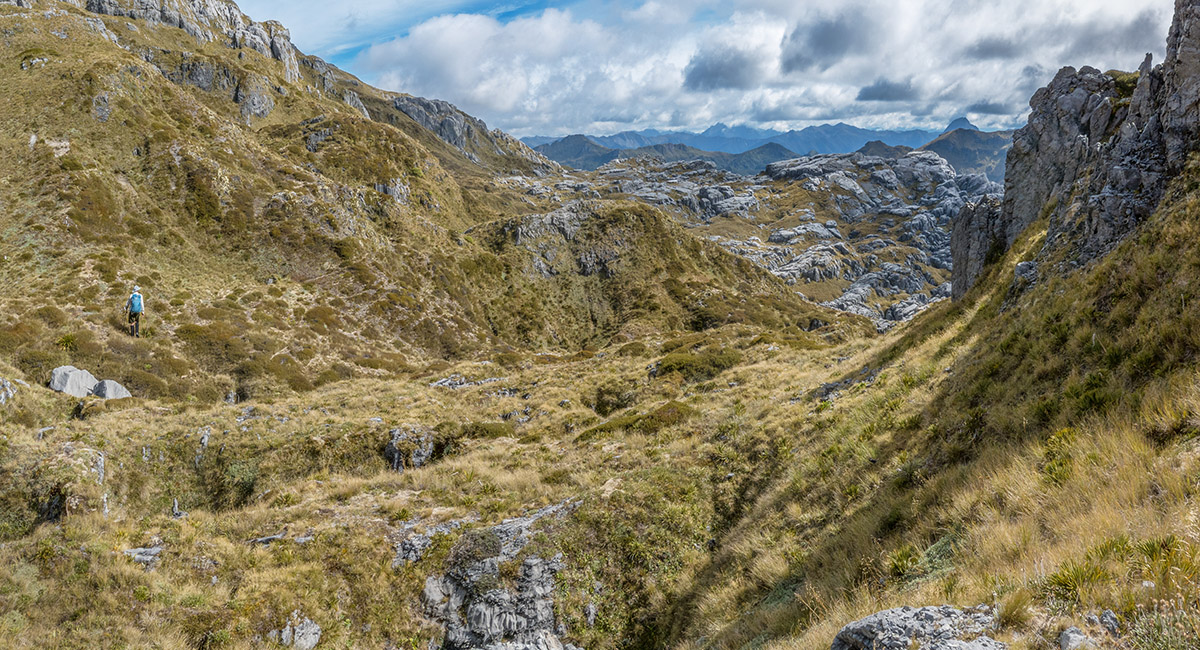
Down in the tussock basin beneath the north side of Mt Owen, Mt Bell right

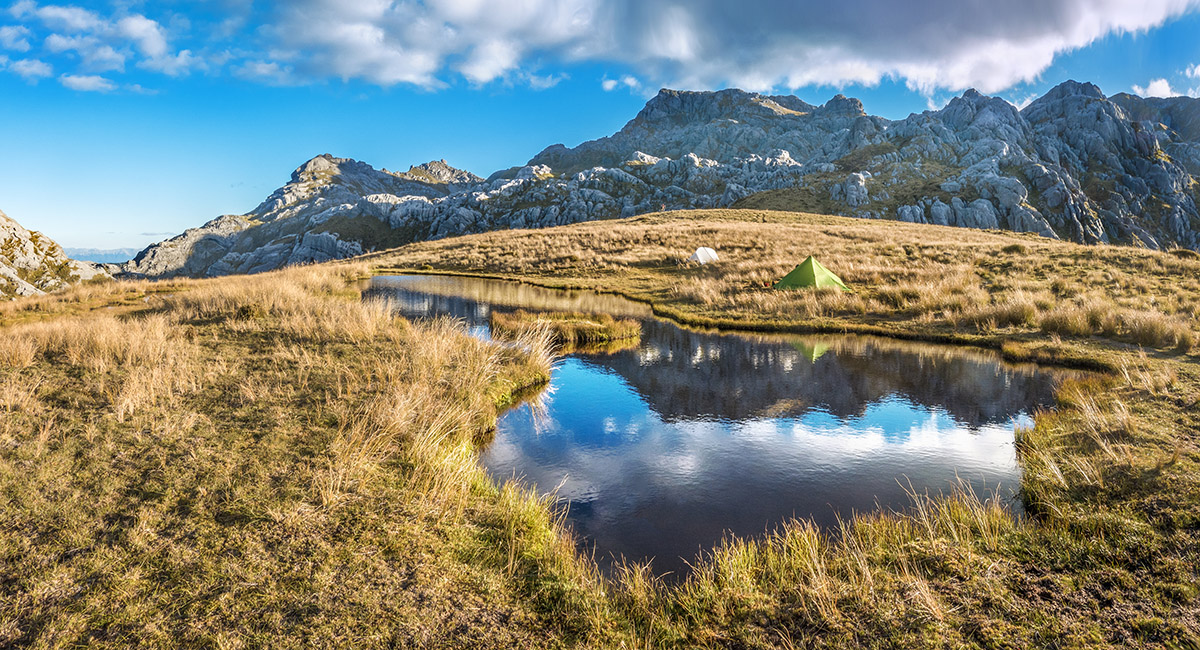
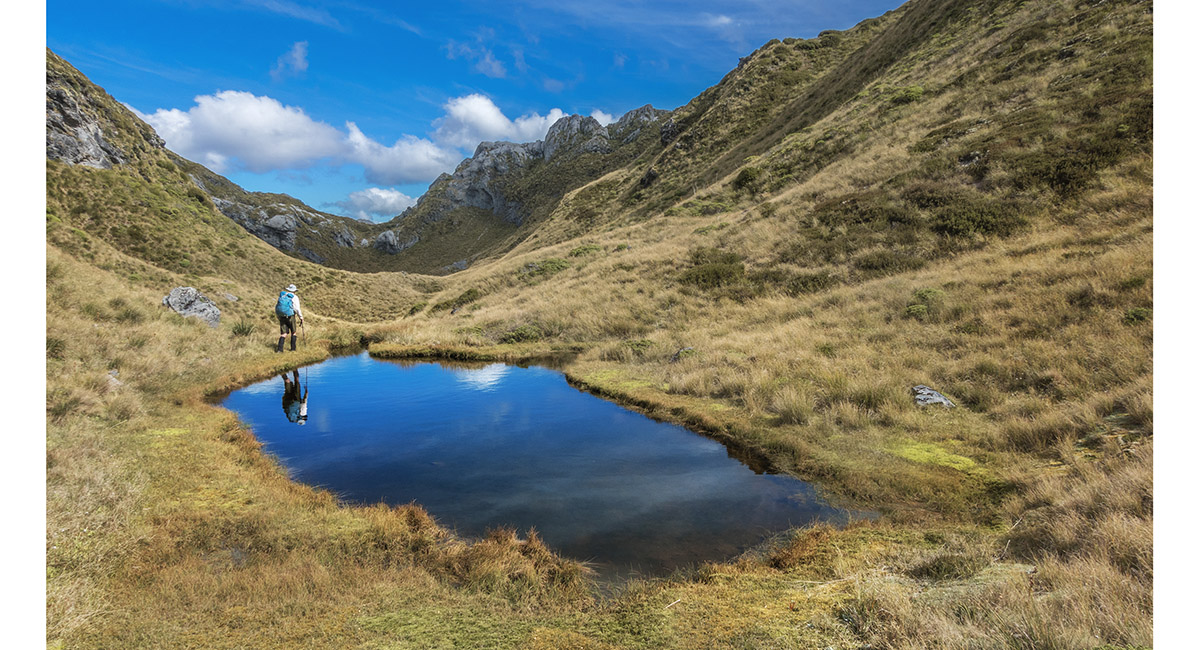
Our camp at the tarn at 1520m, looking south to Mt Owen

Our camp at the tarn at 1520m, looking east to Mt Bell at dusk. Sentinel Hill (1600m) is left and Pt1764 distant centre

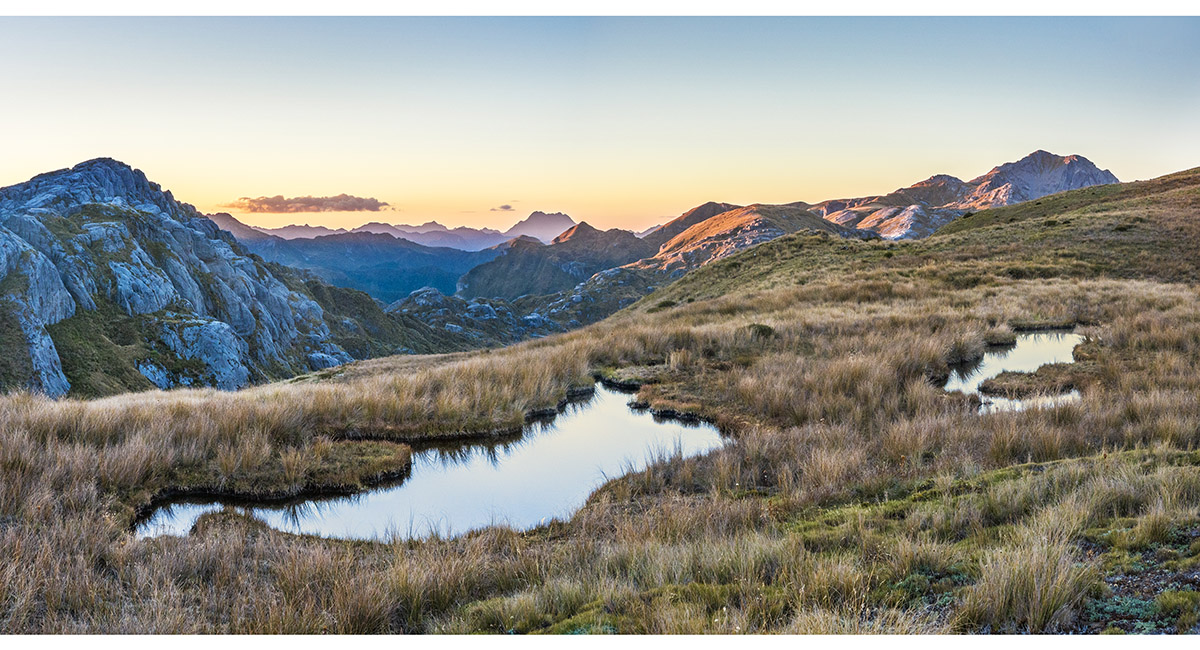
Dusk view across two tarns just north of the camp site, with Culliford Hill far right and Mt Kendall (1762m) distant centre

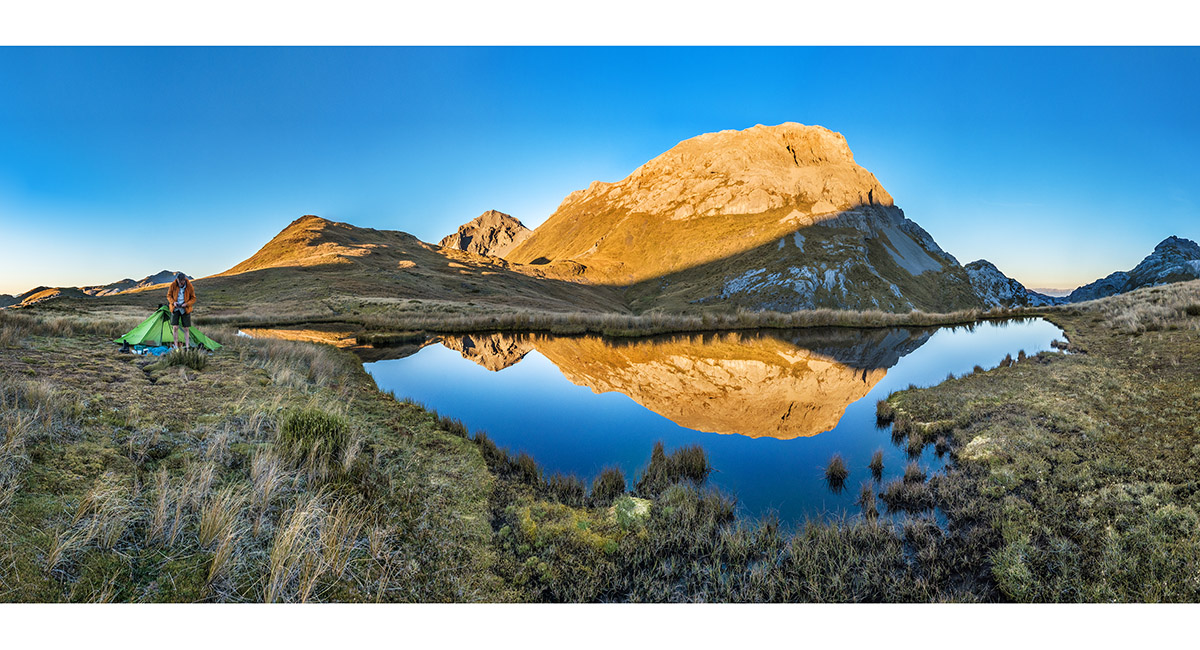
A view back to Mt Bell from the northern tarns at last light

Last light, with Mt Bell left and Mt Owen right

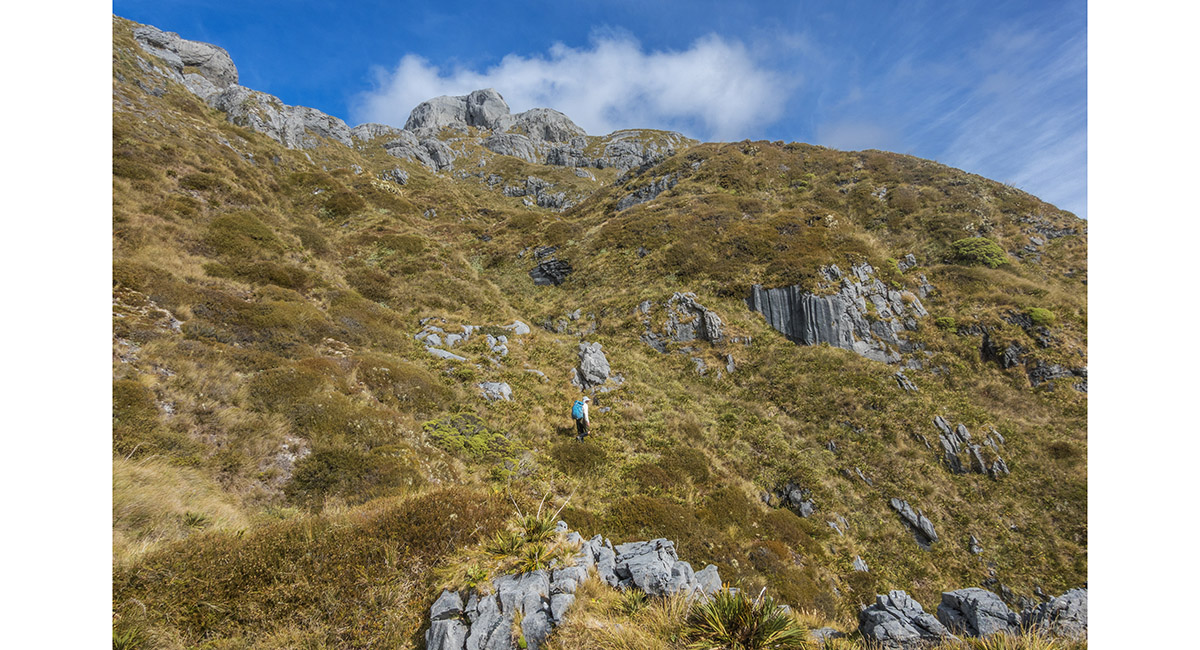
Heading to the west-side base of Mt Bell early morning

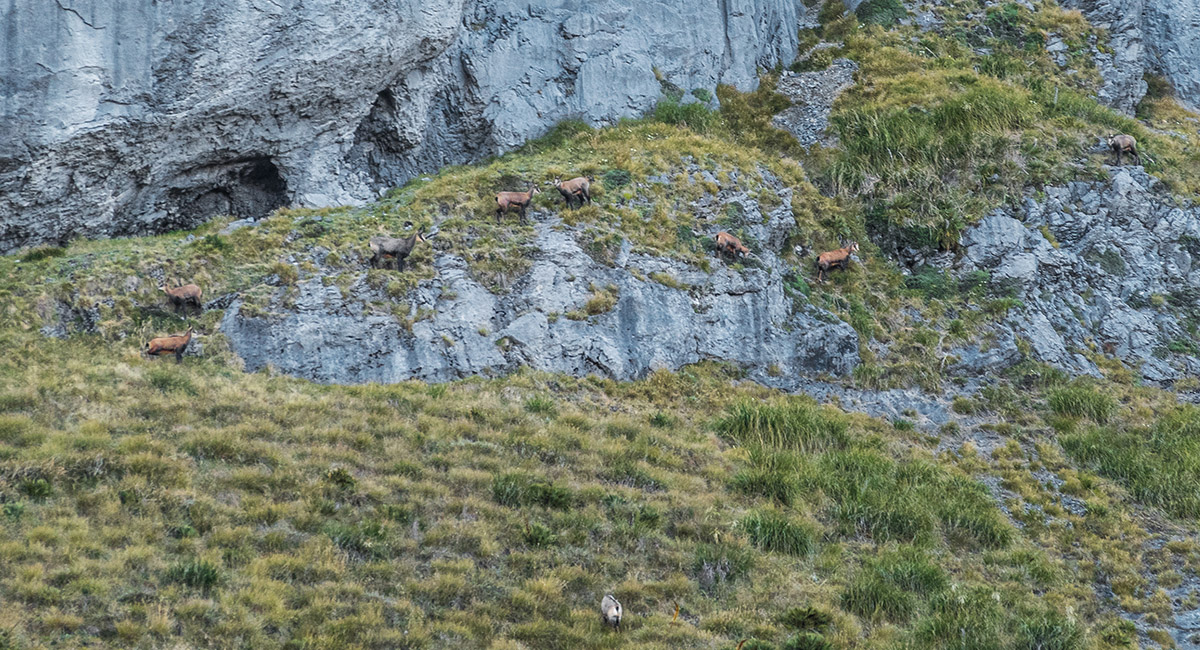
Chamois on the west face of Mt Bell

A diagonal seam cuts up the west face of Mt Bell angling southeast, here at about 1600m

Now at about 1700m

A view south to Mt Bell's summit (1857m, left) and Mt Owen, from the point where the seam reaches the flat summit ridge

Looking north from below the summit along the summit ridge of Mt Bell

Mt Bell summit view north to The Twins (left), Mt Arthur and Winter Peak (centre) and Pt1732 (right)

On the north ridge of Mt Bell at 1750m, at the point where the descent drops west and sidles down to 1600m, before joining the route to Granity Pass Hut

On the sidle, with Sentinel Hill mid centre, Mt Owen and Replica Hill left, Culliford Hill right and Pt1764 far right

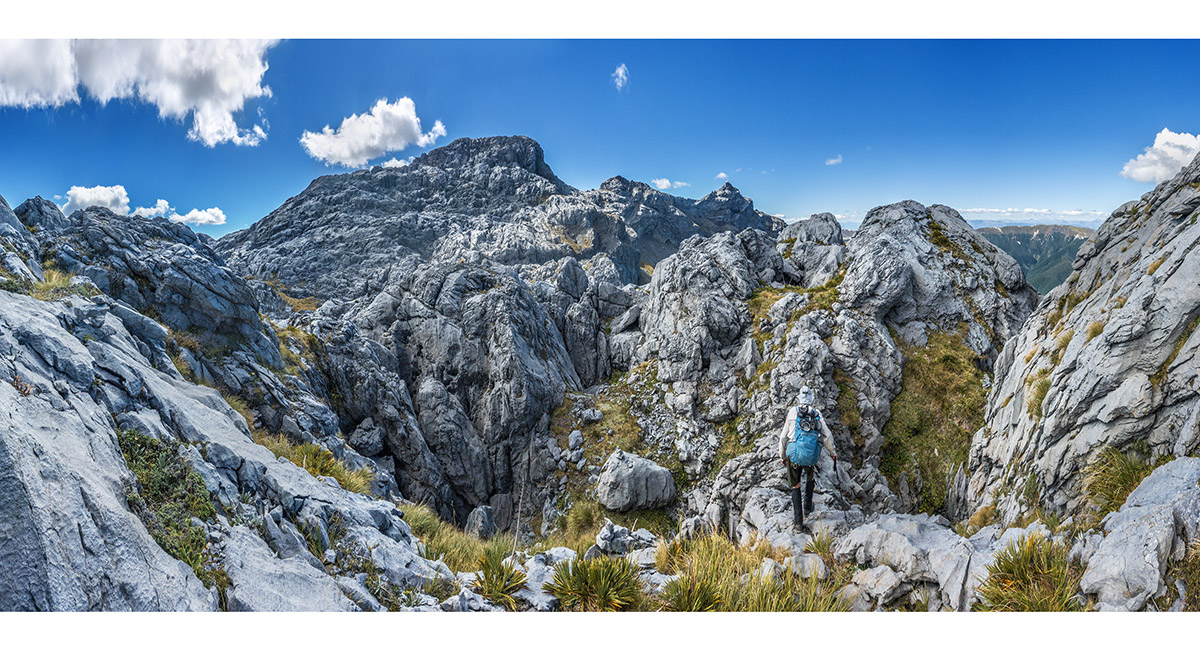
Heading back up the north face of Mt Owen to find a place to begin heading northwest to Replica Hill

Heading northwest at about 1600m, off the route to Mt Owen's summit

Now sidling up and north

A view north to Culliford Hill (left of centre) and Billies Knob (right of centre), from about 1700m. Sentinel and Pt1764 are far right

The south face of Mt Patriarch to the north

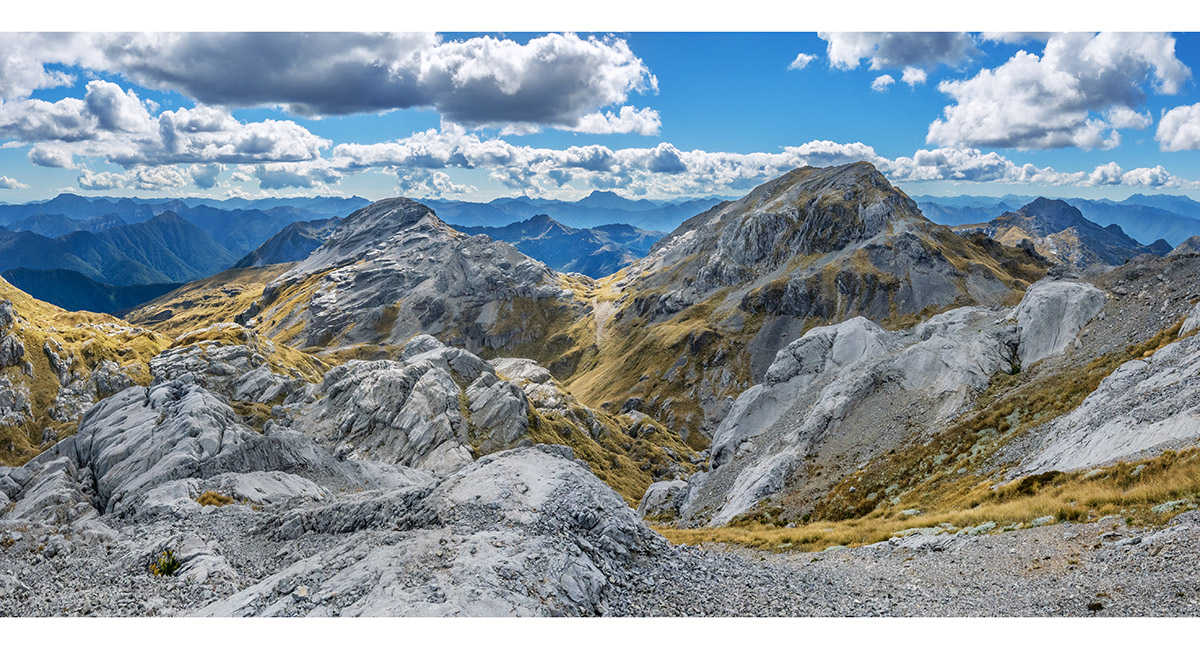
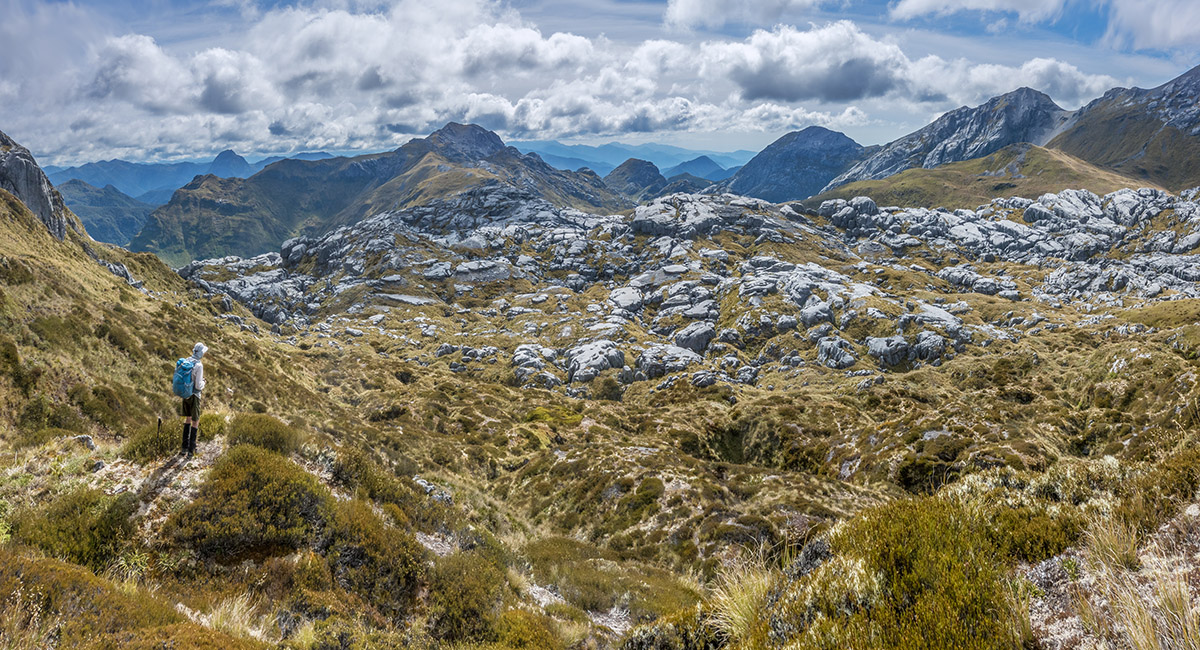
A view south along the summit ridge of Replica Hill (1822m) to Mt Owen directly behind, east to Mt Bell (centre), then Pt1764, Billies Knob and north to Culliford Hill (far left)

A view south from Replica Hill to Mt Owen left, Poverty Basin lower centre, Pt1732 right of centre and Pt1763 far right

Mt Owen (right), Mt Bell (centre) and Culliford Hill (left) from Replica Hill

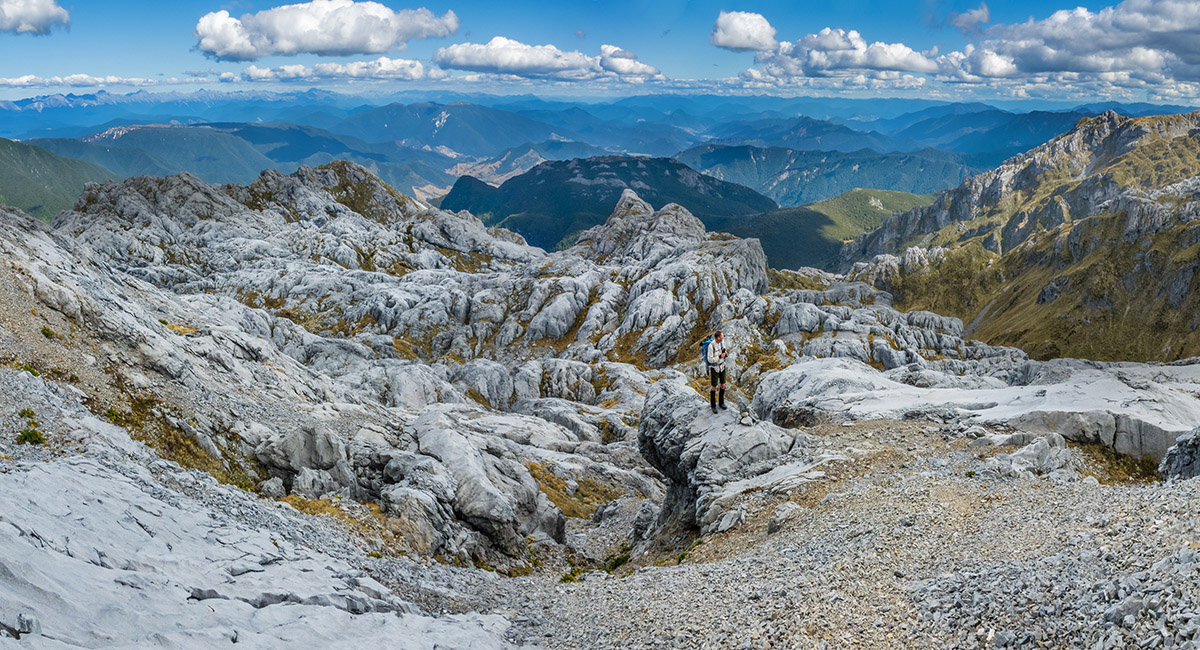
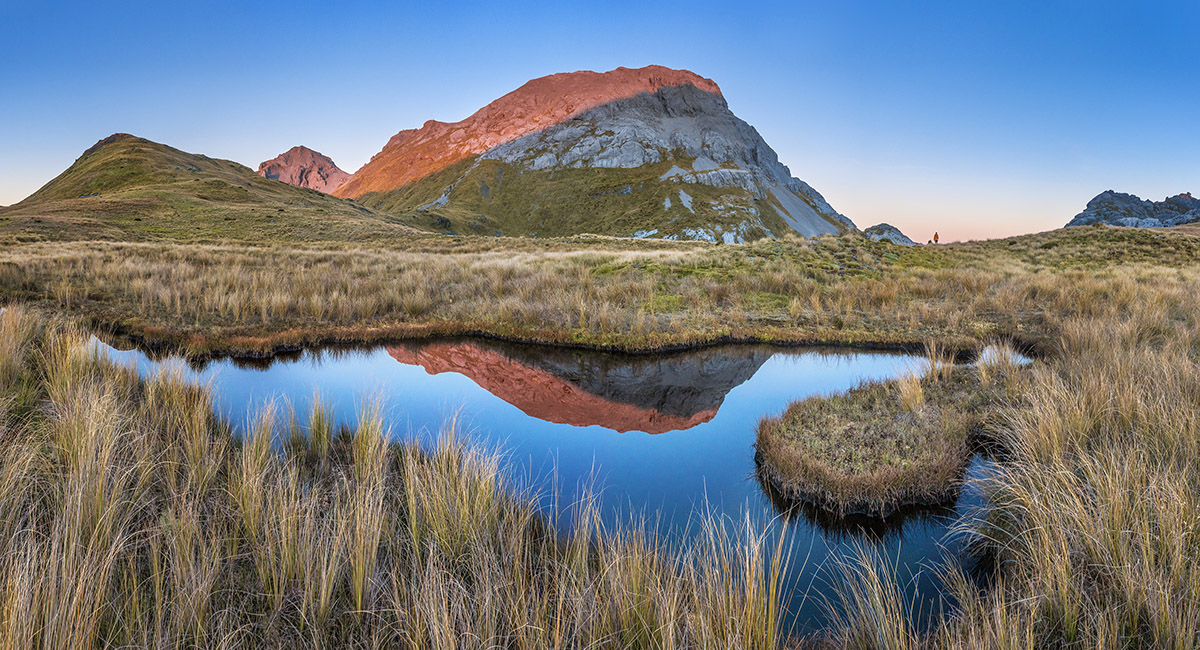
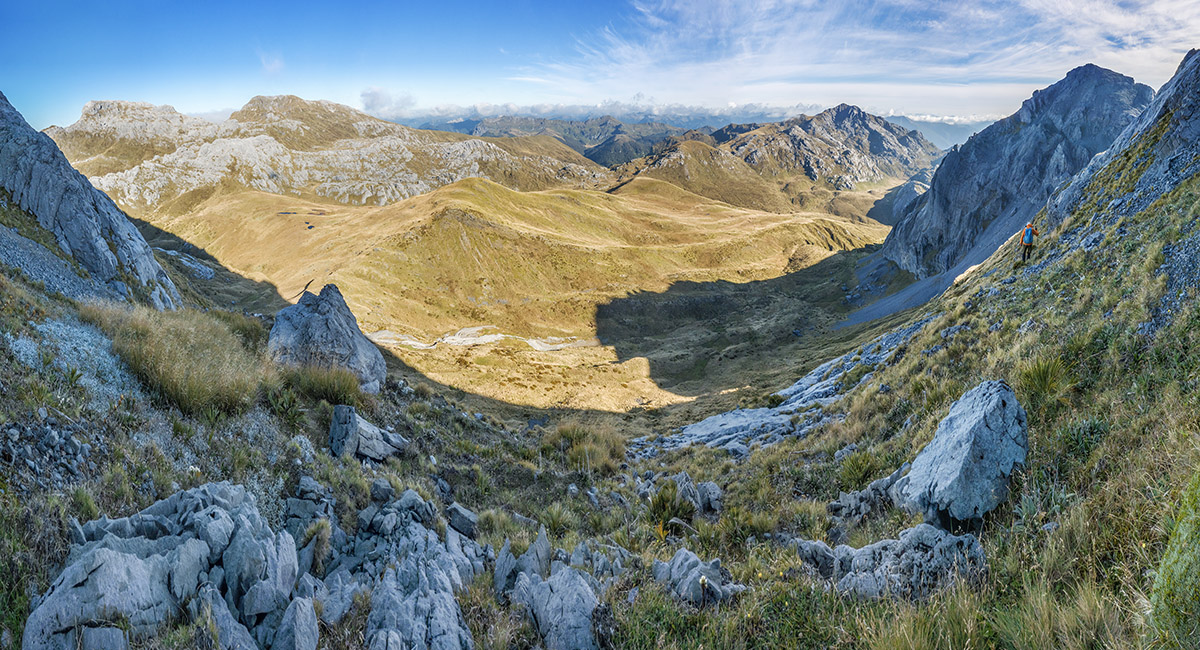
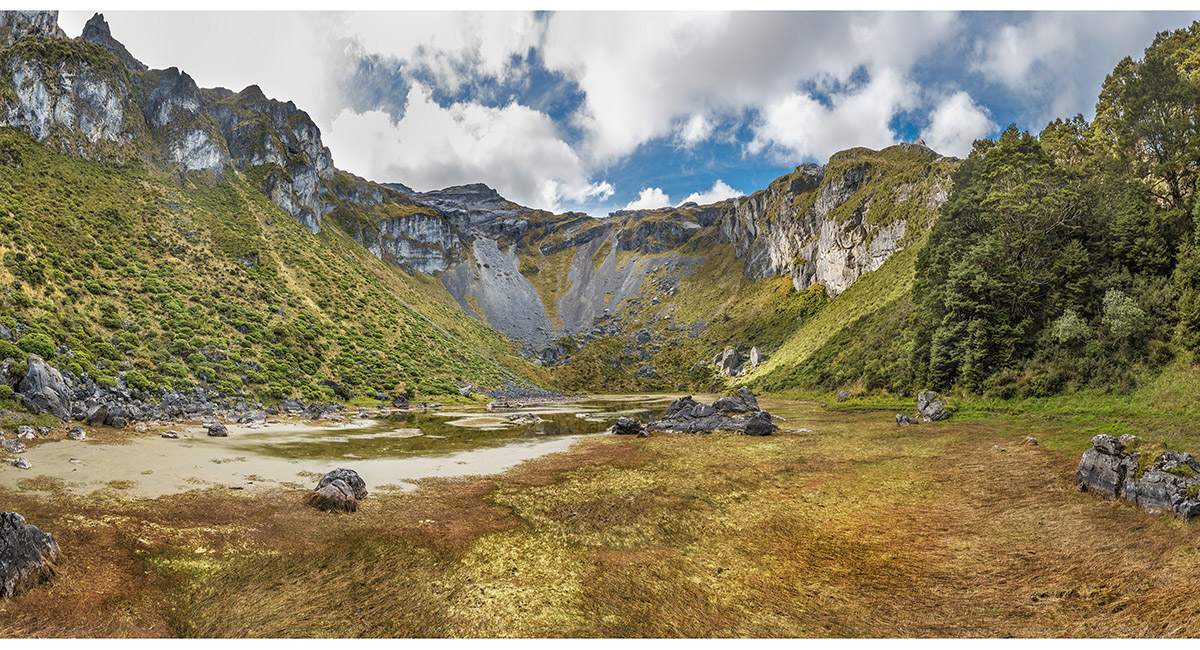
Looking east to Mt Owen from the tarn (1560m) in Poverty Basin

On the 1600m saddle between Poverty Basin and Castle Basin, looking back to Replica Hill (right of centre), the unmarked 1720m high point and Pt1763

Heading south across the broad 1600m saddle between Poverty and Castle Basins


Dropping in to Castle Basin

In Castle Basin, looking north back to the saddle

The tarn at 1440m in Castle Basin, looking south to the saddle at its far end

View north across Castle Basin from the south-end 1450m saddle to its north-end 1600m saddle

The southern edge of Castle Basin's south-end saddle, where it drops steeply to Bulmer Lake

The southern edge of Castle Basin's south-end saddle, where it drops steeply to Bulmer Lake


View southwest from 1400 to Bulmer Lake (1200m)

A crouching Triceratops-like karst formation to the east of the descent route to Bulmer Lake

At 1300m, approaching the treeline on the descent to Bulmer Lake

View north across Bulmer Lake (1200m). The water level is very low

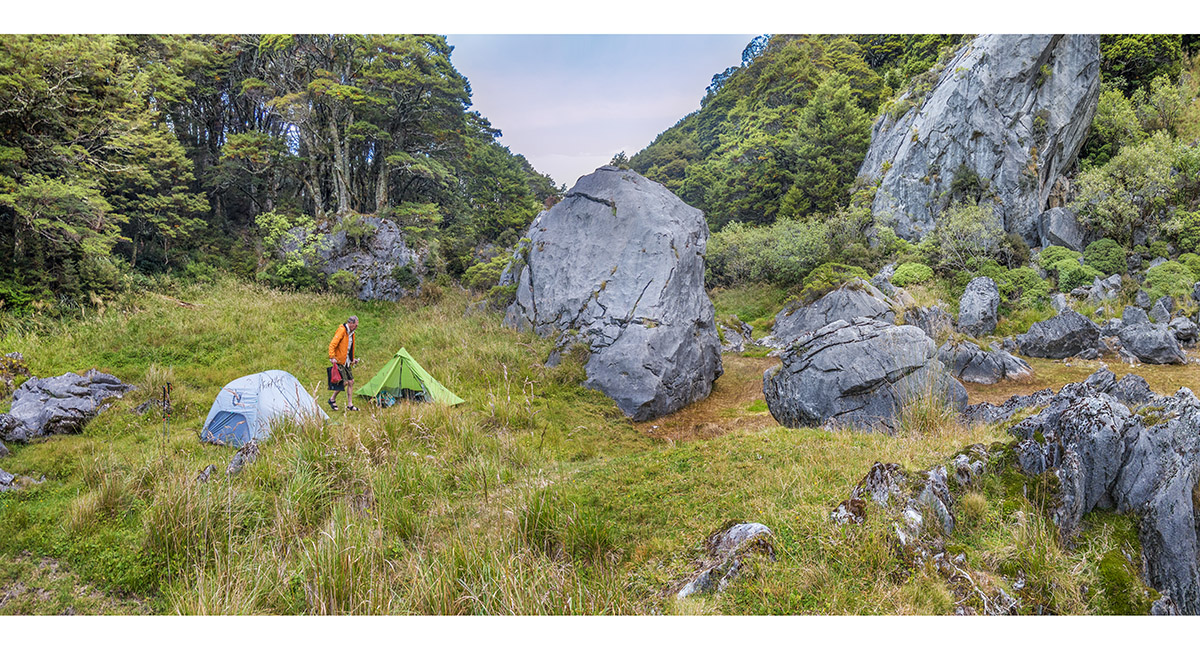
Our camp at the south-end of Bulmer Lake

A view back to the walls surrounding Bulmer Lake, just inside the beech forest on the route south and down

Heading south at about 1150m

An old cairn. New blue route triangles and tape had recently been installed

The route steepens at 1050m

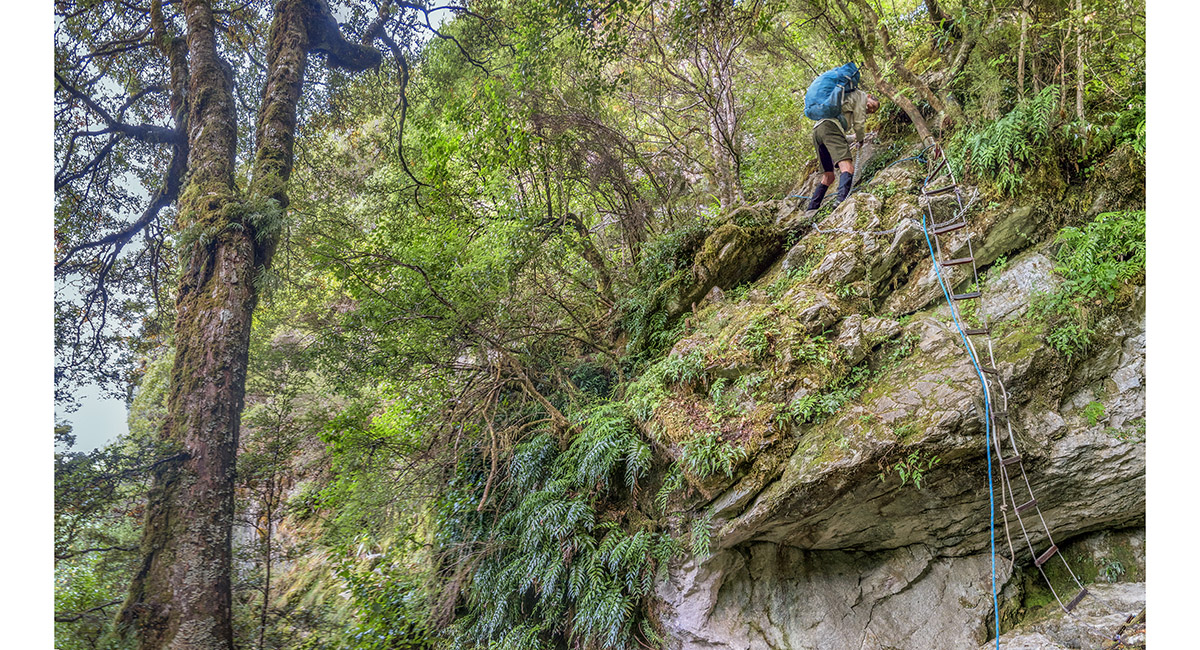
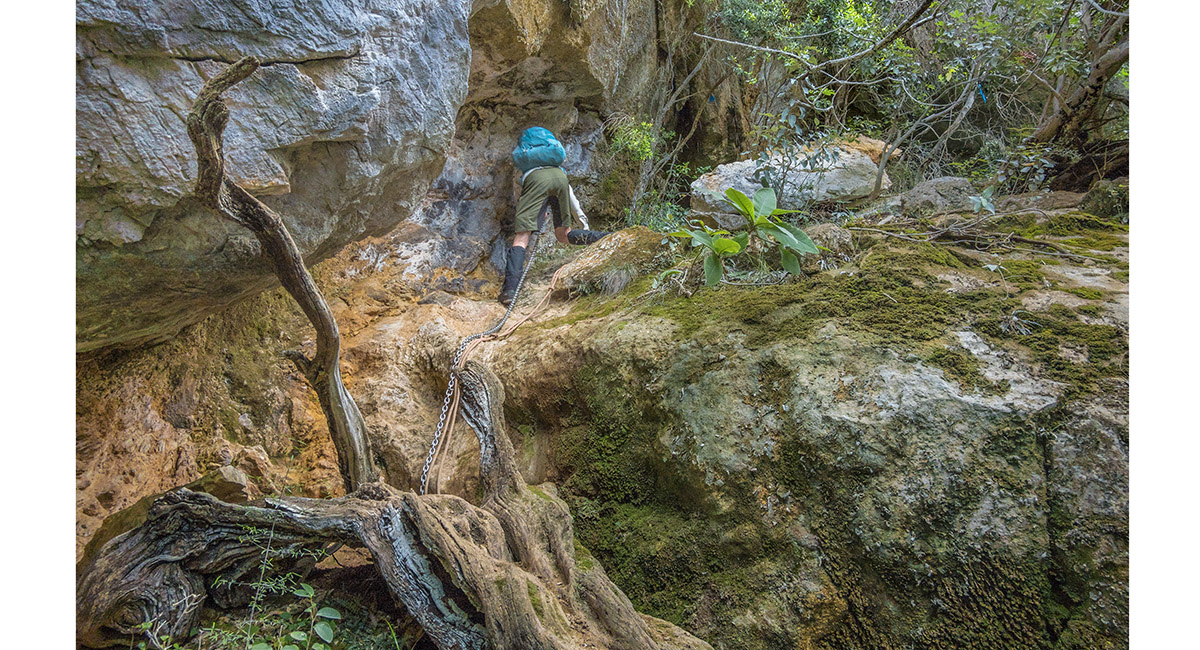
The first and most spectacular of several ropes and chains installed between 900m and 750m

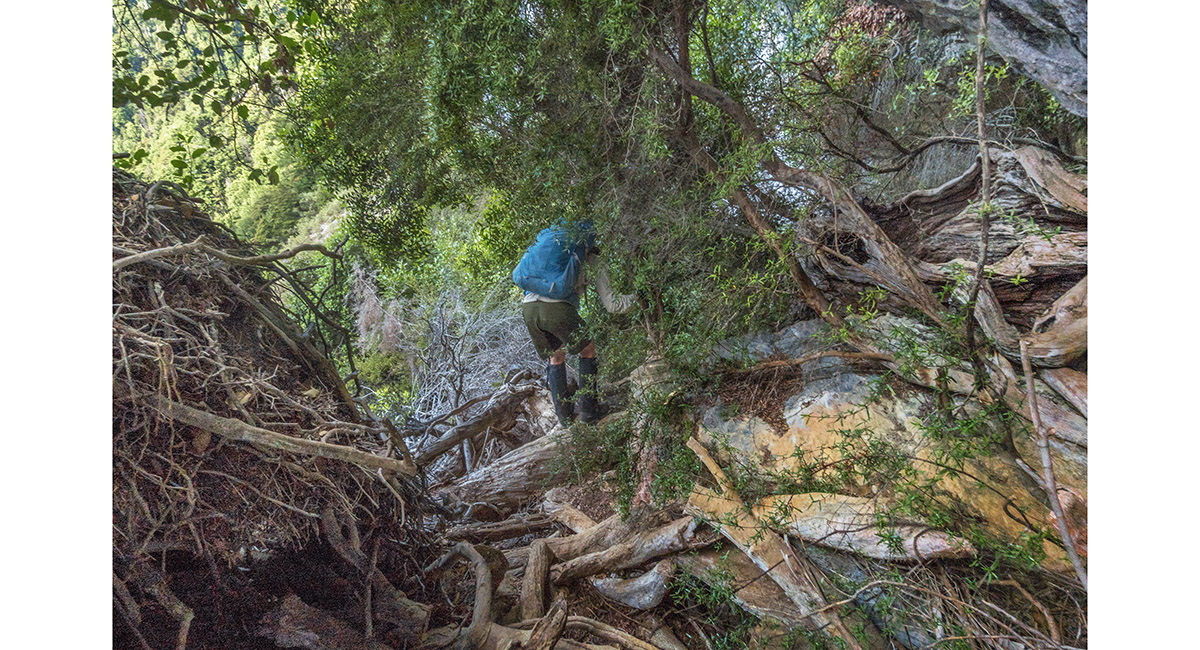
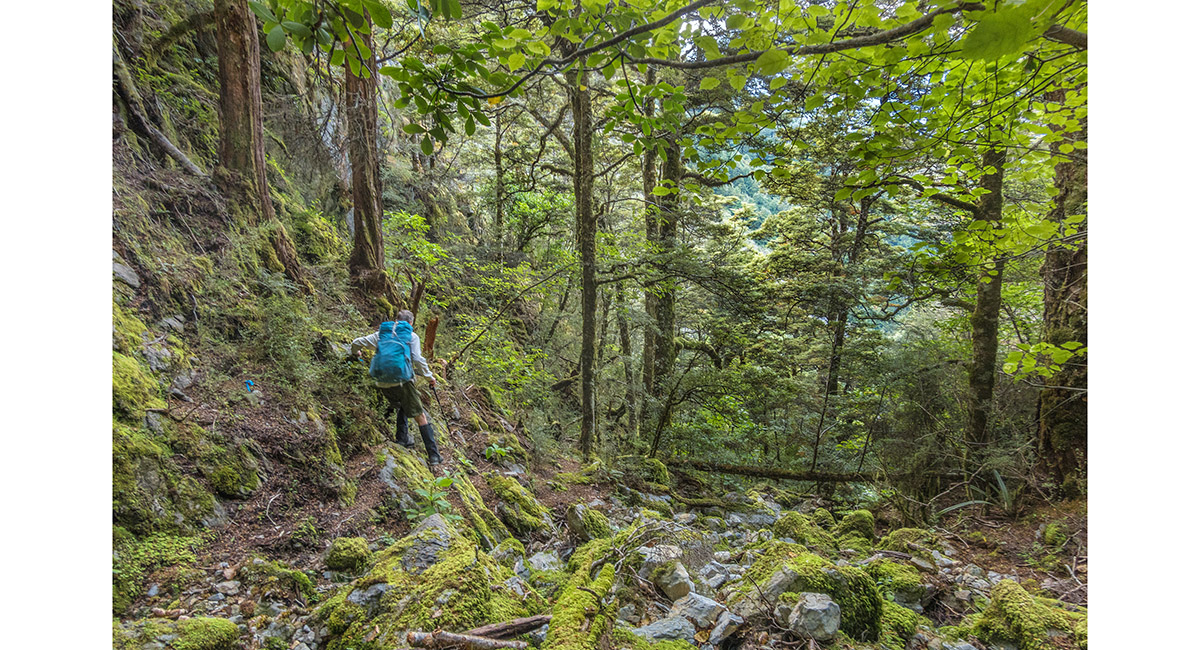
On the steepest section tracing an overgrown ledge leading southwest

On the steepest section tracing an overgrown ledge leading southwest

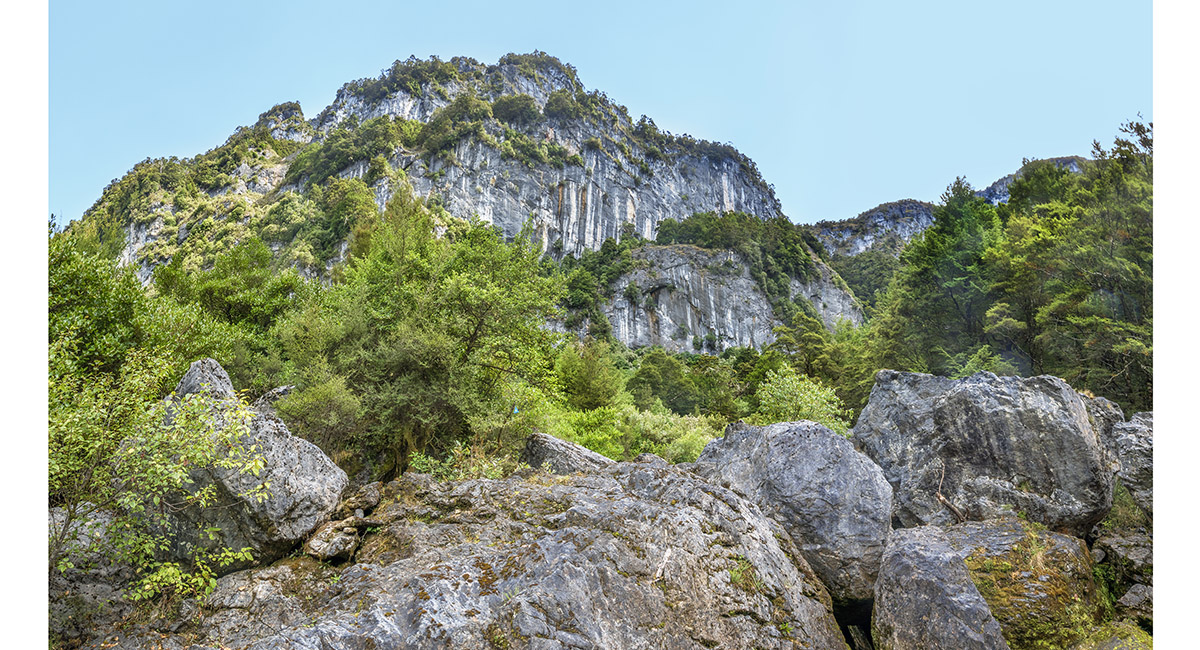
A view back to the improbable-looking descent route, from the boulder field at 700m, near the head of Bulmer Stream

The route then initially follows the stream bed

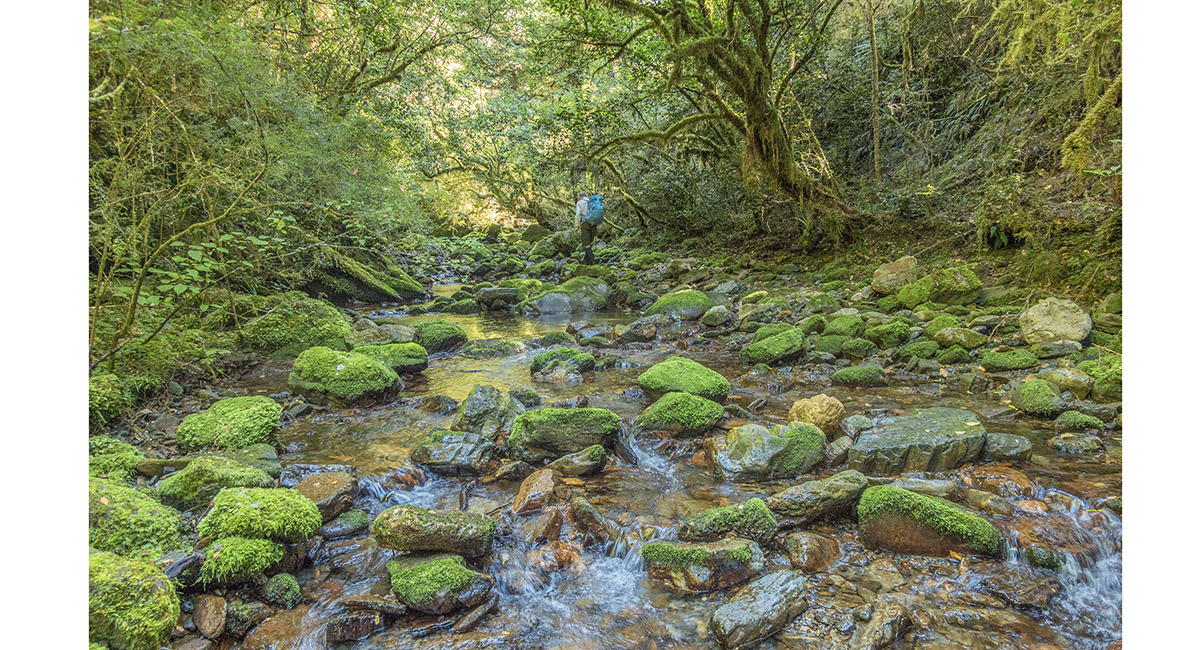
From about 600m until the point where Bulmer Stream joins Owen River at 450m, it alternates between bush trail and stream bed

To order a print or web resolution file of any image you see in this slide show, just right click the image, click “Copy Image URL” and paste in to the “Your message” box of our Contact Us form. Please also note, for each image, if you want a print or web resolution file. We will get back to you as soon as possible to confirm price and payment details.
Open Contact Us in a new window to paste Image URL(s) easily